Page 5 of 8
Posted: Thu Feb 27, 2014 4:14 pm
by Yrjan
I'll prolly just throw some ceramic or steel bb's in there and call it good. Good point Graham.
Posted: Thu Feb 27, 2014 7:44 pm
by Lurch
Actually tried the BB thing with my mtr's. When I dismounted them a couple tires were all rusted and clumped together pretty bad. I won't run them again!!
Posted: Fri Feb 28, 2014 1:37 pm
by Yrjan
Me, Lance and Bryan installed my Rock Krawler mid-Arm kit last night. Still need to install the steering componets. Hopefully have some pix up later tonight or tomorrow...
Special thanks to Lance and Bryan for staying up till almost 3am last night getting it all dialed in for me.
Posted: Sat Mar 01, 2014 10:16 am
by Toolegit86
what did you end up paying for that mid arm kit.. ive been thinking about going long arm i can get the roughcountry upgrade and people have nothing but good things to say about it.. but i dont like the rubber joints.
Posted: Sat Mar 01, 2014 1:36 pm
by Yrjan
Toolegit86 wrote:what did you end up paying for that mid arm kit.. ive been thinking about going long arm i can get the roughcountry upgrade and people have nothing but good things to say about it.. but i dont like the rubber joints.
It was about $2000 after 20% off at northridge. Got the steering upgrades too though.
Posted: Sat Mar 01, 2014 2:03 pm
by Toolegit86
nice..
Posted: Sat Mar 01, 2014 2:42 pm
by TJDave

So where's the pics?

Posted: Sat Mar 01, 2014 5:08 pm
by Yrjan
TJDave wrote::mrgreen: So where's the pics?
It turns out it isn't as "dialed" in as I thought. Waiting for pix until Bryan gets back into town and can finish installing the steering and make some adjustments in the rear.
Posted: Tue Mar 11, 2014 6:10 pm
by Yrjan
Seems like everything is pretty well set. Had alignment done today. Drives strait and true. Still gotta get my exhaust tube modified near the tip as it contacts the rear sway bar now making an annoying rattle. Other than that it's pretty sound. Can't wait to take it out and play a little. Might hit up the slab this weekend. I'll try and get some pix up tomorrow if I remember.
OBDII WiFi iPhone Scanner
Posted: Thu Mar 13, 2014 8:10 am
by Yrjan
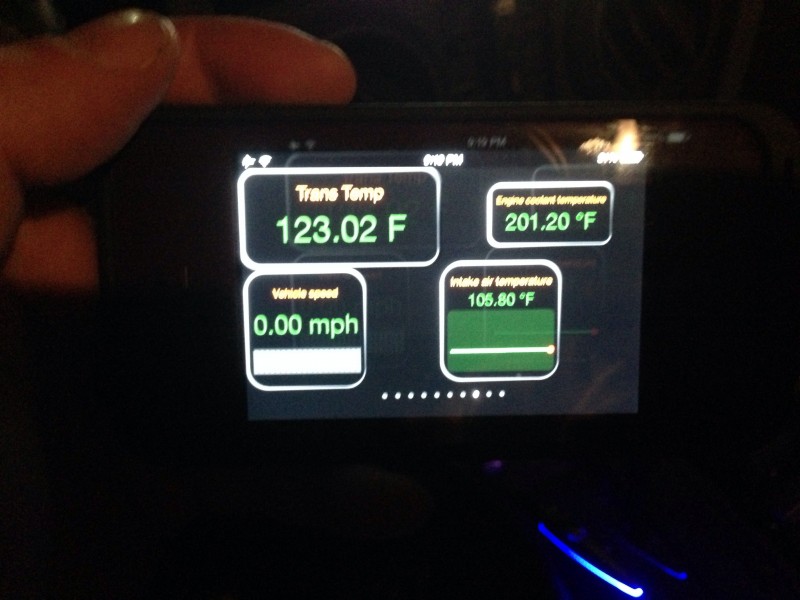
I just bought an ELM327 WiFi OBDII Auto Diagnositic scanner for my Jeep. Also bought a nice windshield mount for a spare iPhone we have. My thoughts are I can mount the unused (spare) iPhone in the corner of my windshield with the app "Engine Link" installed and be able to monitor different things while wheeling. Specifically the trans temp and pitch/roll. I am sure there will be other guages and PIDs i'll be monitoring as well as data logging but I dont have the parts yet. Just thought i'd post this up and see if anyone has heard of this setup or has any knowledge of how it works. here is the link to the OBDII WiFi scanner I bought...
http://www.simvalley.us/elm327wifi
Posted: Thu Mar 13, 2014 8:58 am
by Lurch
I've been looking at those. Kind of curious how well they actually work.
Posted: Mon Mar 17, 2014 8:21 pm
by Yrjan
Lurch wrote:I've been looking at those. Kind of curious how well they actually work.
It works... Just a small preview...
Posted: Wed Mar 19, 2014 6:47 am
by Wrench
I hope to have something like this in the near future.
One of the things I have a curiosity about is the intake air temp. Cold-air intakes are all the (internet) rage, but I have a sneaking suspicion that warmer air (~140 deg) gives much better fuel mileage.
Posted: Wed Mar 19, 2014 7:05 am
by Lurch
I'm more interested to see how it works as a diagnostic tool. Could be really handy to have around.
Posted: Wed Mar 19, 2014 7:47 am
by Yrjan
Scans for DTC's but I dont have any right now. Wont check body codes or air bag lights but still pretty handy...
Posted: Wed Mar 19, 2014 8:48 am
by White trash
Wrench wrote:I hope to have something like this in the near future.
One of the things I have a curiosity about is the intake air temp. Cold-air intakes are all the (internet) rage, but I have a sneaking suspicion that warmer air (~140 deg) gives much better fuel mileage.
Why would warm air provide better mileage? Cool dense (with oxygen) air makes for a better burn and a slight hp increase. A friend had an acura integra years ago with a fabbed ducted cold air intake that he beat like it owed him money at all times. He only broke cv axles whenthe temps dropped under 60* or so. It was odd, that slight increase in density made enough power to push the axles over their limit.

Posted: Wed Mar 19, 2014 11:18 am
by mattawajeep
Lurch wrote:I'm more interested to see how it works as a diagnostic tool. Could be really handy to have around.
I've been using a Bluetooth version of the elm 327 as a Diagnostic tool for years. I use an app on my phone called
Torque to control it.
It'l do pretty much everything a more expensive reader will do. Pull and erase codes, lets you view all of the live information, you can set up custom gauge panels like the one Yrjan posted a picture of, and log pretty much everything your computer ever outputs.
I actually have 3 of the below version, and they all work great, they get thrown in gloveboxes and tool bags so I've always got one if I need it. It's been really nice to have more times than I can count when working on peoples cars.
$11.14 on Amazon
Posted: Wed Mar 19, 2014 3:44 pm
by Wrench
White trash wrote:Why would warm air provide better mileage? Cool dense (with oxygen) air makes for a better burn and a slight hp increase. A friend had an acura integra years ago with a fabbed ducted cold air intake that he beat like it owed him money at all times. He only broke cv axles whenthe temps dropped under 60* or so. It was odd, that slight increase in density made enough power to push the axles over their limit.
Apples and oranges do not compare. What provides the most peak power at WOT does not equal best fuel economy at cruise throttle settings, but I am not going to totally derail this thread to cover every detail to 'splain it.
Dale,
thanks for the link! Now another toy I gotta have...

Posted: Fri Apr 25, 2014 6:32 pm
by Yrjan
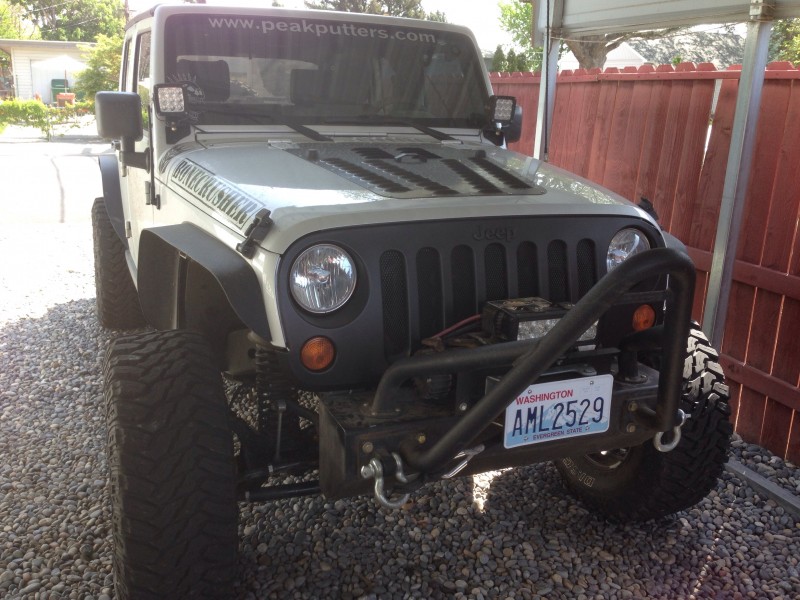
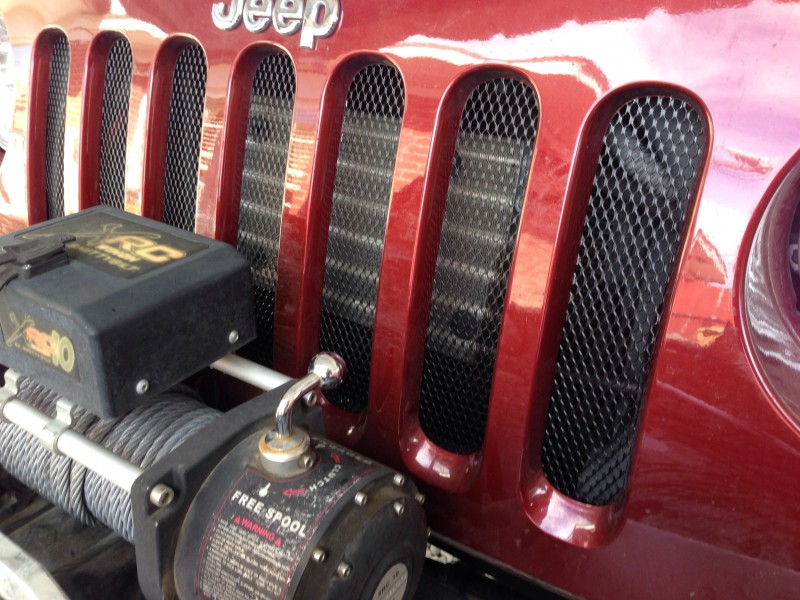
Plastidip'd front grill
Posted: Sat Apr 26, 2014 9:52 am
by Danny
Now that's cool....can't wait to see it....where'd you get that done?
Posted: Sat Apr 26, 2014 11:45 am
by Yrjan
Danny wrote:Now that's cool....can't wait to see it....where'd you get that done?
My driveway. I'm doing another one soon if ya wanna come by and check it out... 509-460-8219 (Mike)
Posted: Sun Apr 27, 2014 9:25 am
by OldGreen
Yrjan wrote:Bolts down through the hard top mounting holes into the nut serts. Waterproofed the wood and used outdoor patio carpet that has a rubber backing.
What did you use to waterproof the plywood and where did you get the carpet?
Posted: Sun Apr 27, 2014 11:12 am
by Yrjan
OldGreen wrote:Yrjan wrote:Bolts down through the hard top mounting holes into the nut serts. Waterproofed the wood and used outdoor patio carpet that has a rubber backing.
What did you use to waterproof the plywood and where did you get the carpet?
Got both at Lowes. Jug of waterproofing deck stuff (liquid) can't remember the name. The carpet was Lowes too. Bulk indoor/outdoor carpet. Cut to length.
Posted: Sun Apr 27, 2014 11:21 am
by Yrjan
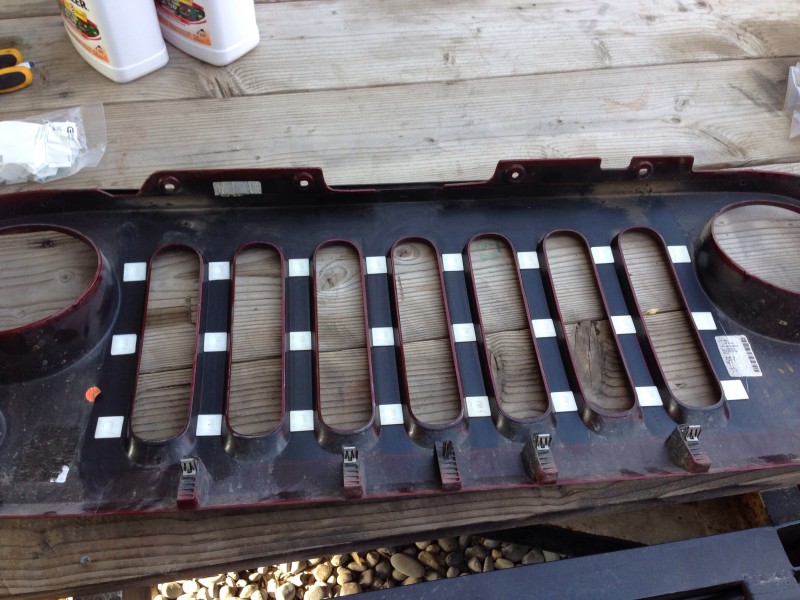
Grill insert instructions...
1) remove 6-7 push pins from upper part of grill. They vary on model year...
2) pull lower part of grill out and remove grill.
3) prep inside of grill where mounting bases are going to stick.

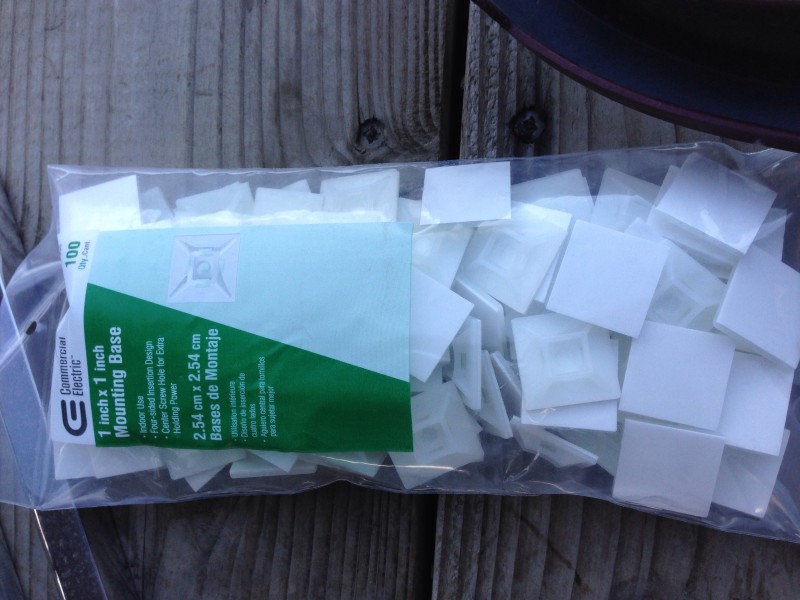
4) place mounting bases...
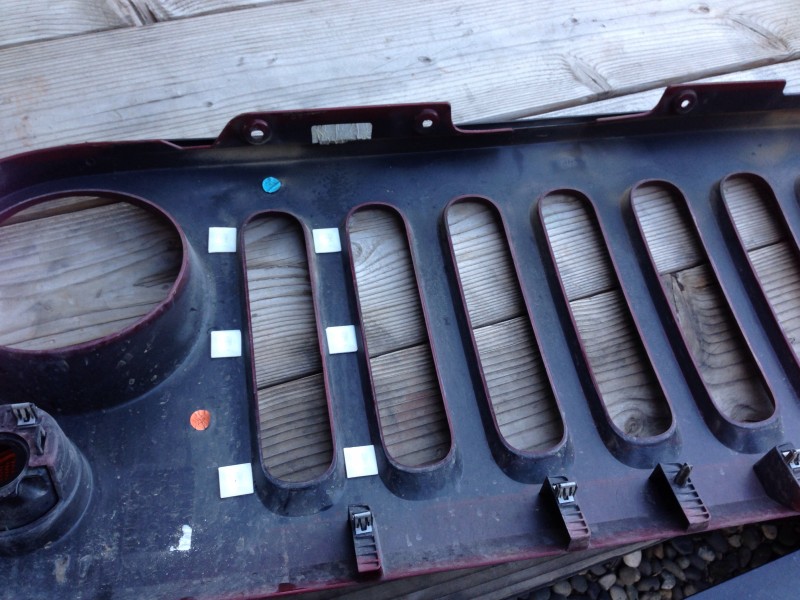
5) buy "rain gutter guards" from Home Depot and cut to size.
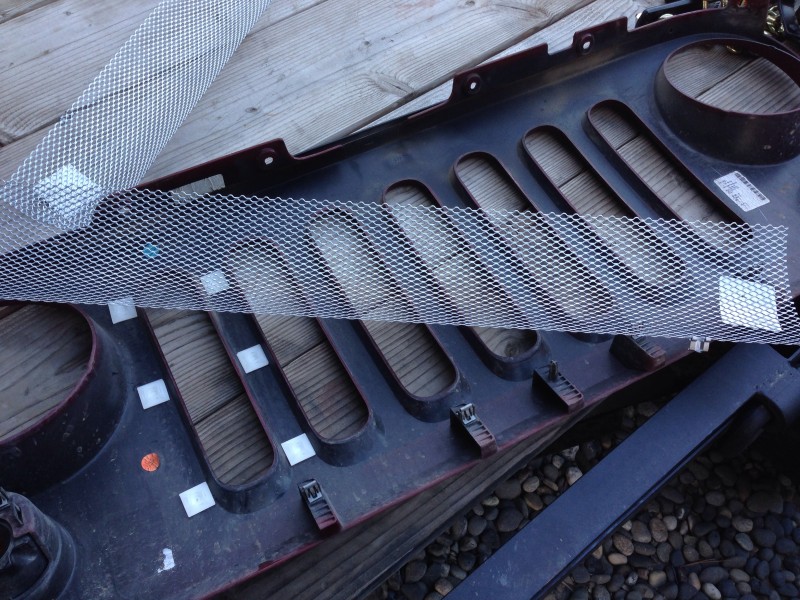
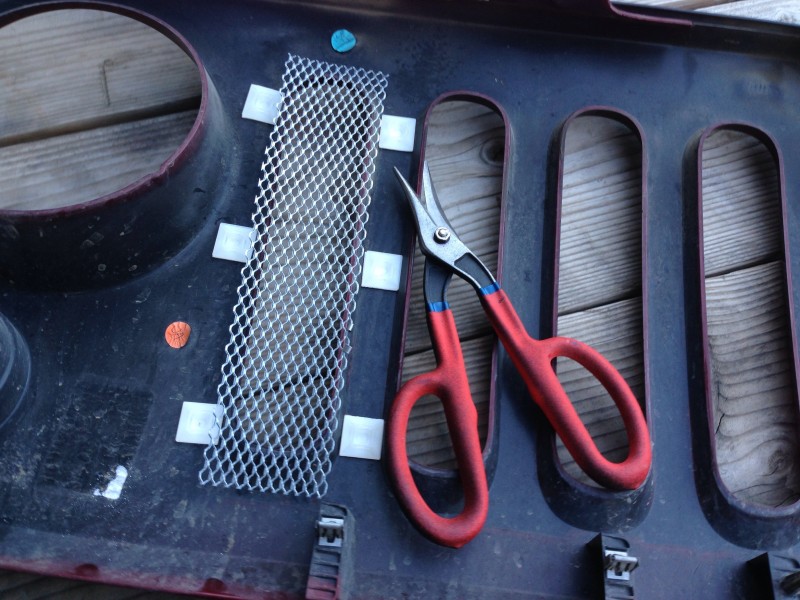
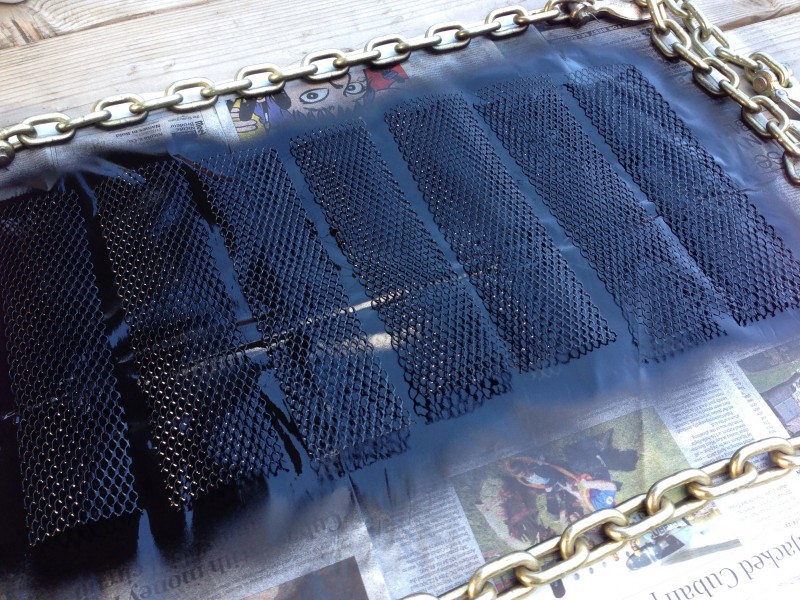
6) paint gutter guards to desired color.
7) attach gutter guards to grill using small zip ties and mounting bases.
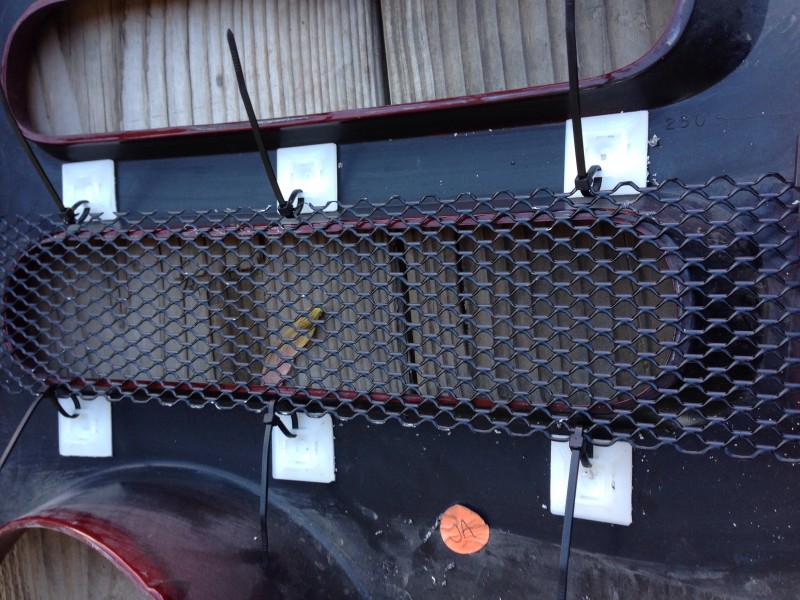

reinstall grill.

Enjoy!
Posted: Sat Jul 19, 2014 7:04 am
by Yrjan
<object width="560" height="315"><param name="movie" value="//www.youtube.com/v/pcZctvpEkBs?version=3&hl=en_US&rel=0"></param><param name="allowFullScreen" value="true"></param><param name="allowscriptaccess" value="always"></param><embed src="//www.youtube.com/v/pcZctvpEkBs?version=3&hl=en_US&rel=0" type="application/x-shockwave-flash" width="560" height="315" allowscriptaccess="always" allowfullscreen="true"></embed></object>