Page 2 of 4

Posted: Sun Jan 30, 2011 10:29 am
by Fozzie
:shock: :shock: :shock: :shock: :shock:

WOWOW!!!!

But, of course we notice that is has good paint!

Nice work Toby!!!

Posted: Thu Feb 10, 2011 5:37 pm
by I'm not so bright
That's a fine looking flat fender!

Posted: Mon Oct 03, 2011 7:01 am
by tobyw
Been a while since I updated this post. Actually, it's been a while since I spun a wrench or fired up the welder. Literally spent the summer at work, so... :roll:

Regardless, I have been able to sneak in a few minutes here and there to keep the ball rolling. No pictures, but a quick list of what has been done:

* Brakes plumbed and bled
* Power steering plumbed and bled
* Roll cage finished and seats mounted
* Finished and painted the corner and rocker guards
* Re-installed the tranny hump cover and shifter boots
* Re-connected all of the wiring to the front clip
* Installed an electric cooling fan with in-cab switch

In between a few of those items, I was able to get it running and have actually driven it around the block a few times! It is every bit as horrible as I remember it being, but that's why I LOVE IT! 8) More to come as the finishing touches roll out, and then I'll be calling a run to get some of the bugs worked out...

Image

Posted: Mon Oct 03, 2011 8:42 am
by OldGreen
Hail to the bus driver, bus driver, bus driver. . .

Can you even imagine that the one in the background is a direct descendant?

Posted: Fri Oct 07, 2011 2:37 pm
by Optiskate
Looks really good man. Cant wait to see that thing in action.

Posted: Fri Oct 07, 2011 7:57 pm
by Danny
Awsome Toby, I'm totally impressed. Wish I had the know how to do something like that. I'll be over on the 22 or 23rd. Gotta check it out before going under the knife.

Posted: Sat Oct 08, 2011 6:38 am
by tobyw
Danny wrote:I'll be over on the 22 or 23rd. Gotta check it out before going under the knife.


Do that!! Love to catch up and maybe have a cold one or two :wink:

On topic, I dug into the blinker switch wiring of the new column yesterday. Back in like 1998, I put a complete Painless wiring harness in along with a universal blinker switch that hung on the factory column. Well I figured it would be cool to ditch the add-on switch and try to use the integrated switch within the new column. Sounds good, but that requires wire testing and such which is NOT my strong suit... :oops: However, as luck would have it, Painless uses the same universal color coding as the Delco integrated switch (apparently a very common switch used from the 70's thru the 90's on a fantastic spread of vehicles), so it was actually a plug and play affair, and I now have functioning blinkers/hazards using the column switch! And, blinker cancelling :shock:

After that I pulled the diff covers and hosed out the pumpkins, sealed them back up, and added fresh 90wt. Love that smell... Then I finished plumbing in the fuel line with some carefully bent/routed hard line. The last think I did was pull the old soft top out of storage and stretched it over the rollcage...

Then I took it for about an hour long boondoggle. It was AMAZING to drive it again! Still have a small list of items to tidy up, but at this point it's ready for hunting season and perhaps even a trail ride 8)

Posted: Sat Oct 08, 2011 6:45 am
by OldGreen
Shut up. . .cancelling blinkers???????

Posted: Sat Oct 08, 2011 7:48 am
by tobyw
... and power steering. It's almost not a real flattie. :?

But... all you have to do is stand next to if for a few minutes, and you'll leave smelling like 90wt, raw fuel, and exhaust fumes. And somehow you're hands and that back portion of your forearm that you never notice is dirty, will get dirty. Yep, its still a real flattie :lol:

Posted: Sun Oct 09, 2011 8:51 am
by Danny
Forking awsome Toby....U THE MAN!!!!

Picture looks like a proud Mamma and her Baby.

BTW...is that the permanent home for the yellow top?

Posted: Mon Oct 10, 2011 7:03 am
by tobyw
Danny wrote:BTW...is that the permanent home for the yellow top?


Pretty likely. I haven't built a permanent mount for it yet, but that is probably where it will end up. I have an ammo can of roughly the same size for the other fender to haul some basic tools/parts, which will leave the bed space for the spare tire, Hi-Lift, cooler, and lawn chairs. :wink:

Posted: Sun Oct 23, 2011 5:14 pm
by tobyw
I had some help this afternoon getting a few more things tidied up on the Flatty…

Image

I pulled the thermostat housing off to fix a slight leak, and found the t-stat completely broken apart! A quick trip to NAPA and a new 180* stat was in place, although I had to make my own housing gasket from sheet stock. Honestly, who doesn’t stock parts for a ’47 Willys?! :roll: :lol:

Once that was done, I went to work checking out a low power situation I had been noticing on my test drives around the neighborhood. In its prime, I could easily get 50+mph out of the old boy, even with 33â€

Posted: Sun Oct 23, 2011 6:54 pm
by Wrench
Seafoam does a great job of getting rid of carbon buildup in the intake and exhaust system, but you may have better luck trying to get the compression up with Marvels Mystery Oil. That stuff is great! I have found a consistent increase in fuel mileage in every rig I have used it in, and often a noticeable power increase. We have also used it on old aircraft engines to help bring the compression back into spec with good consistent success.

Posted: Sat Dec 10, 2011 7:35 am
by tobyw
Well, another quick and pictureless (booooooooo) update...

The motor is back out. And, well, it's also gone. I sold it to an older fella up North that recently cracked the block in his '48. The test drives I had taken with mine after the power steering conversion proved disappointing in terms of power output. Turns out that when you only have 60hp at the flywheel to start with, adding the parasitic loss of a power steering pump can truly be felt in the driver seat :oops: So, my thoughts/dreams kept turning to that lonely 4.3L Chev sitting in the corner of the shop... And then I found a guy selling another complete 4.3L with most all of the remaining parts I'll need to make my conversion, including a stand-alone EFI harness and external fuel pump. So, while it's not likely to happen this winter as originally planned, the flatty will roll out of the shop with a 4.3L the next time it moves under it's own power 8)

Posted: Tue Dec 13, 2011 5:12 pm
by Danny
U make me want to cry.

Posted: Sun Jan 05, 2014 6:39 pm
by tobyw
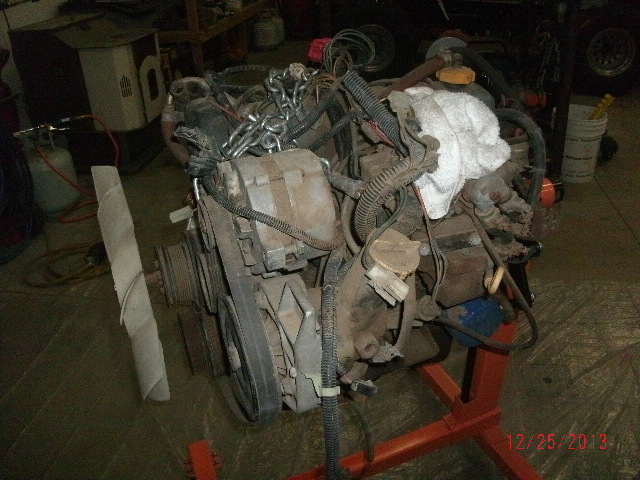
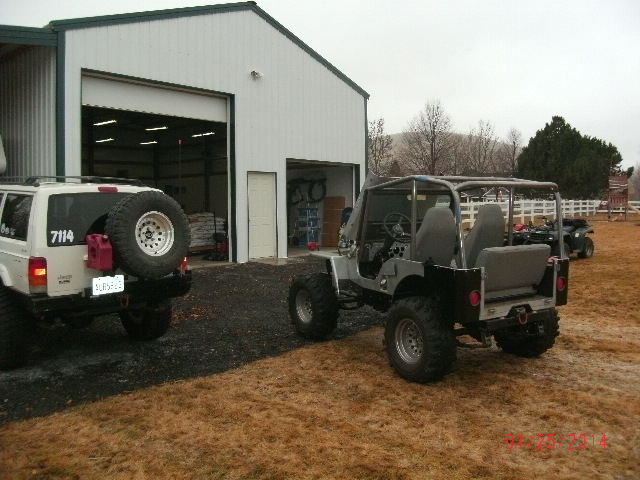
Where did we leave off? Oh yes... I had pulled the engine and sold it to another guy in need. That was, umm, a few weeks/months/years ago :roll: :lol:

Anyhoo, since that fateful day when it was pulled into the shop under it's own power for the last time, MANY things have transpired, not the least of which being a complete 180 in the build plan for my beloved flatty. During the brief hiatus, I scrapped out a Waggy for the offset D44 axles (http://www.peakputters.com/forum/viewtopic.php?t=3428&highlight=), procured a few 4.3L Chevy V6's in various states of repair, and also relieved a Chevy pickup of it's TH350 in Trashy's driveway. All of these parts were to find their way into a newly fabricated frame and a slightly stretched body, landing somewhere around 92-95" in wheelbase on 37" tires. Alas, it wasn't meant to be and ALL of the aforementioned parts have been removed from my shop 8)

The plan now? Well, KISS is the new principle. It's got a wonderful pair of axles already in place with large drum brakes that work fine, the transmission and transfer case, although leaky, function just fine as well. The frame, despite my best efforts over the years, is crack free and straight. So at the end of the day, why fix what ain't broke?

To that end, the resurrection has begun. Again...

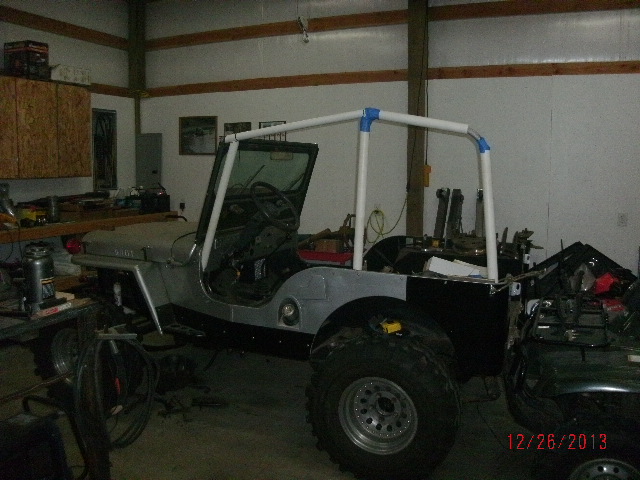
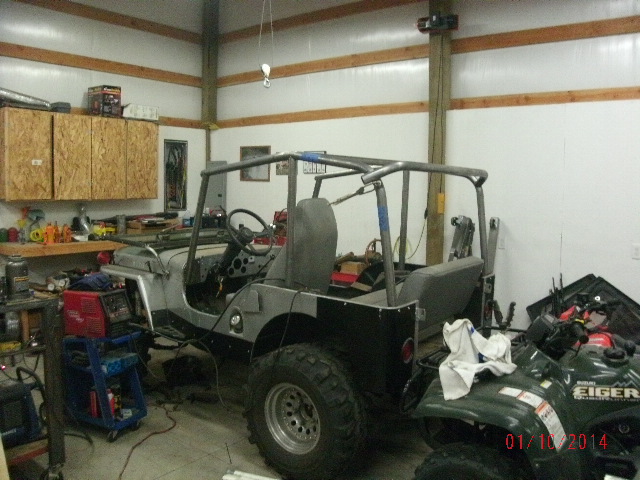
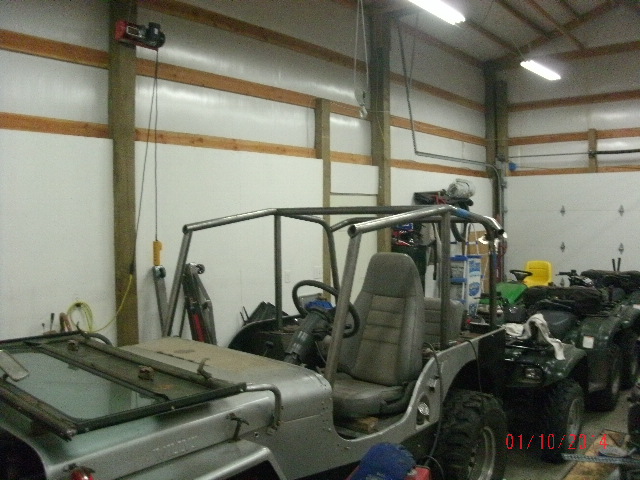
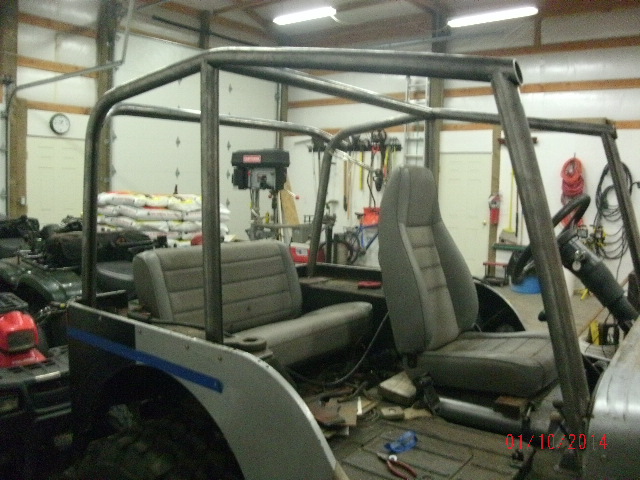
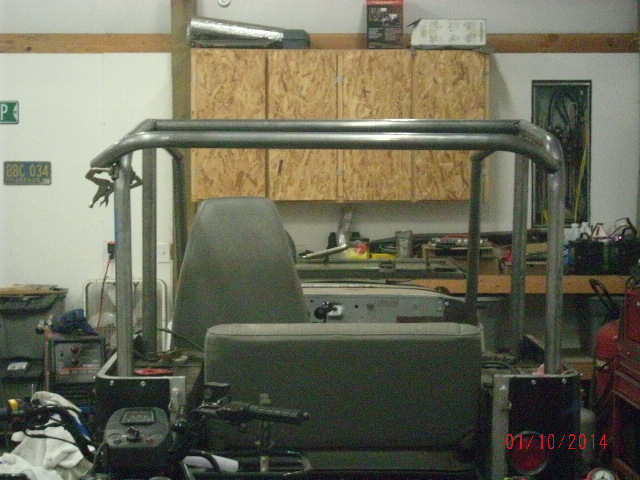
First things first, tearing it down. Knowing the flattie was no longer destined to be a world-beater wheeling machine, it was time to address the lack of rear passenger seating and protection. The cage was simply tailored to a 2-seater program, and with the minions always wanting to tag along, this simply wouldn't cut it. So, out with the old...

Image

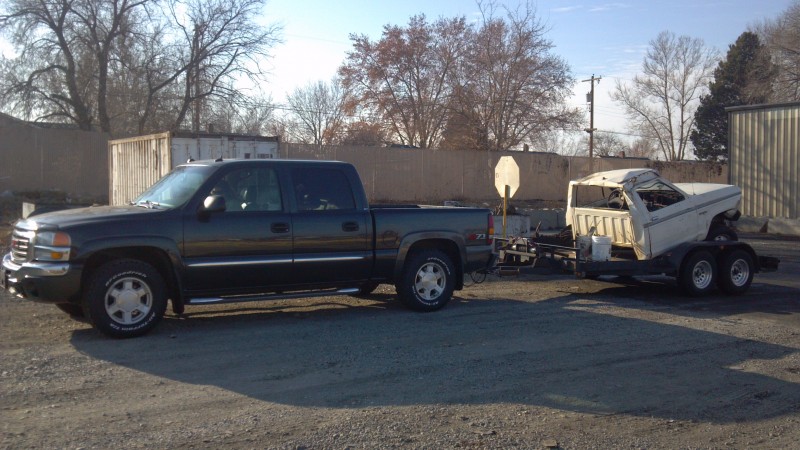
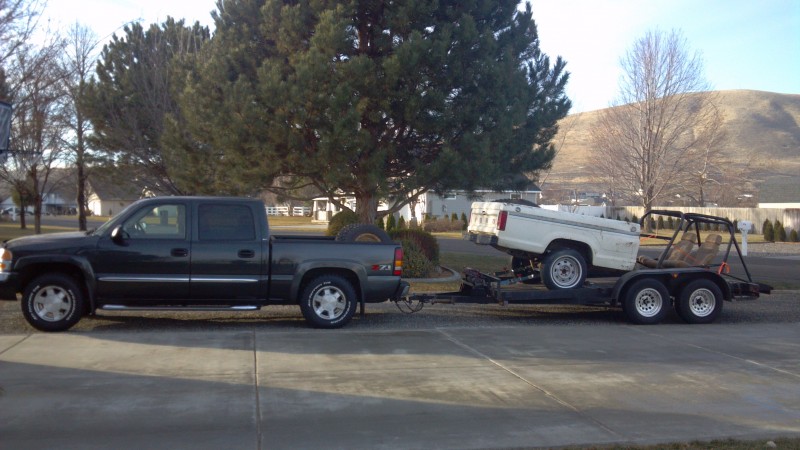
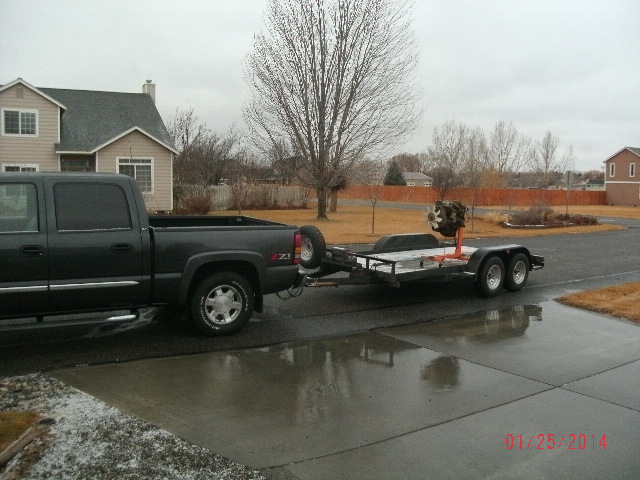
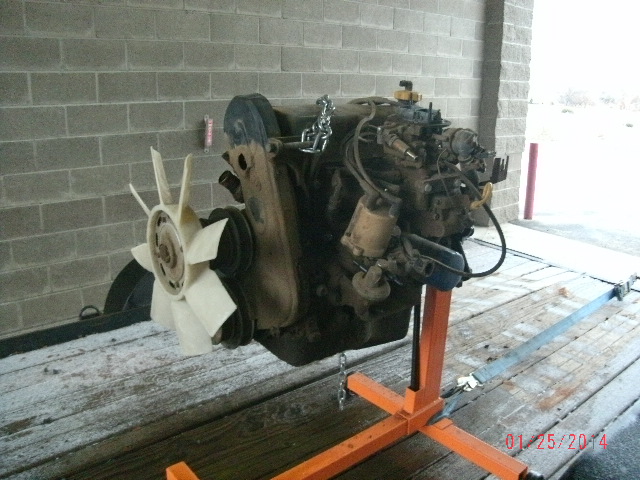
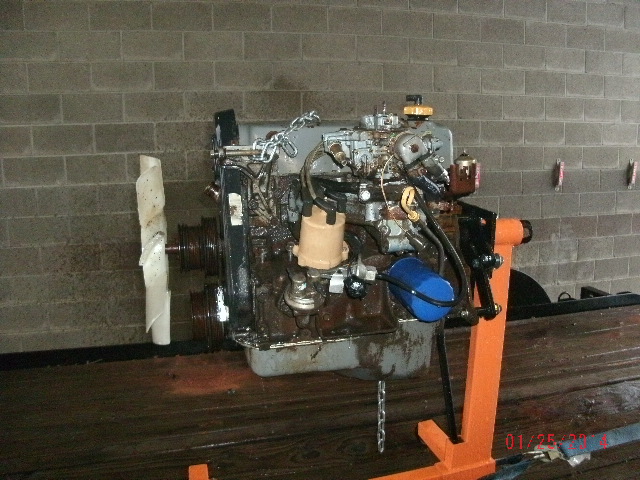
Many years ago, I ran out of talent bombing down a gravel road in my Ford Ranger pickup, with the mighty 2.3L pouring power to the ground at an incredible rate :roll: 
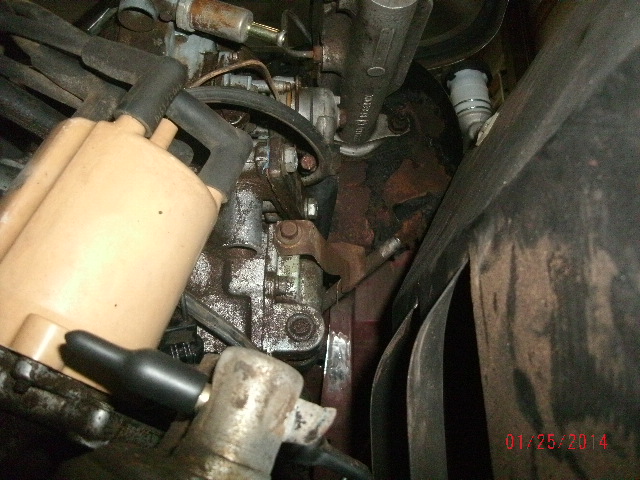
After the dust settled, I was hanging upside down by the seatbelt, surrounded by bent sheetmetal and broken glass. After a little help from a couple buddies, it was back on it's wheels, fired up and driven home. For the next several years, the truck served duty on the family ranch, crooked cab and all. Once I left for college, the truck was parked and left to rot on the back 40. Fast forward a couple decades, and that mighty 2.3L mentioned above is about to get a second lease on life. A quick trip to the ranch in the dark, with some help from OG, and the Ranger was loaded onto my trailer for a trip to my shop. My dad requested the bed section for use as a little farm trailer, so after a couple of hours pulling the aforementioned 2.3L, out came the plasma cutter and within minutes the Ranger was in two pieces. A trip to the scrap yard for the cab section and a trip to the ranch for the bed section and old rollcage (already slated for another flatty project), and the shop was clean and ready to resume the resurrection.

Image

Image

Image

Posted: Sun Jan 05, 2014 6:54 pm
by tobyw
There isn't a lot of room in a flattie. Period. Sure some of us were lucky enough to grow up banging around the woods in the backseat of one, but that backseat is just miserable by today's standards. Still, it was time to put a backseat in my flattie... And with a backseat, comes a requirement for tubular protection.

We begin with a PVC template...

Image

Once the design was finalized and the measurements verified, it was time to whip out the tube bender and notcher, and get to work...

Image

Image

Image

The seats are from a '95 YJ, and fit very will in the comparatively small confines of the flattie. Along those lines, one unique feature of this cage is a lack of traditional A-pillars. In an effort to maximize pedal box volume and simply help with entrance/egress, I am experimenting with a dash mount configuration for the A-pillars.

Image

Image

Those of you really paying attention may notice the change in tires/wheels, as well as the hanging pedals... More info/detail on these changes to follow.

Posted: Sun Jan 05, 2014 9:30 pm
by 79chevy39.5's
Back to swampers. I do like the simple idea of a repower. If i can get my dads flatty in my hands it will get brake upgrades. And lockers and hopefully a top

Posted: Sun Jan 05, 2014 9:52 pm
by Roman
Image

LOL... Looks like a HEAVY cab

Posted: Mon Jan 06, 2014 6:59 am
by bobracing
tobyw wrote:Image


Did you end up just running the main bar straight back? or put a bend in it to match the body?

Is the main bar not bent down to tie into the window frame similar to a wrangler?

As for a flatfender, the dash isn't as bad for tying into, they are part of the body unlike later models were the dash is just bolted in.

Posted: Mon Jan 06, 2014 7:31 am
by Lurch
Looking good!! It's nice to see a build thread on a wheeler with a frame :lol:

Posted: Mon Jan 06, 2014 8:41 am
by OldGreen
Lurch wrote:Looking good!! It's nice to see a build thread on a wheeler with a frame :lol:


I agree. . .and Mine's got a frame sucka. . . :lol:

Posted: Mon Jan 06, 2014 6:35 pm
by tobyw
bobracing wrote:Did you end up just running the main bar straight back? or put a bend in it to match the body?


This took some ciphering... In the end, with the help of the dash plates, I was able to push the A-pillars outboard to within ~1.5" of centerline of the B and C-pillars. So yes, the bend at the B-pillar is slightly out of plane with the C-pillar, drawing the A-pillar tie-in toward the center of the Jeep and landing nicely in the fishmouth. It could have been done with brute force, but I didn't want that much cold spring in the tube.

bobracing wrote:Is the main bar not bent down to tie into the window frame similar to a wrangler?


Correct, it's just a straight bar from the dash plate up to the overhead bar. One less bend, and arguably much stronger. Plus it gives me a way to have a rigid attachment point to the top of the winshield, similar to a stock Wrangler sport bar. If you've ever had the pleasure of driving a flatty with a typical roll cage, you've certainly enjoyed the bang/clang of cage meeting windshield frame. I've done several cages this way over the years, and I like the design much better.

bobracing wrote:As for a flatfender, the dash isn't as bad for tying into, they are part of the body unlike later models were the dash is just bolted in.


Exactly right. The dash is an integral part of the body structure, every bit as stout as any given section of floorboard that a typical cage foot is bolted to. That said, it's still going to get a drop leg behind the dash that will ultimately be tied into the frame, as will the B and C-pillars 8)

Posted: Fri Jan 10, 2014 6:06 pm
by tobyw
A little more cage progress... Since there is NOTHING square and true on a 1947 Willys, especially one that has been subject to my program over the years, simply performing a rinse/repeat from driver side to passenger side doesn't exactly work. Pretty much every piece and every notch needed to be just a bit different than it's counterpart, but hey, if it was easy everyone would wheel a flatty :lol:

Image

Image

Image

Image

And I've said it before and I'll say it again, a quality tube notcher is absolutely worth it's weight in gold...

Image

At this point, I'm still trying to decide if I like the rear spreader. It's tacked on one side and help up with vice grips on the other, and I'm going to leave it that way for a few days to see if it grows on me. Sort of a proof of concept experiment. At this point, it's very much a function over form piece, as I don't like it whatsoever, but it, or something like it, needs to be there... When I sit in the back seat, I have barely-adequate head clearance with the spreader in place, but in all reality, a normal sized human will never be in the back seat. If they are, something else is terribly wrong so head clearance probably won't be a huge concern :lol:

Posted: Sat Jan 25, 2014 4:13 pm
by tobyw
As mentioned, form follows function and the rear spreader is here to stay. I got it tacked in on both sides and then decided to pull the Jeep out of the shop for a quick cleanup...

Image

Image

Once the shop floor was swept up and the flatty relocated to the opposite bay, it was time to address the motorvation portion of this project. The 2.3L pulled from the old Ranger was grimy at best, and just needed a thorough cleaning before I started manhandling it to mock it into place. I mean, I'm not a barbarian :lol: So, it got hoisted onto my trailer and a quick trip to the local coin wash...

Image

Image

Image

Image

So with a moderately clean motor to work with, it was time to start mocking it into place...

Image

Image

As expected, I ran into some interferences over on the driver side. Flatties were never intended to have a power brake booster or a Saginaw style steering setup, so both of those modifications are trying to share space with the fuel pump, oil filter, and carb/intake on the 2.3L. The fuel pump is already slated to be plated off and replaced with an electric pump, so that is a non-issue. The oil filter can be either relocated completely or turned down 90* with an adapter, so that is also a pretty simple and inexpensive work around. I am currently stuck, however, on what to do with the carb and intake issues. Actually, the intake itself is OK but the factory carb has A LOT of stuff hanging off it, most of which is what interferes with the brake booster. The electric choke housing, as well as some sort of heat exchanger dealio below the EGR block, are the offending items. Not sure if I can adapt a different, more compact, carb to this intake, or if I'll need to go full monty on a swap? James or WT, have any thoughts? Here are some pics of the issues:

Image

Image

Image