I have been doing H.V.A.C service for 18 years so winging it is no problem, The furnace pilot tube is fixed, and now the gas valve leaks gas, so that should be around $100 to fix. i couldn't find a model on it but the vent says hydro flame, looks identical to this but the gas valve is different http://www.atwoodmobile.com/manuals/furnaces/MPD%2032072%20SP%201.08.pdf
the oven has pilot pressure issues, but the stove top works great, the oven is a wedgewood stove Number W283844 Model 12122
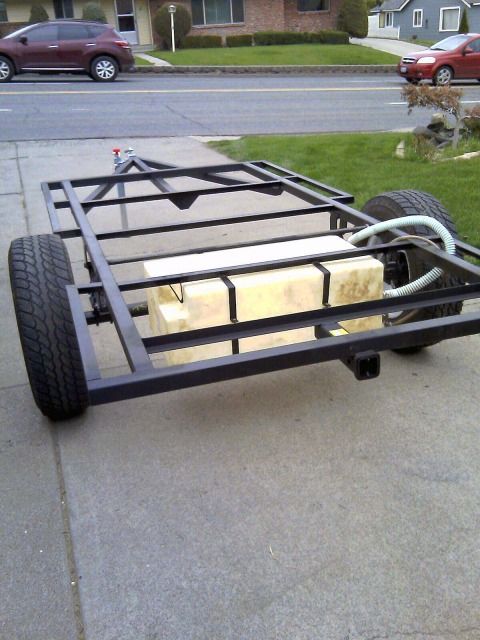
off road tear drop trailer build
-
Wrench
- Peak Putters Member

- Posts: 1237
- Joined: Sat May 30, 2009 7:23 am
- Location: in a van down by the river
colemancooler wrote:I have been doing H.V.A.C service for 18 years so winging it is no problem, The furnace pilot tube is fixed, and now the gas valve leaks gas, so that should be around $100 to fix. i couldn't find a model on it but the vent says hydro flame, looks identical to this but the gas valve is different http://www.atwoodmobile.com/manuals/furnaces/MPD%2032072%20SP%201.08.pdf
the oven has pilot pressure issues, but the stove top works great, the oven is a wedgewood stove Number W283844 Model 12122
I would need the exact Furnace model number to verify, but it looks like there may be a retrofit valve kit for those that converts it to DSI. The standard valves are no longer available for the 7900 series furnaces.
As for the stove, was that the model number on the tag in the stove-top burner area with the lid off? My parts lists dont list it, but that may just be because of it's age.
Paul
'84 XJ, '19JL
'84 XJ, '19JL
-
colemancooler
- Posts: 288
- Joined: Wed Mar 14, 2007 4:49 pm
- Location: yakima
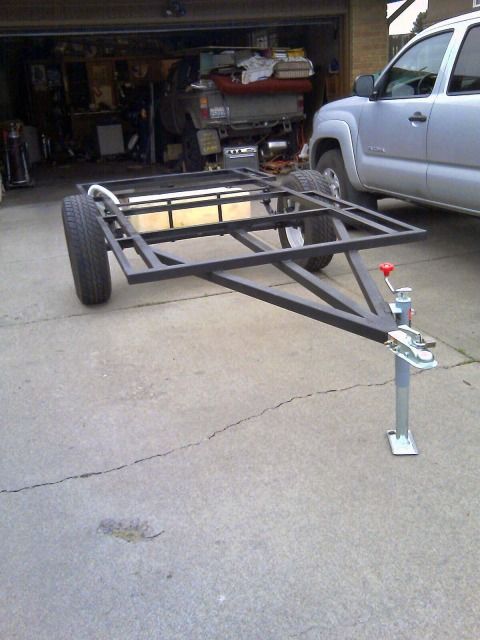
the camper is gone, I got a wealth of parts from it, and spent $17 hauling the remnants to the dump ( 860 lbs ), I also made $16 selling all the aluminum trim, hope soon to have sold the camper jacks and toilet/ black water tank, also now that the camper is gone I can get the trailer out from behind the house and weld on the tongue jack and safety chains, which came yesterday
shindig wheelers #36
-
colemancooler
- Posts: 288
- Joined: Wed Mar 14, 2007 4:49 pm
- Location: yakima
-
colemancooler
- Posts: 288
- Joined: Wed Mar 14, 2007 4:49 pm
- Location: yakima


-
colemancooler
- Posts: 288
- Joined: Wed Mar 14, 2007 4:49 pm
- Location: yakima

Oh, I'm liking this. I'll be 1st in line to buy it from you for cheap when you go to sell it, but I imagine that is not going to happen. 
Okay, we're a little crazy to have a Duramax for a daily driver. But if we go off our meds, we might wind up in a Prius.
If you want to hear God laugh, tell Him your plans.
N7EEL WROD249


If you want to hear God laugh, tell Him your plans.
N7EEL WROD249
-
colemancooler
- Posts: 288
- Joined: Wed Mar 14, 2007 4:49 pm
- Location: yakima
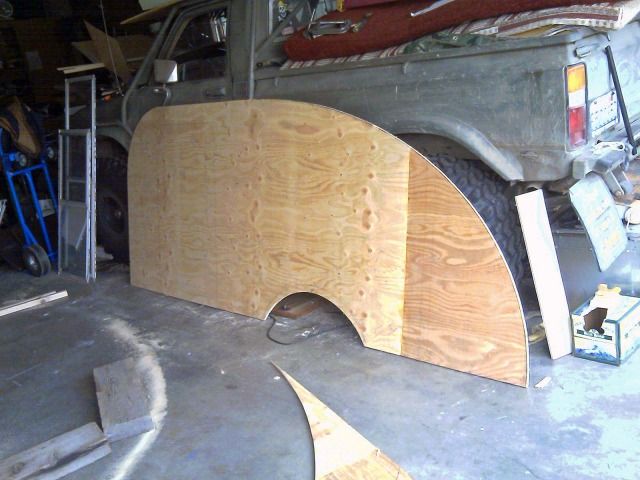
I used a 3 wing cutter and a very large 1/8" biscuit
3 wing cutter is a router blade

I plan on skinning it with Baked on enamel sheet metal, like what is used to make sheet metal flashing, But with the exception of a fair amount of pre planning, some of the ideas I have are subject to change. I am shooting from the hip on some of the details
3 wing cutter is a router blade
I plan on skinning it with Baked on enamel sheet metal, like what is used to make sheet metal flashing, But with the exception of a fair amount of pre planning, some of the ideas I have are subject to change. I am shooting from the hip on some of the details
shindig wheelers #36
Sounds good. I use biscuit joints for a lot of stuff. It sounds like you used one long biscuit that runs the length of your joint. Regardless, biscuit joints are really tough to rip apart once they set up. Cool project.
I don't Text (at least not very well), I eat Blackberrys, and I only Twitter after sex...
-
colemancooler
- Posts: 288
- Joined: Wed Mar 14, 2007 4:49 pm
- Location: yakima
-
colemancooler
- Posts: 288
- Joined: Wed Mar 14, 2007 4:49 pm
- Location: yakima
just ordered 2 of these yesterday for the interior
http://www.amazon.com/Seasense-Super-Bright-Interior-Surface/dp/B001HPJLBG/ref=pd_sim_sbs_sg_3
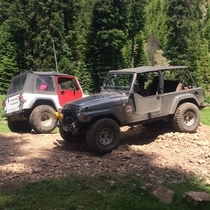
current Pic

http://www.amazon.com/Seasense-Super-Bright-Interior-Surface/dp/B001HPJLBG/ref=pd_sim_sbs_sg_3
current Pic
shindig wheelers #36
-
colemancooler
- Posts: 288
- Joined: Wed Mar 14, 2007 4:49 pm
- Location: yakima
slowly but surely making progress, usually any day that it is out in the front at least two people stop to talk to me about it.
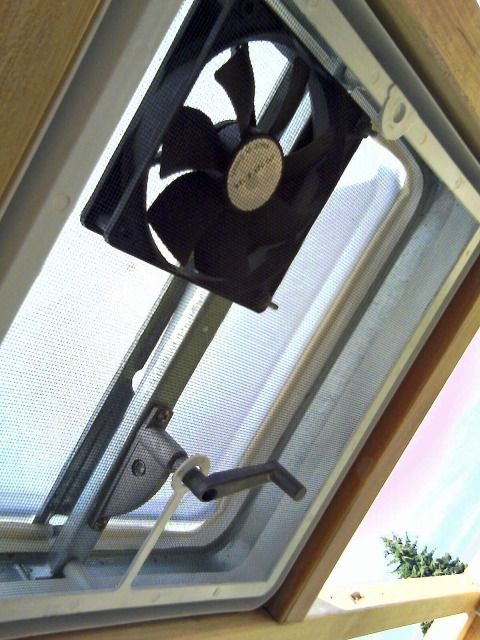
made my own fantastic fan with a computer fan
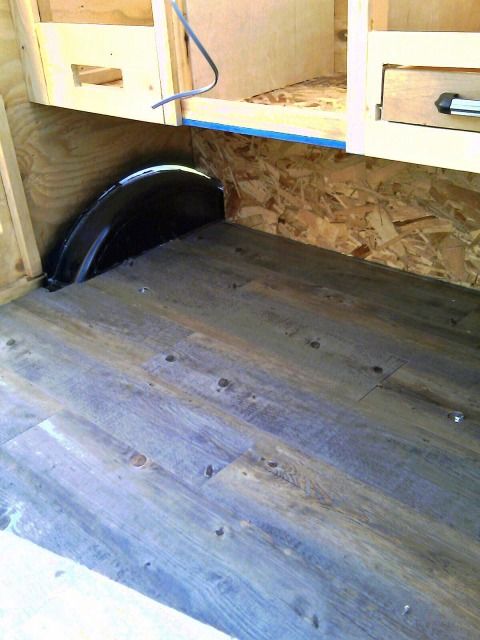
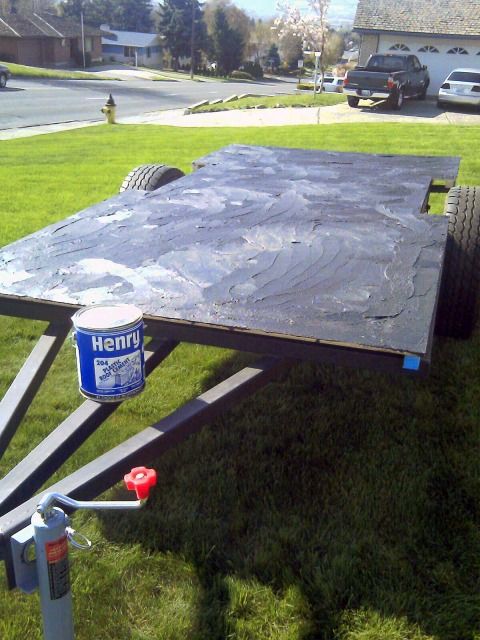
got flooring installed, this is tile from a grocery store that was left over, I got from my neighbor
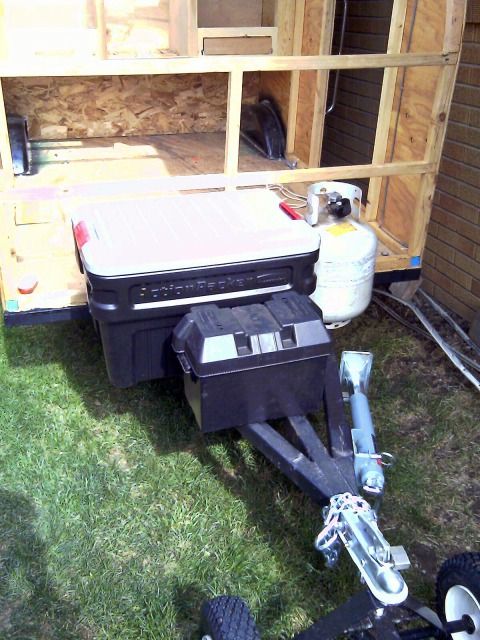
getting the tongue storage figured out, and some wiring done
made my own fantastic fan with a computer fan
got flooring installed, this is tile from a grocery store that was left over, I got from my neighbor
getting the tongue storage figured out, and some wiring done
shindig wheelers #36
-
LiftedZuki
- Posts: 121
- Joined: Tue Oct 07, 2008 9:08 pm
- Location: Kennewick, WA
Re: off road tear drop trailer build
colemancooler wrote:I have been planning this for a while now and do not have a job, but recently came into some $ and am itching to get started. the first issue I have run into is the trailer will most likely be under 1,500lbs and the only way I can buy a pre made axle with 6 on 5.5 bolt pattern, is to buy a 3,500lb axle, the over kill would be ok, but the ride would SUCK!, I am also considering an independent custom air bag suspension
which might nickle and dime me to death
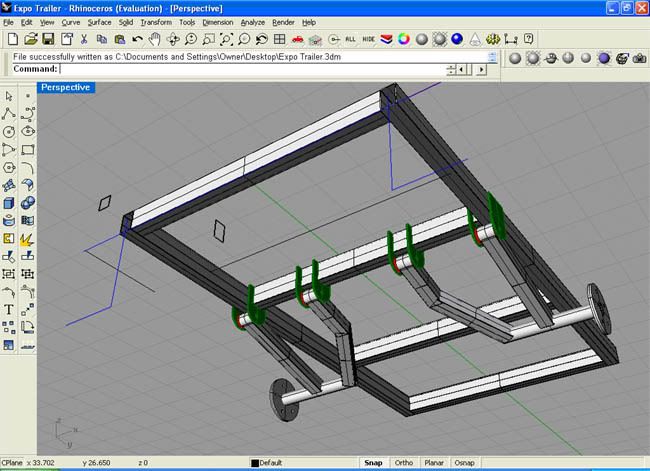
I never see people use rhino3d. I love this program so much.
-
colemancooler
- Posts: 288
- Joined: Wed Mar 14, 2007 4:49 pm
- Location: yakima
got a 60 watt solar set up for fathers day
http://www.zampsolar.com/index.php?m=87&s=542&c=&id=1306
I am very excited to get this mounted, but still have to get the skin on first
http://www.zampsolar.com/index.php?m=87&s=542&c=&id=1306
I am very excited to get this mounted, but still have to get the skin on first
shindig wheelers #36
-
Wrench
- Peak Putters Member
- Posts: 1237
- Joined: Sat May 30, 2009 7:23 am
- Location: in a van down by the river
If I were you, I would not plan on solid-mounting that nice solar panel. Get or make a nice adjustable tripod so you can plant it when you hit camp. Travel with it stored in a flat area inside, like on a bed or something.
Those things loose major efficiency when not pointed directly at the sun (or when parked in the shade), and they are easily susceptible to being damaged by tree branches, etc. if hard mounted on the coach.
Those things loose major efficiency when not pointed directly at the sun (or when parked in the shade), and they are easily susceptible to being damaged by tree branches, etc. if hard mounted on the coach.
Paul
'84 XJ, '19JL
'84 XJ, '19JL
-
colemancooler
- Posts: 288
- Joined: Wed Mar 14, 2007 4:49 pm
- Location: yakima
from what I have read it is not worth the extra effort to constantly move the solar panel to keep it facing the sun, It would suck to break it

from a knowledgeable person that has done it, Not meOkay, here's where you have to make some decisions that will affect how much solar panel you buy. You can expect to gain about 20% extra charging capacity if you're real anal and point the panel right at the sun every 30 minutes or so. If you're lazy like me you can just lay the panel flat where it will get full sun and forget about it. Bump the panel sizes shown above up by 20% if you can't be bothered by angling the panel towards the sun. But watch out for any kind of shade on your panel. Just the tiniest, little bit of shading will cripple your panel's output.
shindig wheelers #36
-
colemancooler
- Posts: 288
- Joined: Wed Mar 14, 2007 4:49 pm
- Location: yakima
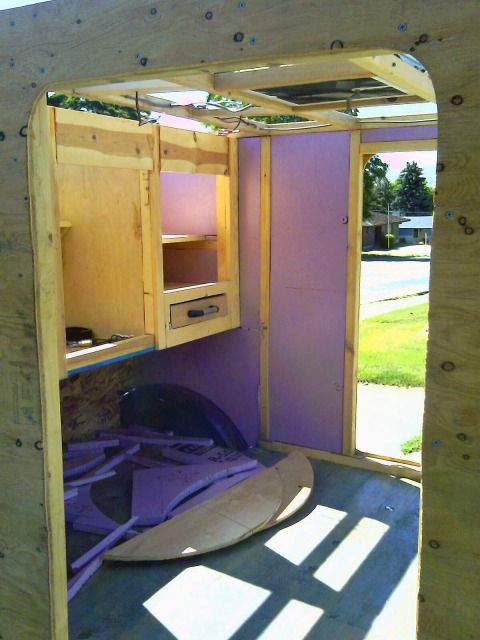
still slowly making progress, i am getting the walls insulated, and wood paneling on the walls inside, also got the door mocked up, and received my Led rope lights that I ordered on ebay For $9

I have talked to my sheet metal supplier and a 4'x10' sheet of aluminum is around $94, way too rich for my blood until I go back to work, but I still have a lot to do, with the parts I have
I have talked to my sheet metal supplier and a 4'x10' sheet of aluminum is around $94, way too rich for my blood until I go back to work, but I still have a lot to do, with the parts I have
shindig wheelers #36
benw wrote:You can just get the 3500 pound axle and use some lighter springs. The axle itself isn't going to affect the ride.
If you want it to ride smooth I would suggest using some nice led lights long toy ota or jeep springs instead of the super short trailer springs.
Use a drop axle flipped upside down for better ground clearance.
If I plan for long journey and on tough roads what kind of springs you will advice me?
-
Livin4Today
- Posts: 1054
- Joined: Thu Jan 26, 2012 8:23 am
- Location: Kennewick, WA
Alright I'll say it where is the updated status report? It's been 4 months since the last one...
Lance
Building a capable off roader is easy, building a street legal one that you can wheel and then drive daily is the challenge...
2007 JKU, 7" RK lift, 40s, ARBs, 5.38s, Headers, Fox Coilovers, etc. http://www.Livin4Today.com
Building a capable off roader is easy, building a street legal one that you can wheel and then drive daily is the challenge...
2007 JKU, 7" RK lift, 40s, ARBs, 5.38s, Headers, Fox Coilovers, etc. http://www.Livin4Today.com
-
colemancooler
- Posts: 288
- Joined: Wed Mar 14, 2007 4:49 pm
- Location: yakima
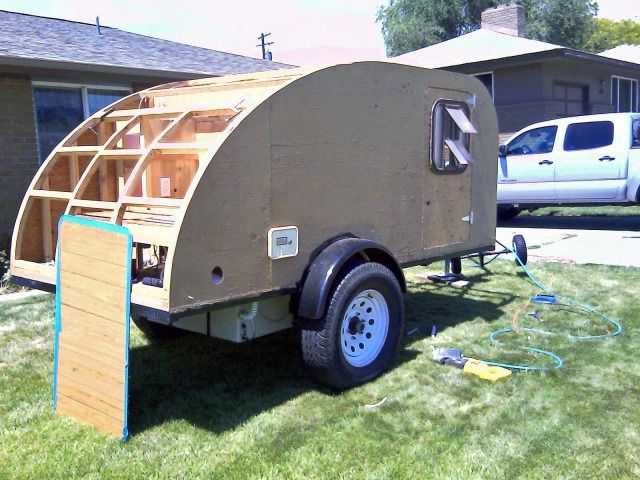
I was waiting for nice weather to take Pics, but I have been lazy and Broke, I mounted the led tail lights under the frame and built flat bar guards to protect them, also had to re wire the tail lights because the used length of 7 wire I had had a short in it. the outside is skinned with 1/4 ply I just need to get off my but and build the doors and Keep saving $ for the aluminum skin
shindig wheelers #36
-
Livin4Today
- Posts: 1054
- Joined: Thu Jan 26, 2012 8:23 am
- Location: Kennewick, WA
colemancooler wrote:I was waiting for nice weather to take Pics, but I have been lazy and Broke, I mounted the led tail lights under the frame and built flat bar guards to protect them, also had to re wire the tail lights because the used length of 7 wire I had had a short in it. the outside is skinned with 1/4 ply I just need to get off my but and build the doors and Keep saving $ for the aluminum skin
We can't wait for nice days in the winter! Take some pics and share!
Lance
Building a capable off roader is easy, building a street legal one that you can wheel and then drive daily is the challenge...
2007 JKU, 7" RK lift, 40s, ARBs, 5.38s, Headers, Fox Coilovers, etc. http://www.Livin4Today.com
Building a capable off roader is easy, building a street legal one that you can wheel and then drive daily is the challenge...
2007 JKU, 7" RK lift, 40s, ARBs, 5.38s, Headers, Fox Coilovers, etc. http://www.Livin4Today.com
Return to “Projects and Build-Ups”
Who is online
Users browsing this forum: No registered users and 9 guests