Page 1 of 3
Grocery Getter v2.0
Posted: Fri Apr 20, 2012 9:50 am
by tobyw
Since I currently have very limited resources in terms of time and tools/equipment (stupid job
really cuts into my fun time

), the upgrades to the Grocery Getter v2.0 will be small and slow in coming...
That said, regardless of the vehicle or the owner's time situation, certain things need to be addressed to get full enjoyment from a group outing. Topping the list are safety items, recovery equipment, and communications. I keep my safety and recovery gear in a couple of Rubbermaid Action Packer bins, that are easily transferrable from vehicle to vechile (and with my penchant for changing rigs, these bins have been a great investment


). Since the Grocery Getter came factory equipped with nice tie-down loops in the cargo area, I was already one step ahead with no need to make any mounting provisions for the bins. Sadly, with the sea of rounded off plastic that makes up the late-model XJ dash, the same could not be said for the mounting of a CB.

First I removed the center console to access the situation. I found a nice sturdy dash support bracket there, which made the perfect foundation for a CB mount:

Once I did some test fitting and calibrated eyeballing, I bent up a little bracket out of some 1â€
Posted: Fri Apr 20, 2012 9:56 am
by White trash
After your first trip down a washboard gravel road you'll be adding another support to that cb. It's going to wiggle and bounce till that thin bracket snaps off...
Posted: Fri Apr 20, 2012 11:24 am
by mattawajeep
White trash wrote:After your first trip down a washboard gravel road you'll be adding another support to that cb. It's going to wiggle and bounce till that thin bracket snaps off...
Velcro would work great in there.
Posted: Fri Apr 20, 2012 12:54 pm
by tobyw
White trash wrote:After your first trip down a washboard gravel road you'll be adding another support to that cb. It's going to wiggle and bounce till that thin bracket snaps off...
What you can't really see is that the bottom edge of the CB actually rides on the floorboard/carpet, so it's got bottom "support". I agree it's not the best mounting arrangement I've ever seen, but it's more than adequate for the mall.

Posted: Fri Apr 20, 2012 1:15 pm
by iaccocca
tobyw wrote:White trash wrote:After your first trip down a washboard gravel road you'll be adding another support to that cb. It's going to wiggle and bounce till that thin bracket snaps off...
What you can't really see is that the bottom edge of the CB actually rides on the floorboard/carpet, so it's got bottom "support". I agree it's not the best mounting arrangement I've ever seen, but it's more than adequate for the mall.
Easy on the speed bumps there big fella'.
My brake controller for one, is just jammed between the CB and the dash and it has stayed in place through a few runs and a bit of Three-Ball silliness.

Posted: Sat Apr 21, 2012 9:20 am
by tobyw
For the next chapter of this saga, I turned my attention to the suspension. After running a 4.5â€
Posted: Sat Apr 21, 2012 9:37 am
by tobyw
While the Jeep was in pieces, I decided to tackle some other areas: namely the axles and transmission:

I dropped the transmission pan, changed the filter, and added a bung to the pan to accept the temperature sending unit:


And then slipped in the transmission cooler:

I was in a tremendous hurry to get things back together and get back to work, so I didn’t get any pictures of the locker installations. Unfortunately, I ran into some issues removing the roll pin from the D30 carrier so I was not able to get the front installed, but the rear went in just fine. I’ll get back after the front axle sometime later this spring…
Posted: Mon Apr 23, 2012 6:36 am
by tobyw
Posted: Mon Apr 23, 2012 7:22 am
by TJDave
It's amazing how fast you've always been able to change out stuff on your rigs.....well most of them anyway.

Must be the dedicated pit crew!

Posted: Fri Apr 27, 2012 12:19 pm
by Livin4Today
I might be wrong but thought I saw some child labor going on there... LOL
Posted: Mon May 21, 2012 11:01 am
by tobyw
Got some time to put in a couple more hours of wrenching on the Grocery Getter v2.0 over the “weekendâ€
Posted: Tue May 22, 2012 8:52 pm
by Danny
Tow-be....that rear plate sure looks like it's going to be hard to "C"!!
Posted: Wed May 23, 2012 6:14 am
by tobyw
Czek... It's on the list
Posted: Thu May 24, 2012 2:57 pm
by colemancooler
Nice

Posted: Mon May 28, 2012 3:36 pm
by tobyw
So the kids woke me up this morning
begging to go Jeeping… I attribute that to good parenting

At any rate, the sun was out and it was indeed a nice day for a quick jaunt, so I took the opportunity to squeeze a bit more family time out of my reprieve from work and also to finally get the bumpstops set on the Grocery Getter v2.0. We headed to a familiar spot just North of town, and the kids played around and took in the view while I fine tuned the uptravel stoppers:


After a little testing, 3 hockey pucks turned out to be just the ticket:


And in the rear, the 4â€
Posted: Mon Jun 04, 2012 5:05 am
by tobyw
No pictures this time, but I spent 15 minutes pulling the throttle body and cleaning it and the IAC up. Did wonders for idle quality
One more thing off the list...
Posted: Sat Jun 09, 2012 6:15 pm
by tobyw
For anyone keeping track, you may recall I had some issues with my initial attempt at installing the locker in my front D30. For whatever reason, the roll pin fought me trying to come out of the carrier, and due to time constraints I was unable to fight back and ended up just putting it back together with a mashed up roll pin and part of a broken drill bit to keep things company inside the otherwise still-stock pumpkin… Fast forward 2 months or so, and I had another opportunity to step into the ring with the mighty D30.
Step 1 is to pull the dirty bugger out of the axle housing…

Step 2 is to take advantage of the Father’s Day sale at Sears and buy yet
another set of roll pin punches…

Step 3 is to apply liberal force…
 (Yes, I realize that in this picture it appears I was attempting to drive the roll pin out in the wrong direction. However, it was just a feable attempt at documenting my journey )

Round 2 went to the D30. What took place next didn’t end up on camera, but it involved (among other things) a full-blown sledge hammer, oxy/acetylene torch, a ½â€
Posted: Sat Jun 09, 2012 8:44 pm
by OldGreen
The counterpoint is that I removed two D30 roll pins today by using an old dull drill bit for a punch.
Disclaimer: this comment was inserted just to be an a$$.
Posted: Sun Jun 10, 2012 6:00 am
by tobyw
There is a b!tch slap with your name on it en-route via FedEx

Posted: Sun Jun 10, 2012 8:45 pm
by Danny
U 2 R a hooooot!!!
I still want to know who's going to win!! So far it's tie.
Posted: Tue Jul 03, 2012 10:47 am
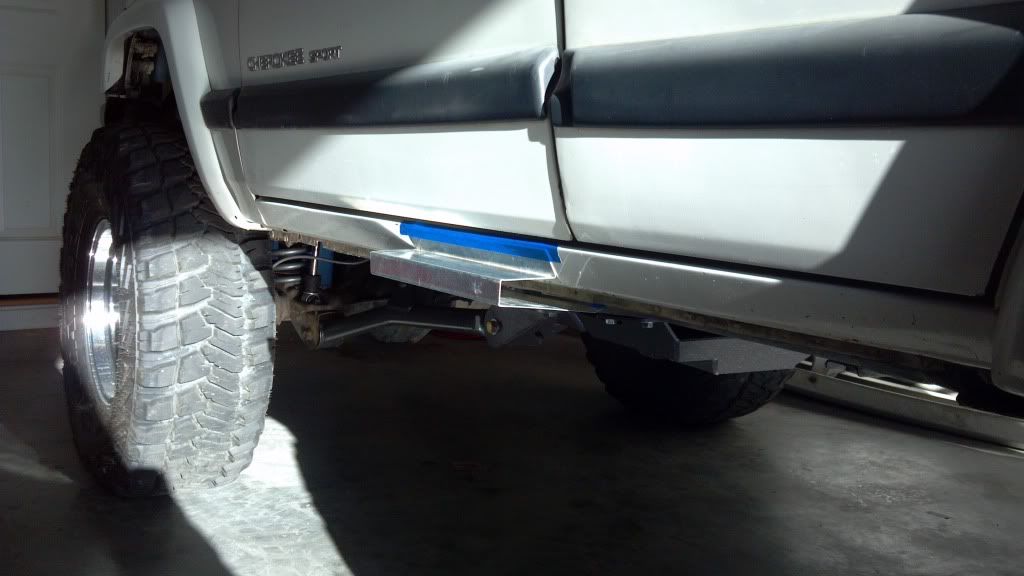
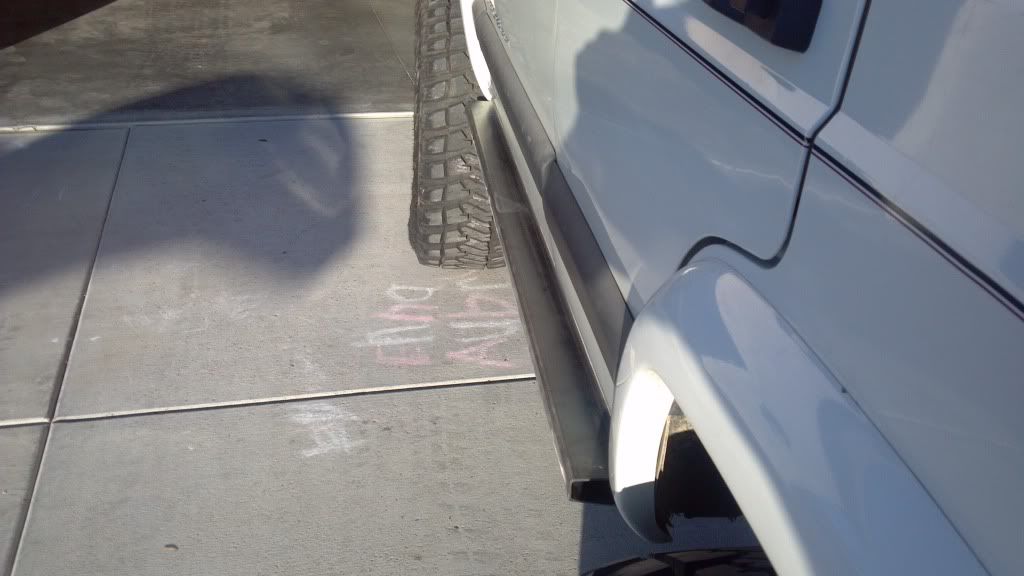
by tobyw
One of the last pieces of the puzzle (not
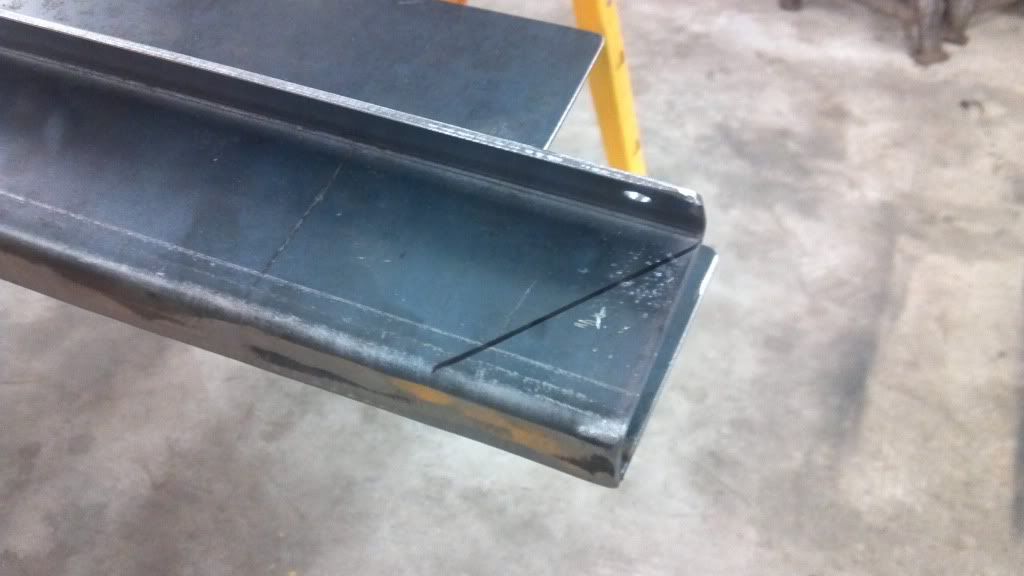
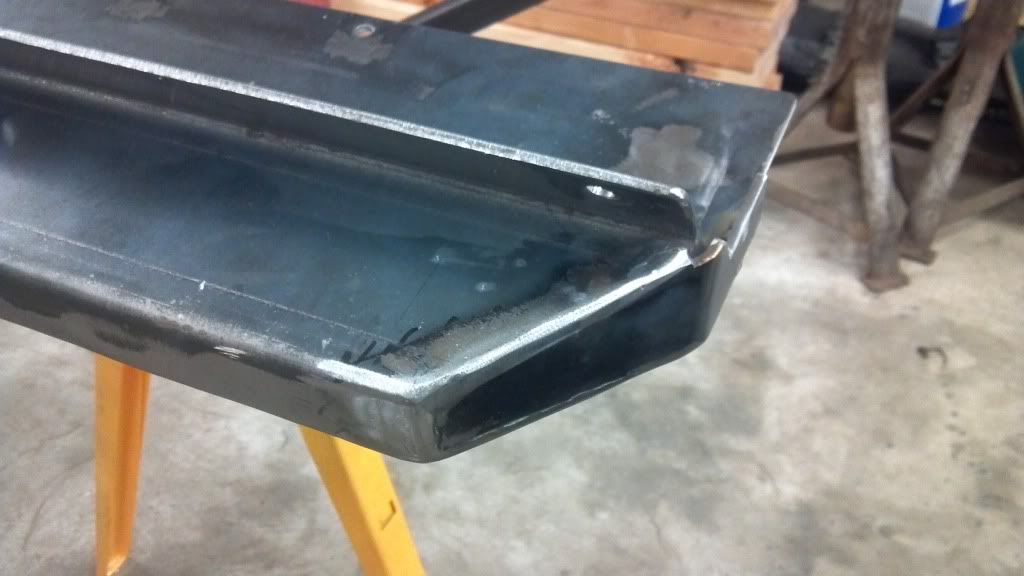
the last mind you…) was some rocker protection. I built some very typical box tubing rock sliders for GGv1.0, and while they served their purpose without fail, I wanted something different this time, if for no other reason than because I could…
It all started with a mockup from some light gauge sheetmetal:

After several iterations, I was finally happy with the shape and transferred it to some 10ga plate:
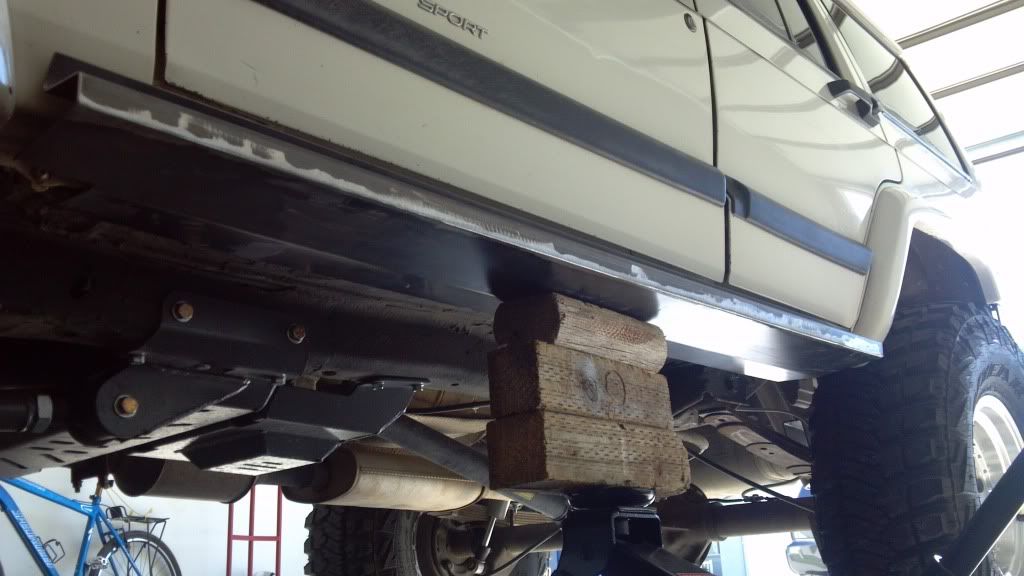
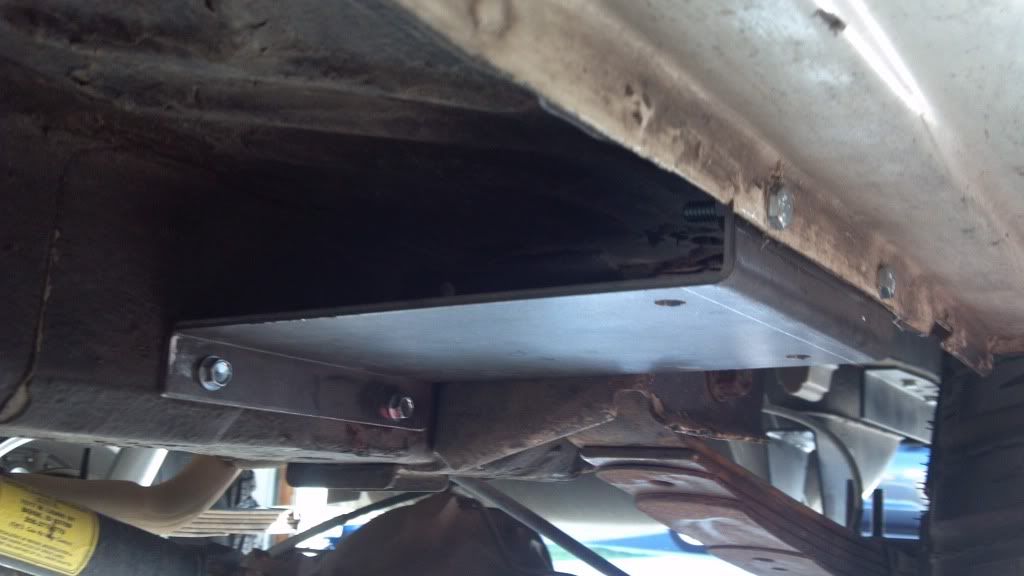
More 10ga was used to make some simple ‘Z’ plates that tie the pinch seam back to the unitbody rails:
And mockup:
Using my
whip-zammy setting tool, I set the nutserts and hung them on the Jeep:
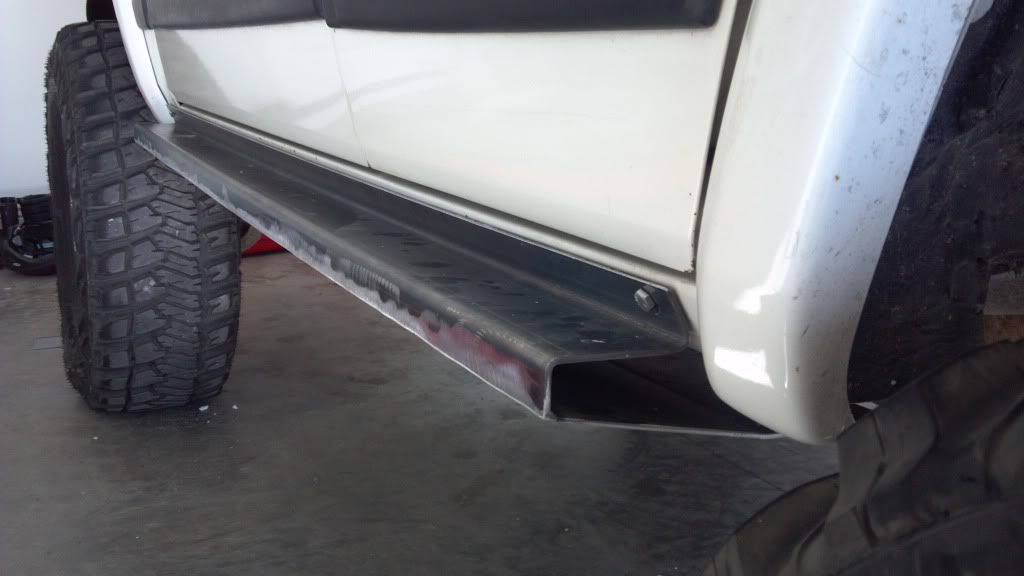
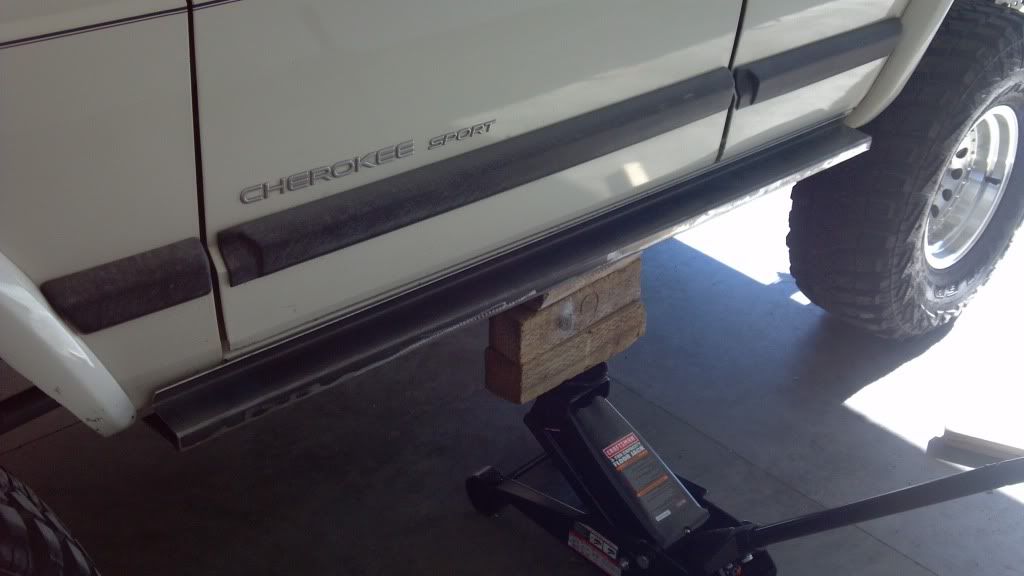
Then I pulled the Jeep out of the garage to see my handywork in natural lighting:

Happy with the results, I pulled it back into the garage and marked/drilled/installed the rest of the mounting hardware:


And finally pulled them back off to miter and cap the ends:
I probably won’t have time to paint/install them this weekend, but hopefully they’ll be on by mid-July. In the meantime, you’ll probably be able to view a second, finished, install a little closer to home
Posted: Tue Jul 03, 2012 12:22 pm
by OldGreen
Where can I get me some of those!!!!?
Posted: Tue Jul 03, 2012 6:54 pm
by colemancooler
Nice work
Posted: Tue Jul 03, 2012 7:48 pm
by SPR
Nice deal Toby. I put together a simliar setup for T0yota pickups. My buddy fabbed several sets out of stainless for me to finish up and try to sale. What a pain to drill.
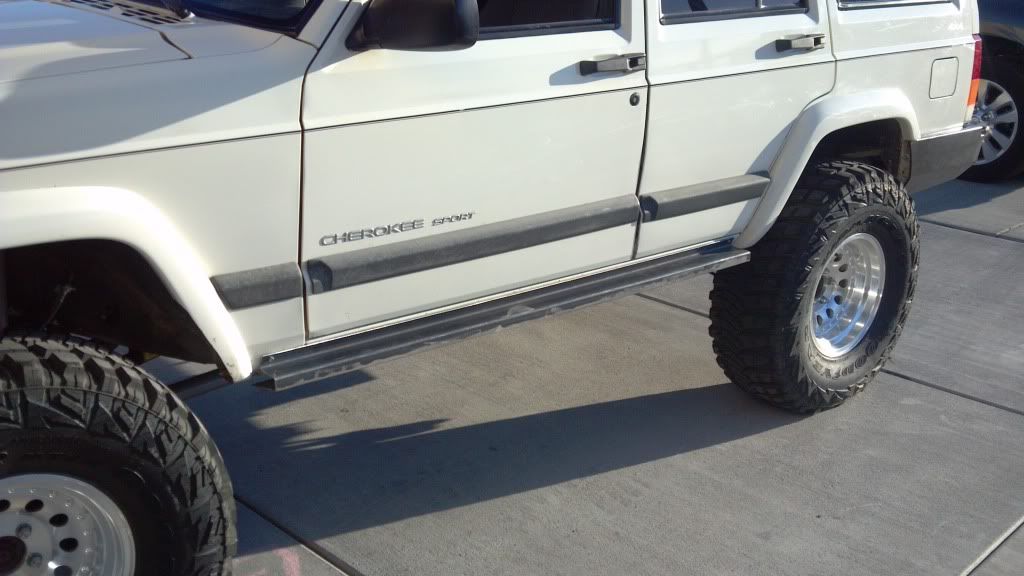
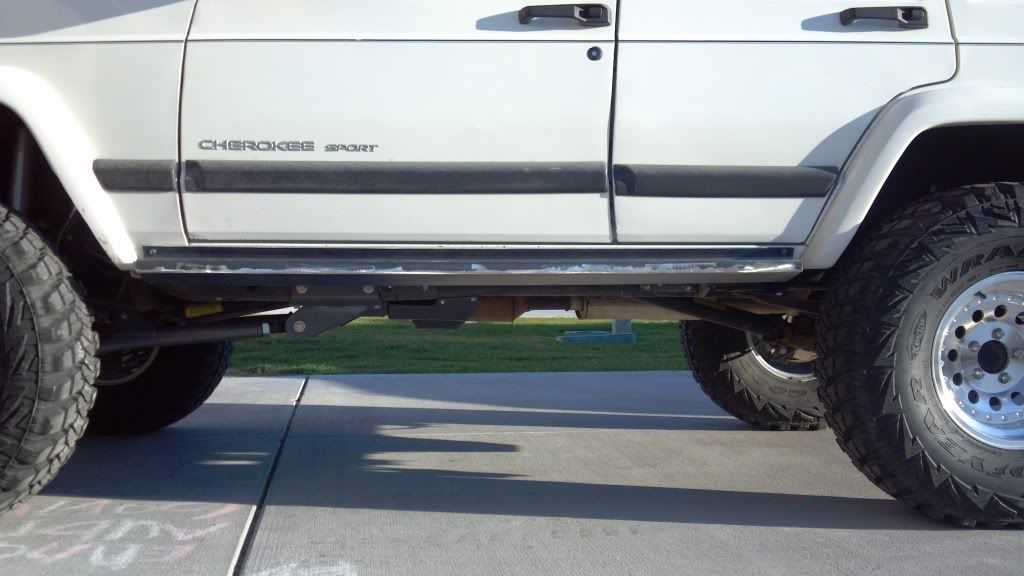
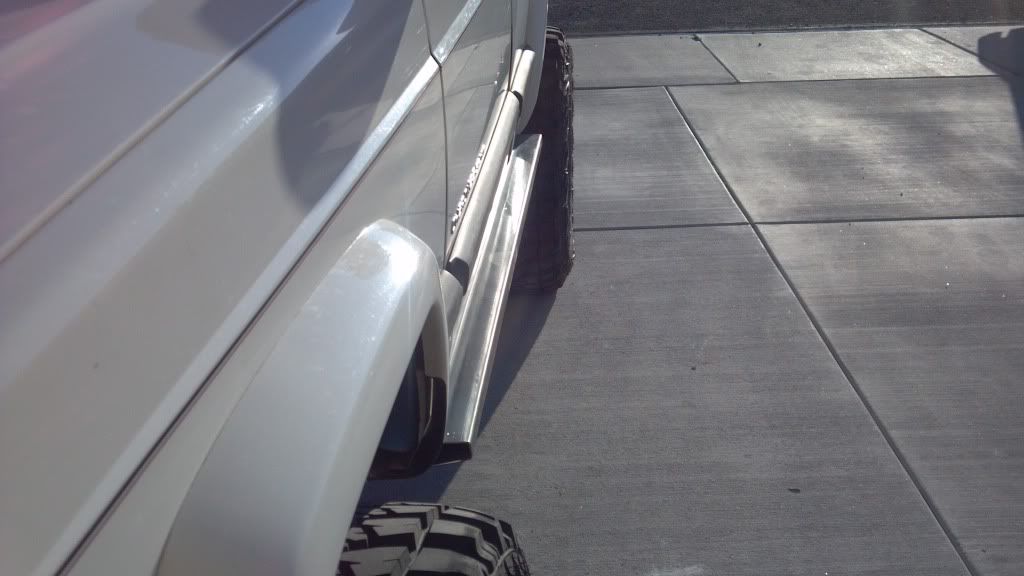
Posted: Fri Jul 13, 2012 6:44 pm
by tobyw
Finally got around to painting and installing the rock sliders...


I believe OG has already blasted off for our
EPIC adventure, and and I think all of the worthy upgrades to GGv2.0 are now complete, so until I get back home and have access to my fabrication equipment this thread is pretty much over. But, look for some run reports in the near future


