YJ mods, an on going thread.
TJDave wrote:Maybe when you load it up with all the stuff you would take on the trail including gas and a rear passenger it will level it off some.
This.
Don't even think about messing with those rear packs until you are fully weighted down... Both my SOA YJ and GGv2.0 ended up dropping well over 2" once I was loaded up with rear bumper, spare tire, tools, and spare parts. Of all the rigs I've built over the years, these are two in which I frankenstiened the rear leaf packs, which leads me to believe that maybe some of those aftermarket spring mfgs really do know something I don't
Yep, I've wheeled one of those, too...


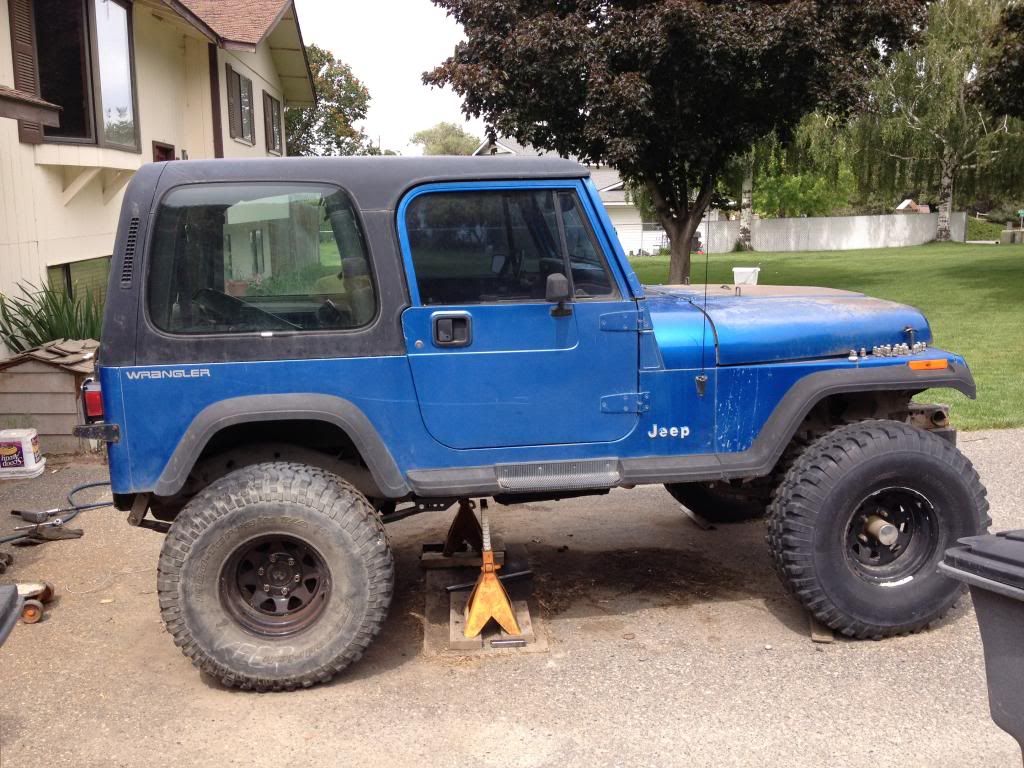
To much stink bug look for me, somebody have a stock YJ main springs?
Says 1deg but the that is with 36" in front, 35" in back, and maybe some driveway slope.
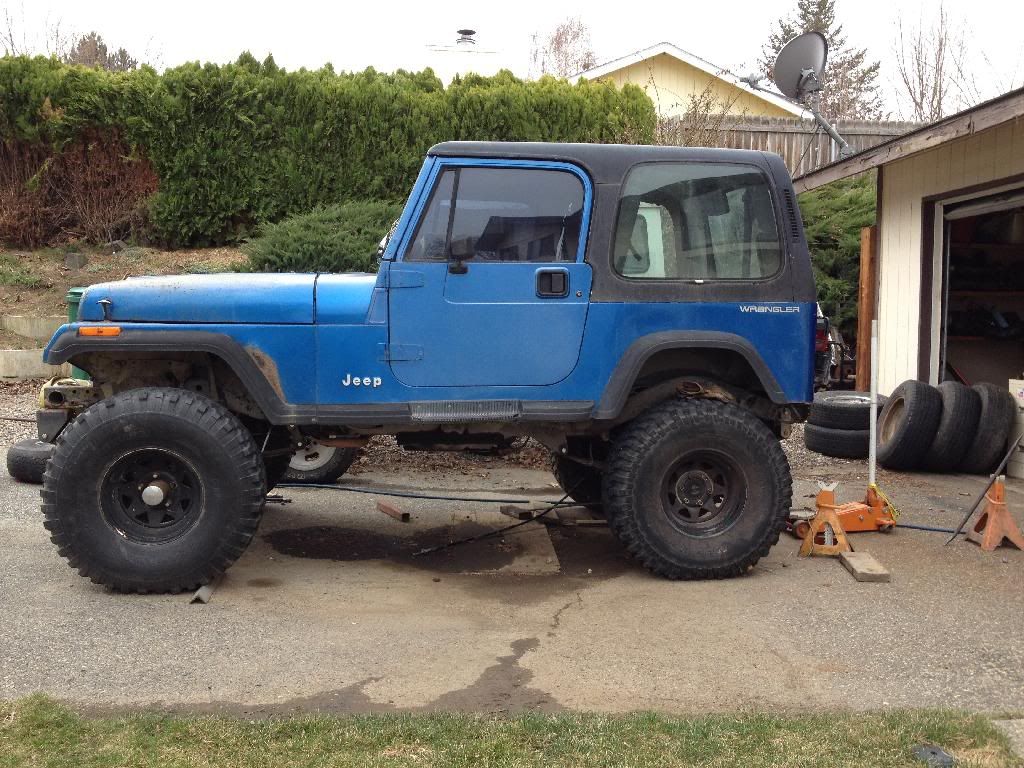
After sitting in the driver's seat making vroom vroom noise it seems this thing is a bit on the tall side.
Says 1deg but the that is with 36" in front, 35" in back, and maybe some driveway slope.
After sitting in the driver's seat making vroom vroom noise it seems this thing is a bit on the tall side.

James
'92 YJ with a little something of everything.
'92 YJ with a little something of everything.
-
White trash

- Posts: 1763
- Joined: Tue Jan 22, 2008 9:38 pm
- Location: El Pasco
Been a little slow with progress. For some reason the kids and wife know when there is extra money and time.
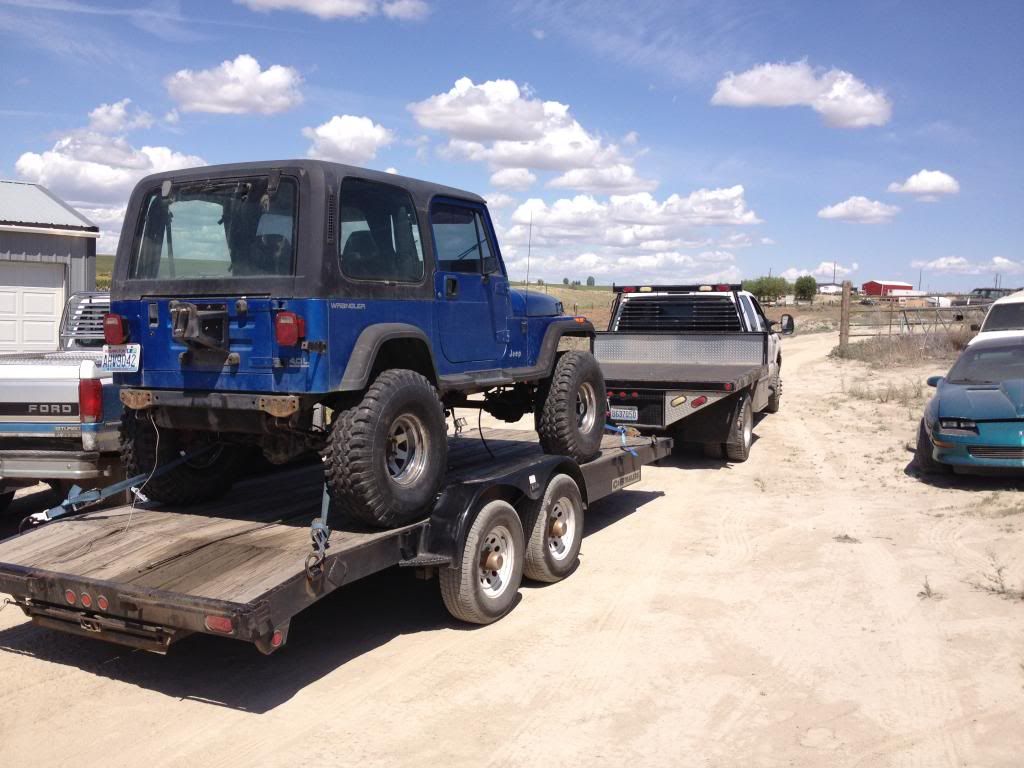
The trip to Portland wasn't only for a swap meet adventure but to pick this up too.
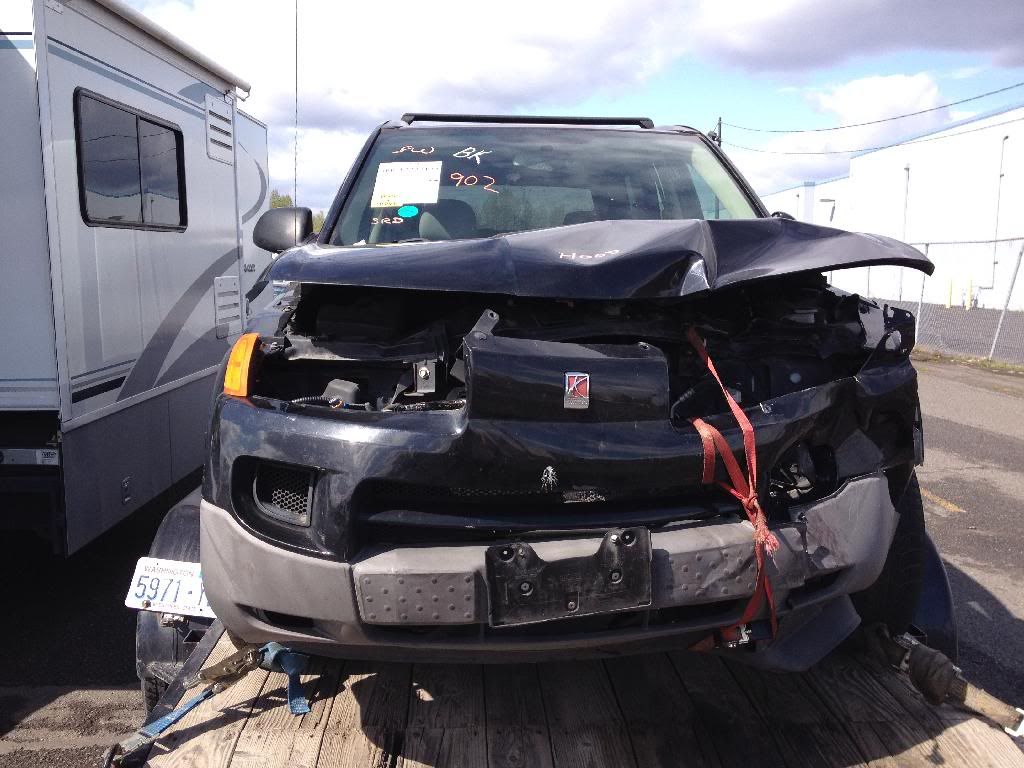
One of the kids had to have a Saturn and turns out the 4cyl CVT trans are a huge pile of scrap metal that GM was sued over, so of course the trans went out. The CVTs are about 3K from GM and nobody else will touch them. This is where the Black Vue comes into play, it's a 5sp. Just so happens a Vue went up for insurance auction in Portland the same day as the swap meet, very nice timing. Needless to say, she is getting a 5sp with a clutch to burn up every 100K for $300 vs a 3K trans.
As a side note. The Vue was at IAA, wow, LOTS of wrecked cars, maybe 20 acres to be conservative. They used 15K forklifts running around the yard picking up most cars from the front and setting them on the trailers, very fast. I was impressed with my first visit to an insurance auction yard.
James
'92 YJ with a little something of everything.
'92 YJ with a little something of everything.
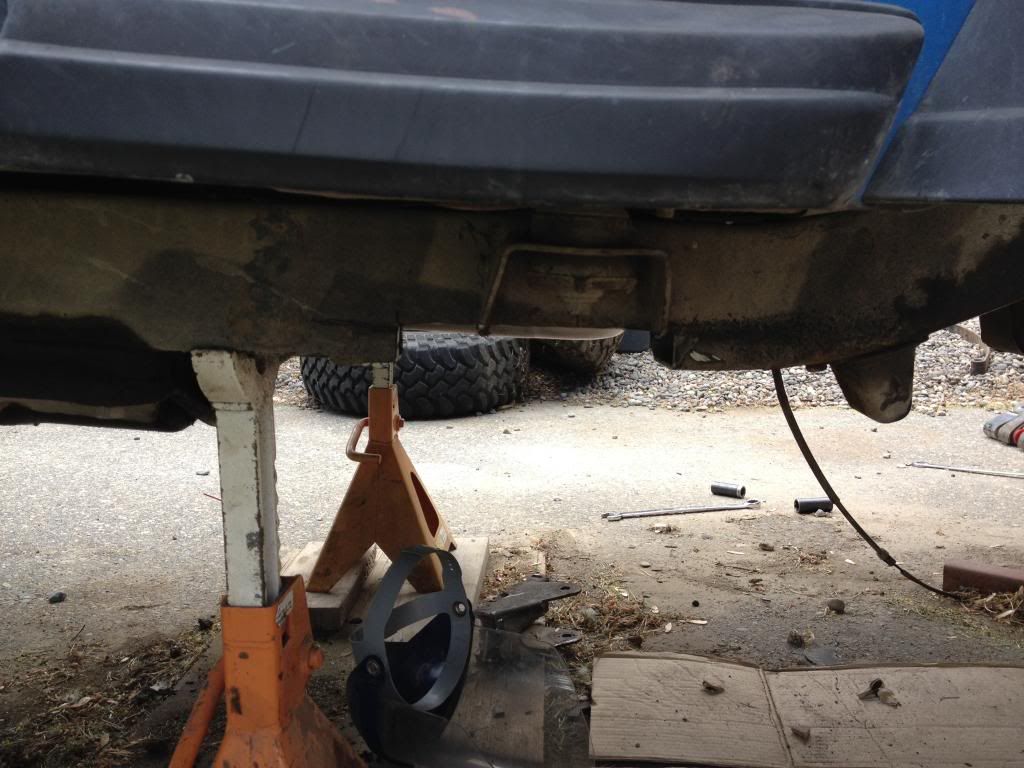
Wasn't going to post these but, being a little bore waiting for the Benton #1 firefighter banquet to start, why not.
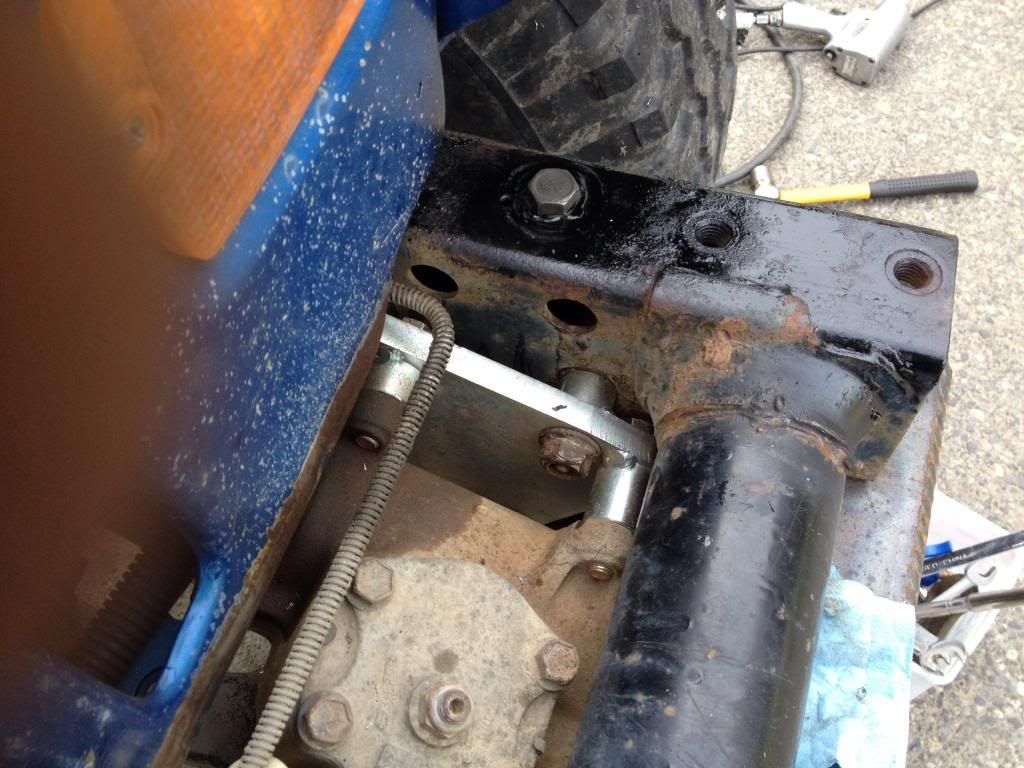
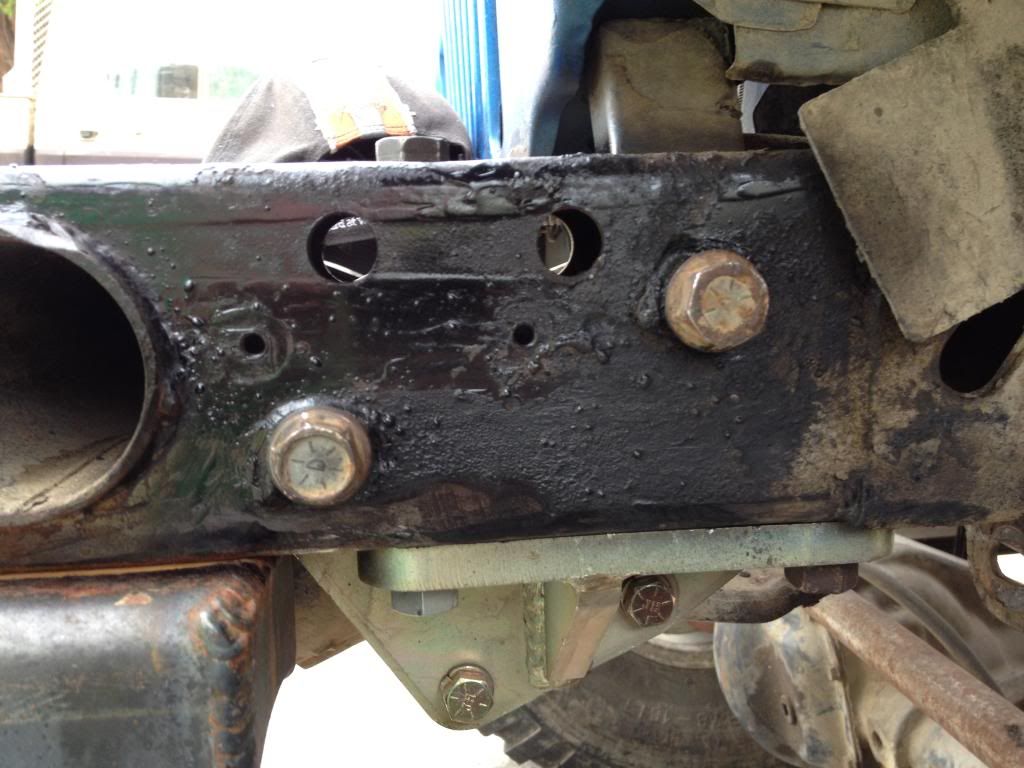
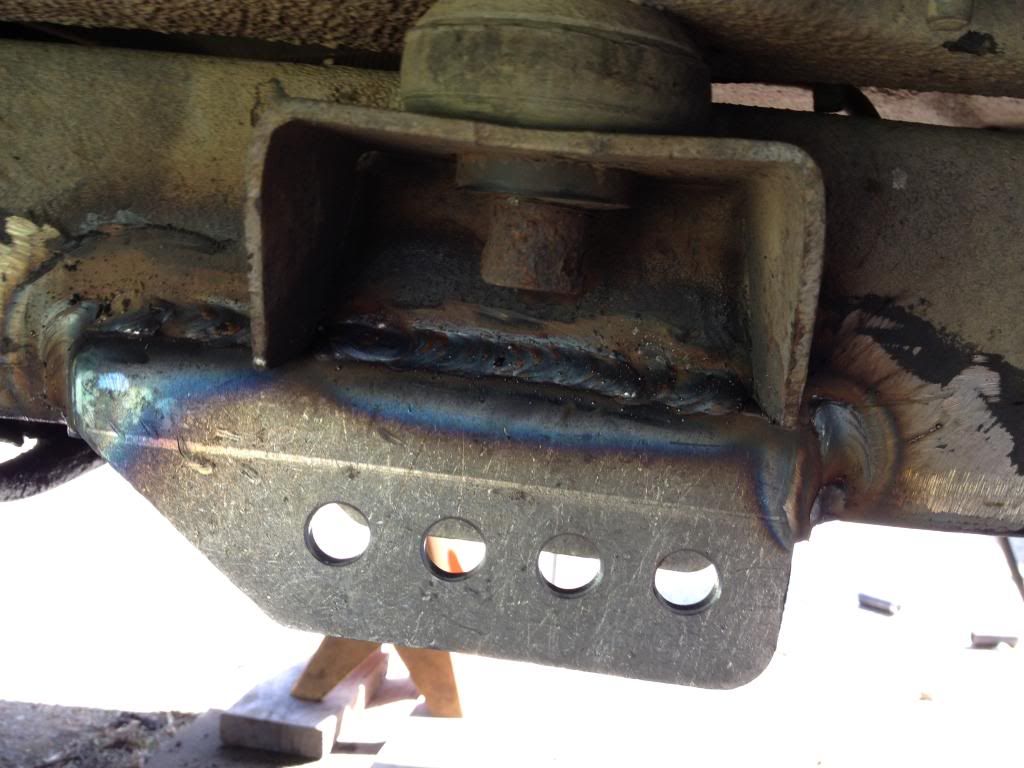
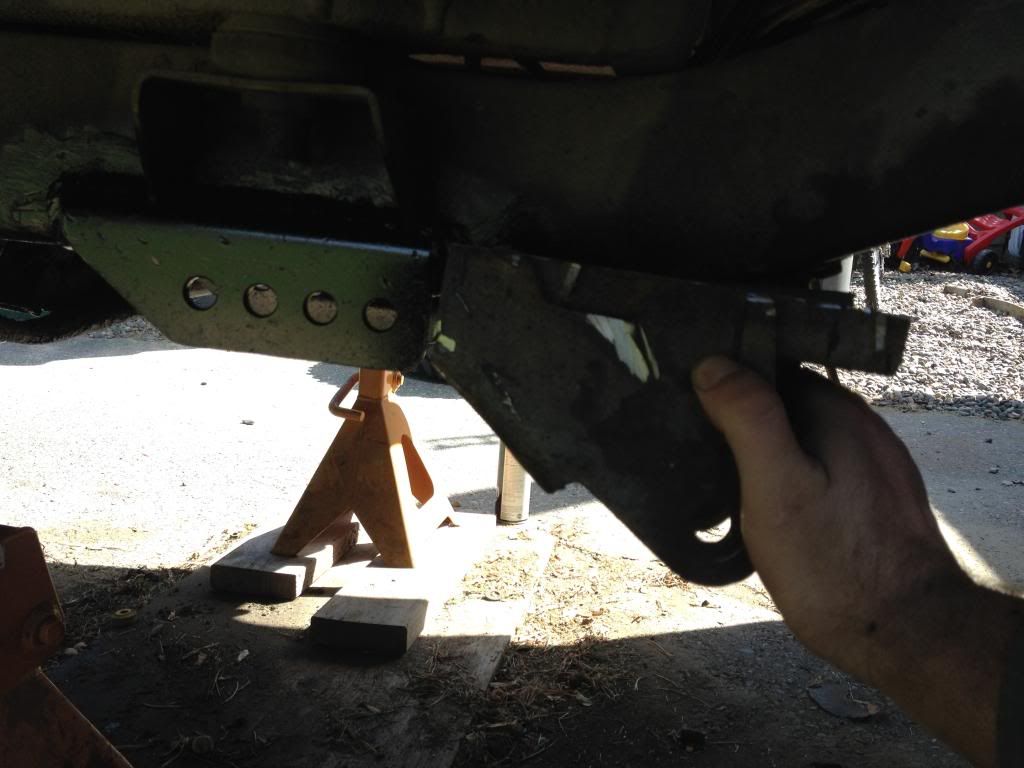
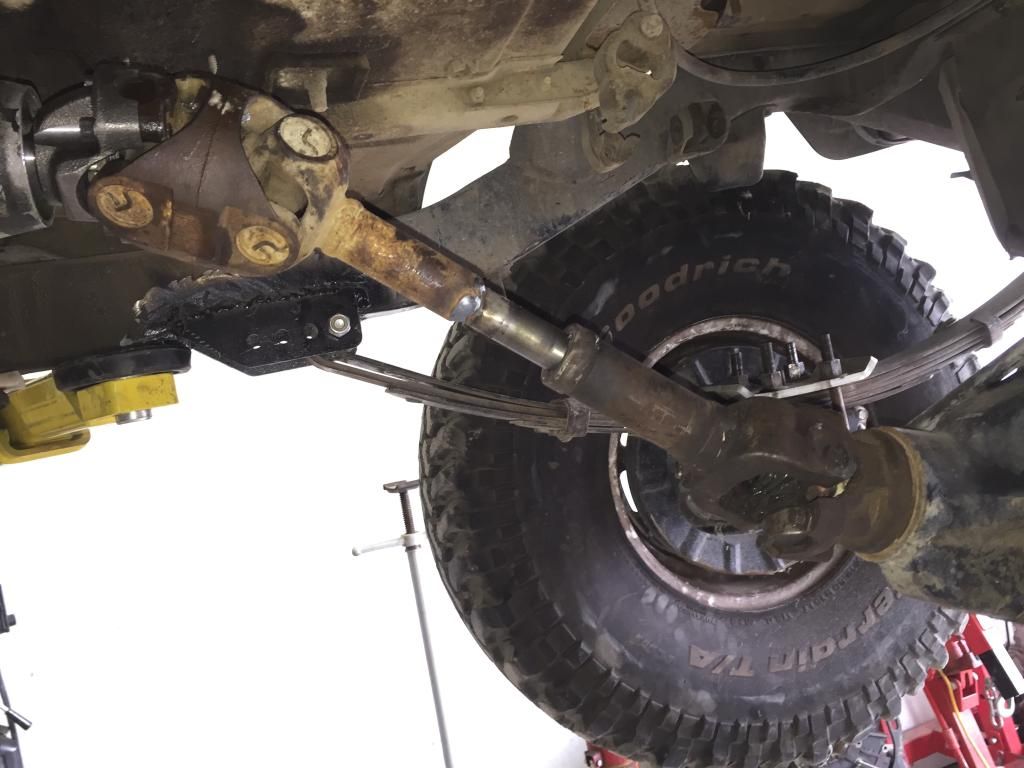
This is to fix a captured nut that broke off inside the box frame, and add a HD steering box mount with 1" stretch.
Find and drill a hole above the existing under frame steering box mount.
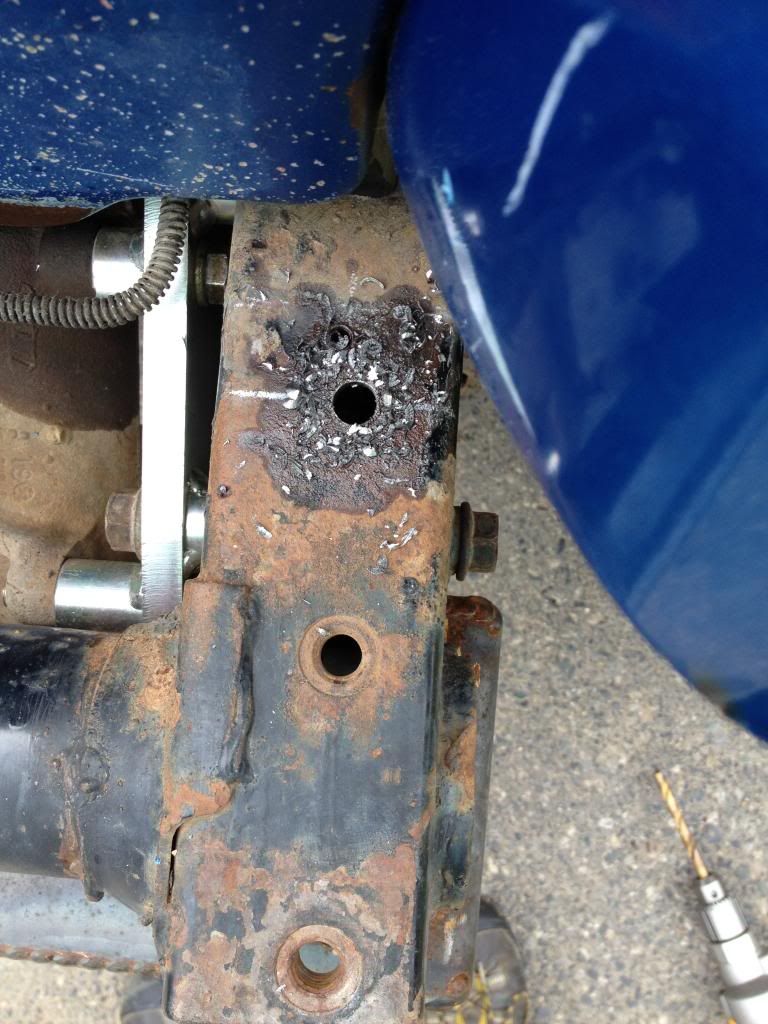
Cut and fit an anti-crush sleeve.
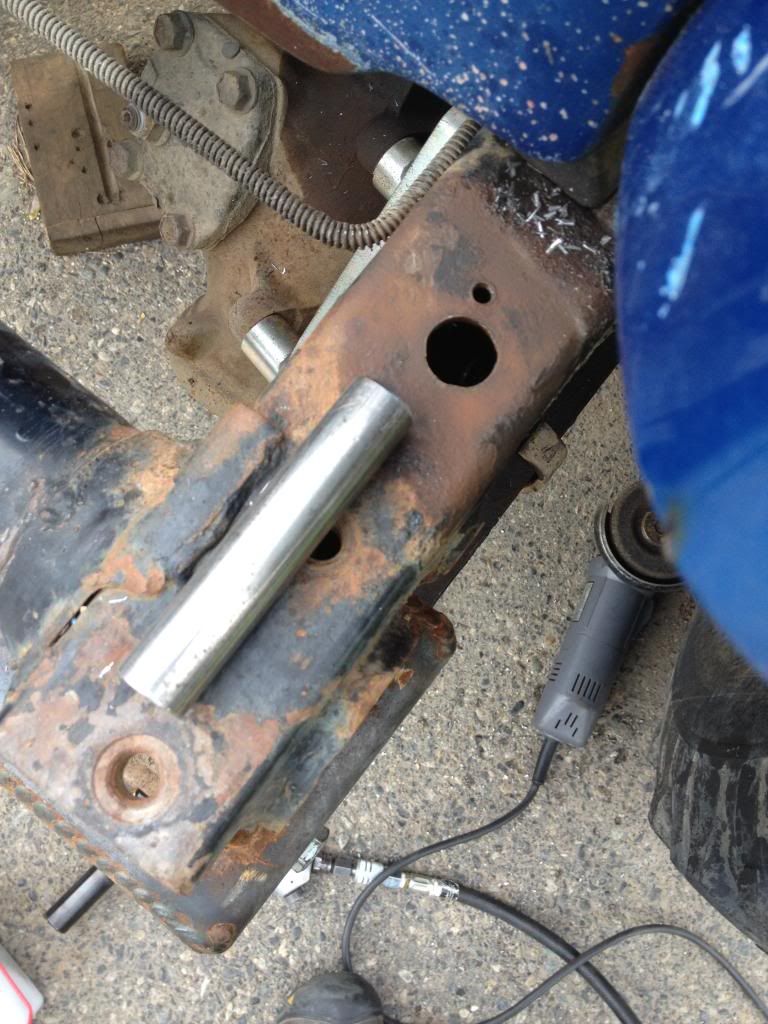
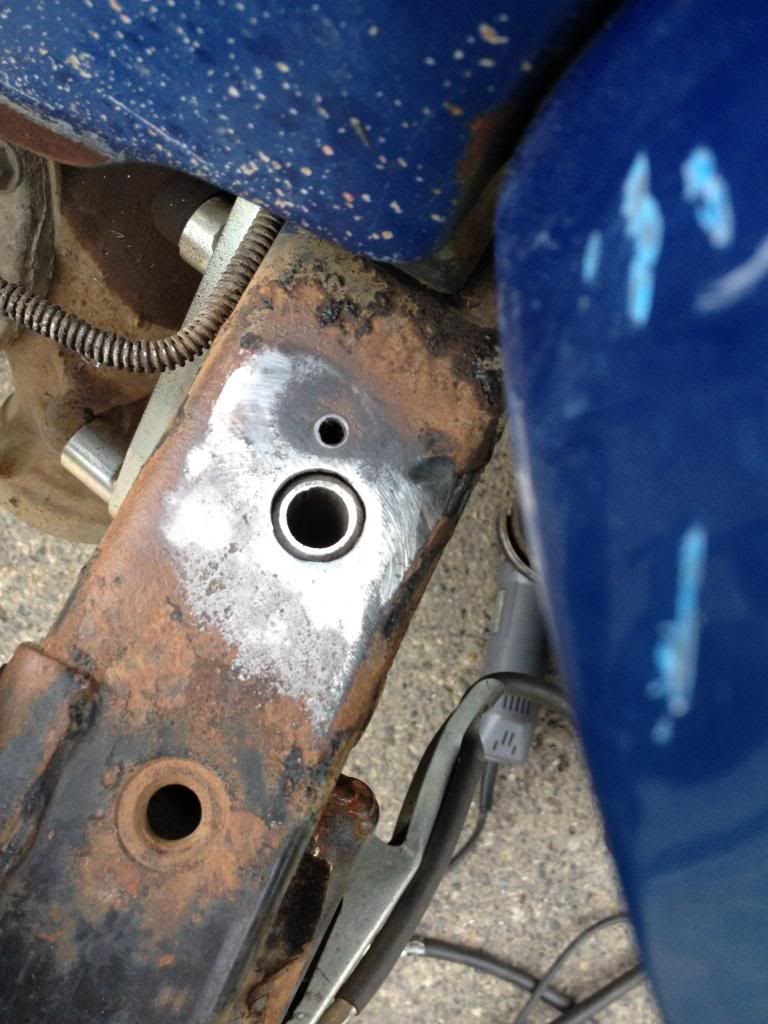
Weld. Only welded one side, we'll see if this was a mistake or not. It is just a sleeve.
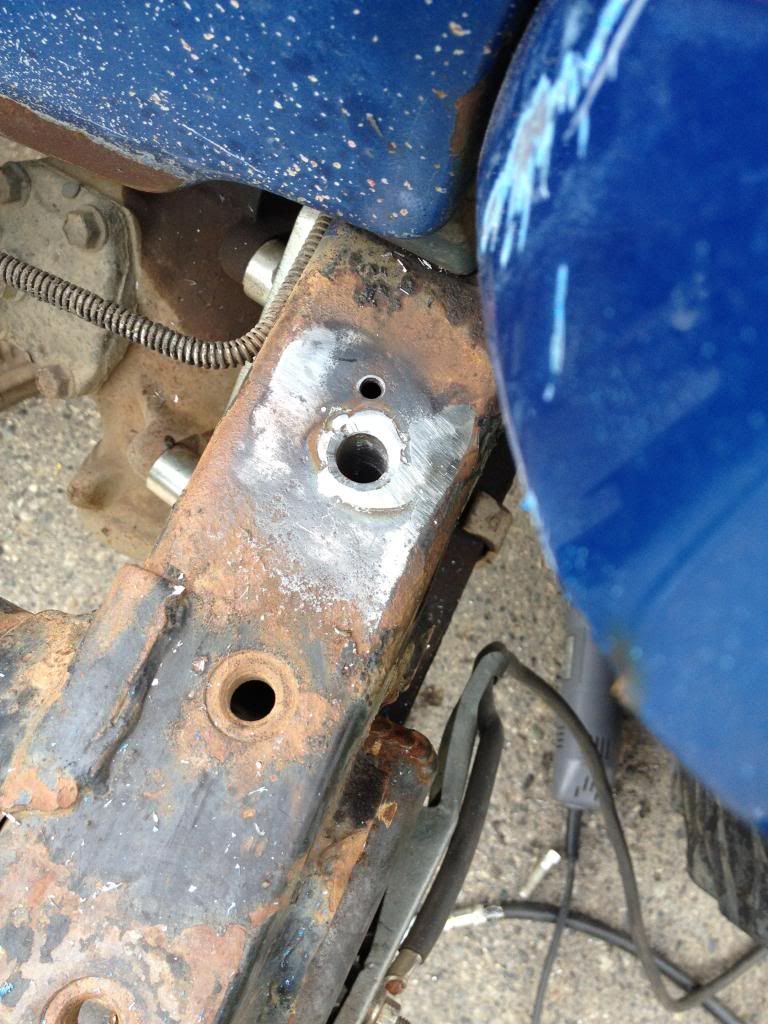
And the bolt runs thru the frame instead of having a captured nut.
And the food still isn't ready.
This is to fix a captured nut that broke off inside the box frame, and add a HD steering box mount with 1" stretch.
Find and drill a hole above the existing under frame steering box mount.

Cut and fit an anti-crush sleeve.


Weld. Only welded one side, we'll see if this was a mistake or not. It is just a sleeve.

And the bolt runs thru the frame instead of having a captured nut.


And the food still isn't ready.
James
'92 YJ with a little something of everything.
'92 YJ with a little something of everything.
White trash wrote:Leave the springs alone. Replace the hangers with a lower profile version and move the mounting hole back just a touch so the shackles don't stand up so straight.
I wanted to tell you to "stuff that isn't family friendly" but the more I thought about it the more I liked the idea.
Sneak peak.

James
'92 YJ with a little something of everything.
'92 YJ with a little something of everything.
-
White trash
- Posts: 1763
- Joined: Tue Jan 22, 2008 9:38 pm
- Location: El Pasco
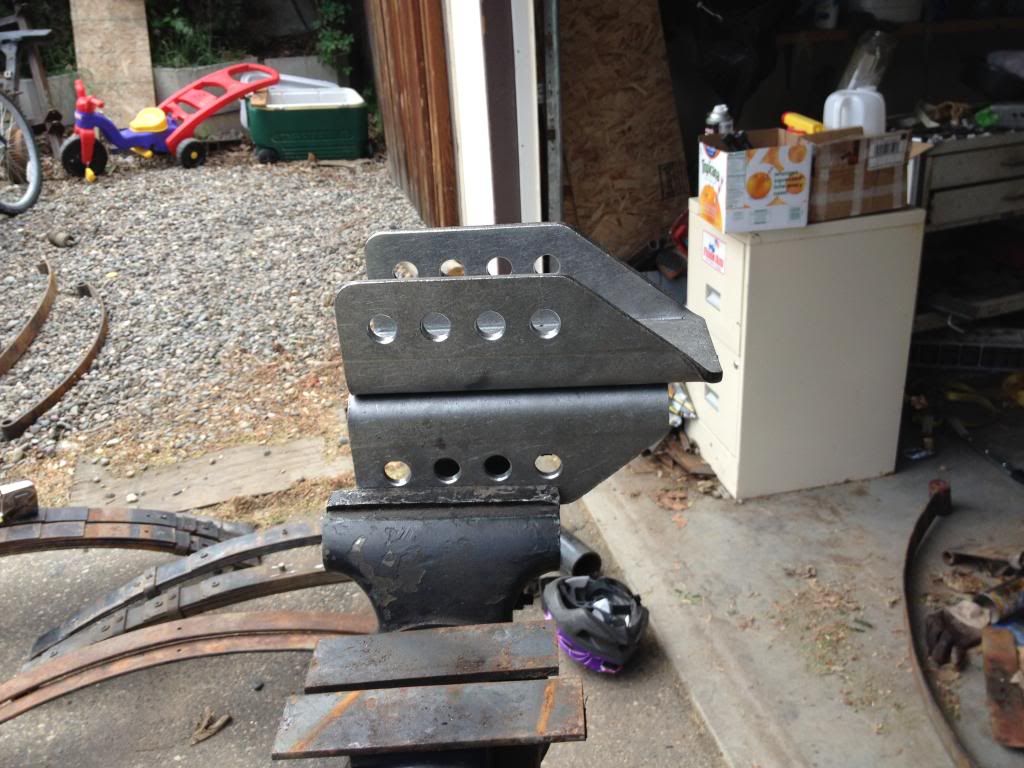
So I decided to take WT's advice to remove the stick bug look. Did a little reading about frenching spring mounts and came up with this.
Remove axle and springs.
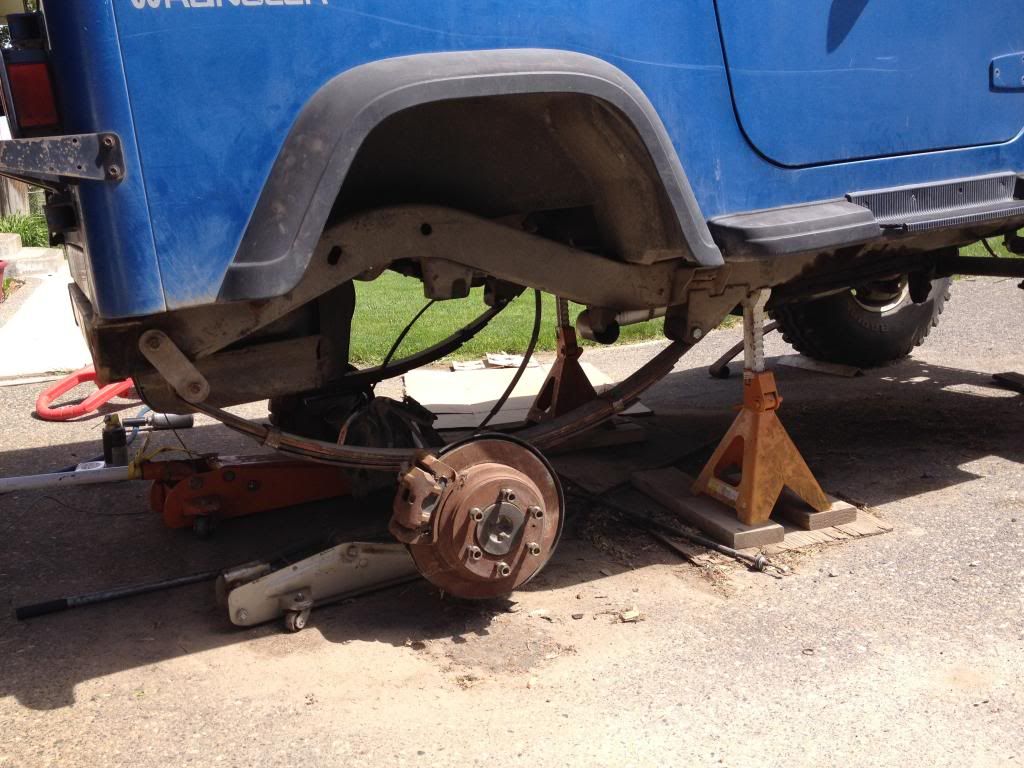
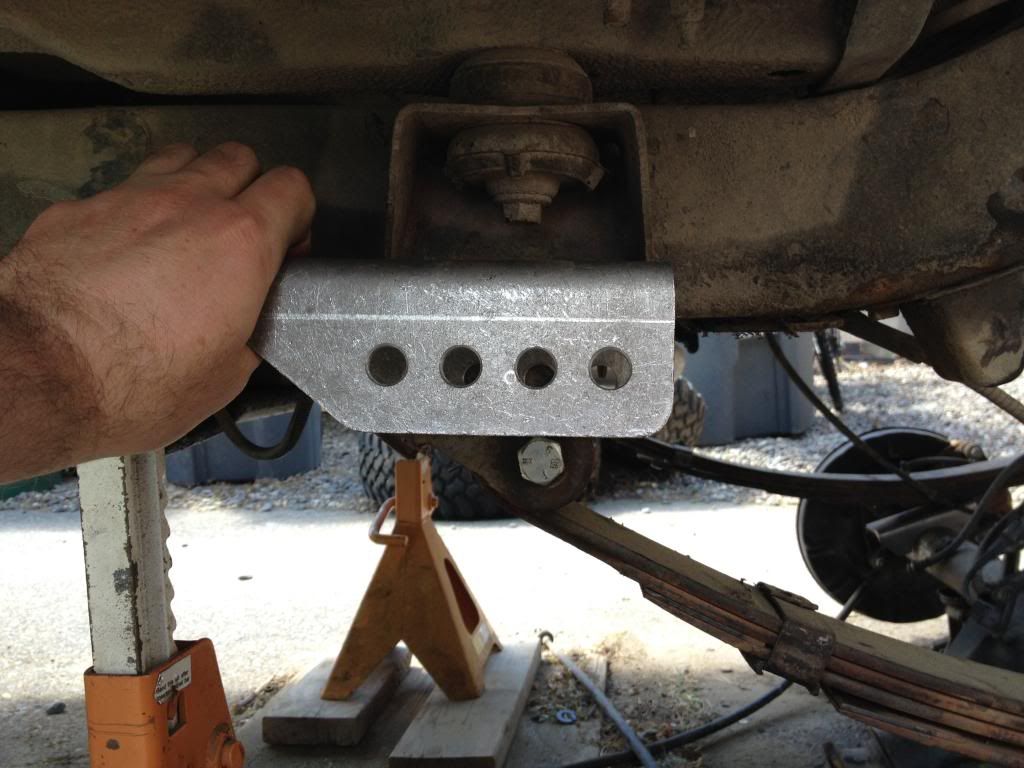
New spring mounts. Extra holes will allow for more spring choices in the future. Could have just cut the old mounts off and weld on new but nope, I had to do it the hard way.
So now it's time for the mount mods.
Cut to length.
Ends capped.
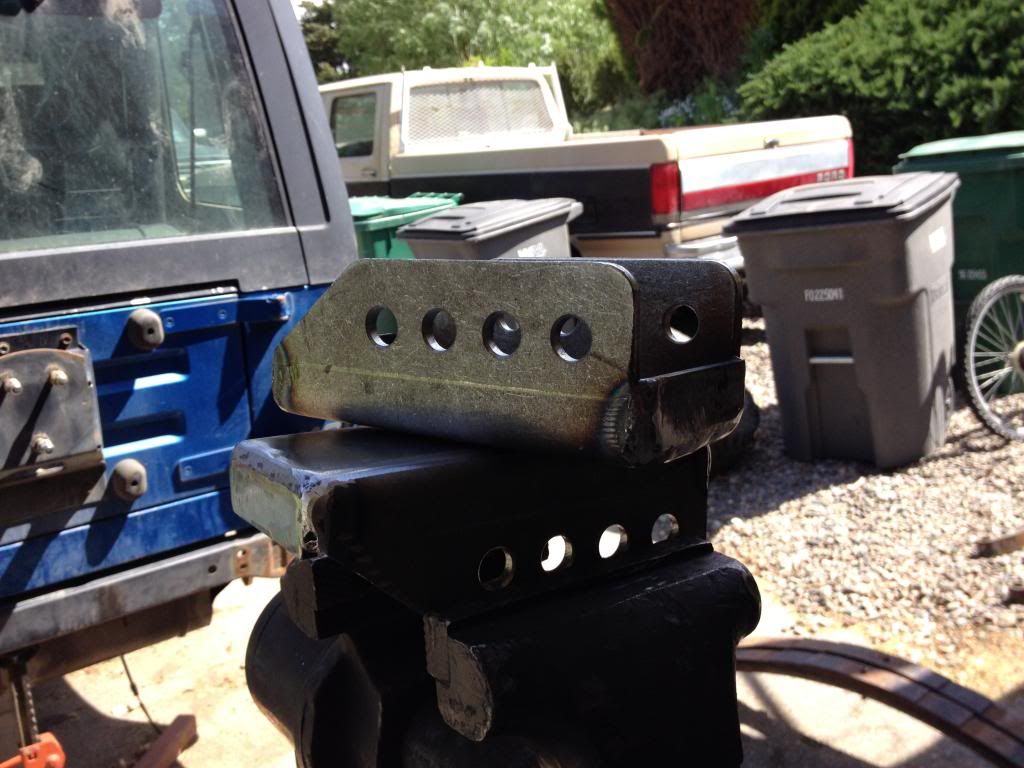
Fit and weld.
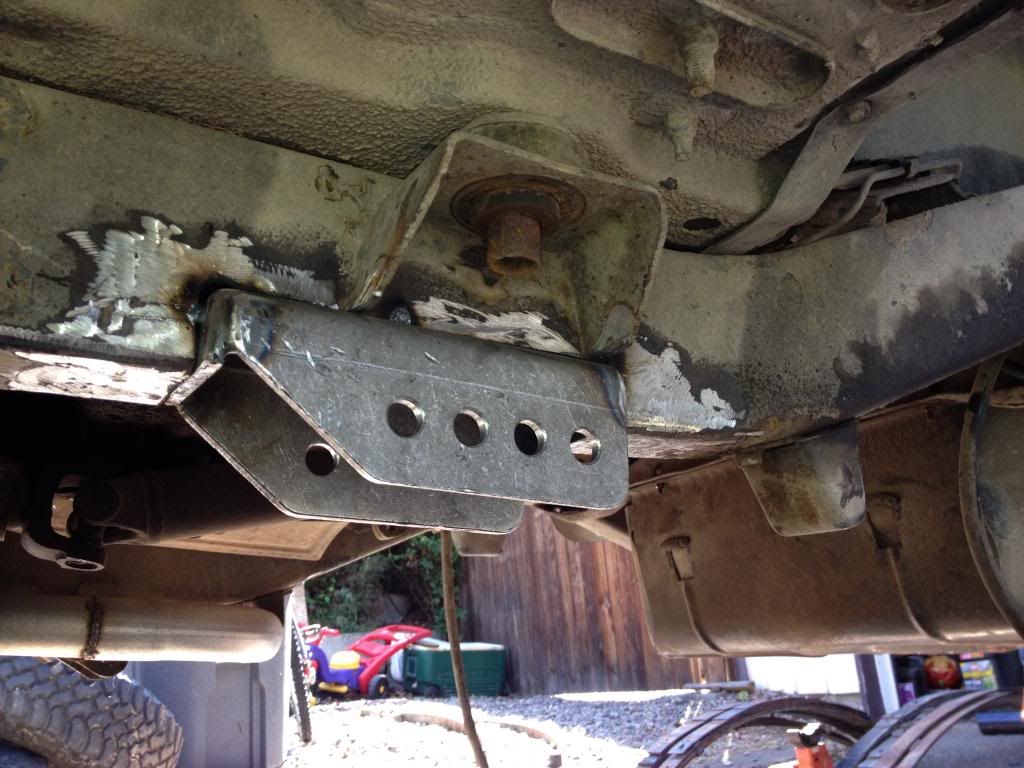
And Paint. Tape shows the mounting holes about 3/4" below the frame.

New and old mount.
Grand total:
This mod raised the spring mounts 2" and made a much less stump graber of a spring mount.
There are new spring ( thank you Steve) that are about an 1" shorter after adding a 2nd main from a 4" lift. Same as the front.
The axle was also moved 1.5" backand the spring pads can move 1" either way. The new mount hole spacing is 1 1/8" which mean a set of 52 could be added later if desired.
blew up 3 grinders.
Remove axle and springs.

New spring mounts. Extra holes will allow for more spring choices in the future. Could have just cut the old mounts off and weld on new but nope, I had to do it the hard way.

So now it's time for the mount mods.
Cut to length.

Ends capped.

Fit and weld.


And Paint. Tape shows the mounting holes about 3/4" below the frame.

New and old mount.

Grand total:
This mod raised the spring mounts 2" and made a much less stump graber of a spring mount.
There are new spring ( thank you Steve) that are about an 1" shorter after adding a 2nd main from a 4" lift. Same as the front.
The axle was also moved 1.5" backand the spring pads can move 1" either way. The new mount hole spacing is 1 1/8" which mean a set of 52 could be added later if desired.
blew up 3 grinders.
Last edited by bobracing on Sun May 18, 2014 2:13 pm, edited 4 times in total.
James
'92 YJ with a little something of everything.
'92 YJ with a little something of everything.
-
White trash
- Posts: 1763
- Joined: Tue Jan 22, 2008 9:38 pm
- Location: El Pasco
-
White trash
- Posts: 1763
- Joined: Tue Jan 22, 2008 9:38 pm
- Location: El Pasco
New used 4 leaf wrangler springs with an extra 4" main leaf vs the older back for a drop off about 1".
and after all the work.
Figure 1" drop for the spring mount, 1" drop for the springs but not sure on what the spring settled at ??.
Was it worth it??? Would still like a longer shackle, we'll see how things go.

and after all the work.
Figure 1" drop for the spring mount, 1" drop for the springs but not sure on what the spring settled at ??.

Was it worth it??? Would still like a longer shackle, we'll see how things go.
James
'92 YJ with a little something of everything.
'92 YJ with a little something of everything.
-
White trash
- Posts: 1763
- Joined: Tue Jan 22, 2008 9:38 pm
- Location: El Pasco
Not much for pictures but some progress.
A trip out to the Rusty Ranch.
Then no pictures but:
Everything was leaking on the trans, so it was pulled and new seals front and rear installed.
Xfer and doubler didn't look the same. Both were disassembled and input shafts were swapped, 32RH seem to have a very long input shaft compared to what was there.
Trans was re-installed, doubler and xfer was temporarily installed to check for "clocking" angle, then pulled, all bolts installed, gooed together and installed. Both together are a little heavy.
For some reason I was missing a small bearing hub, but had saved some large bearing hub and rotors off the Azer. Matching hubs, wahoo.
Steering was up next. Swapped the stock pitman for a waggy. The waggy pittman seems to be a bit high and moves the draglink to far back to use the a tierod over the axle. This will work for now but would like to eventually have the tierod over the axle. As shown above, the steering box was moved forward with a HD steering mount. The movement lead to stretching the steering rod between the wheel and box, always fun on a rusty crusty rig.
Left overs forsale.
Chevy small spindle hub, Ford 5 x 5.5 hubs and rotors, with good bearings.
A trip out to the Rusty Ranch.

Then no pictures but:
Everything was leaking on the trans, so it was pulled and new seals front and rear installed.
Xfer and doubler didn't look the same. Both were disassembled and input shafts were swapped, 32RH seem to have a very long input shaft compared to what was there.
Trans was re-installed, doubler and xfer was temporarily installed to check for "clocking" angle, then pulled, all bolts installed, gooed together and installed. Both together are a little heavy.
For some reason I was missing a small bearing hub, but had saved some large bearing hub and rotors off the Azer. Matching hubs, wahoo.
Steering was up next. Swapped the stock pitman for a waggy. The waggy pittman seems to be a bit high and moves the draglink to far back to use the a tierod over the axle. This will work for now but would like to eventually have the tierod over the axle. As shown above, the steering box was moved forward with a HD steering mount. The movement lead to stretching the steering rod between the wheel and box, always fun on a rusty crusty rig.
Left overs forsale.
Chevy small spindle hub, Ford 5 x 5.5 hubs and rotors, with good bearings.
James
'92 YJ with a little something of everything.
'92 YJ with a little something of everything.

Well it's still moving along, painfully slow.
It's got brakes now, always nice. 4 wheel disk with Chevy 1/2 ton up front, Isuzu rear, and a 1975 Ford T-bird master cylinder. This master does bolt onto the booster but is a pain to get the top on.
Got a home shortened driveshaft put in. Really not digging the driveshaft angle being it's right on the max angle at 32-33deg at full drop.
Thinking 1" motor mounts might help?

James
'92 YJ with a little something of everything.
'92 YJ with a little something of everything.
Return to “Projects and Build-Ups”
Who is online
Users browsing this forum: No registered users and 11 guests