Yet another slow build thread. . .

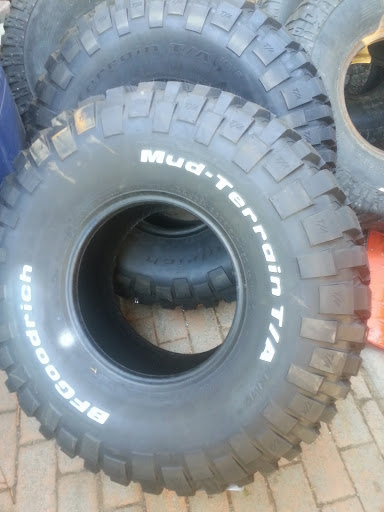
Other tires arrived:
Also got a new exhaust manifold and a new downpipe and a fairlead for the synthetic rope.
Then I got to makin' black boogers. . .mocos negros.
The current project is to make keep on pluggin' away at the 2x6 rocker replacements. First order of business was to figure out how to tie them in to the structure in the "middle" area. The ends will eventually pick up the cage. Here's what some interwebz research and some pharmerengineering came up with:
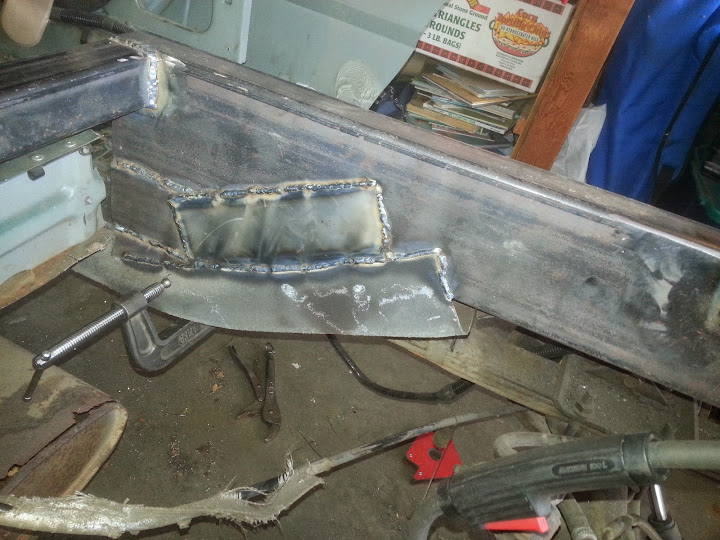
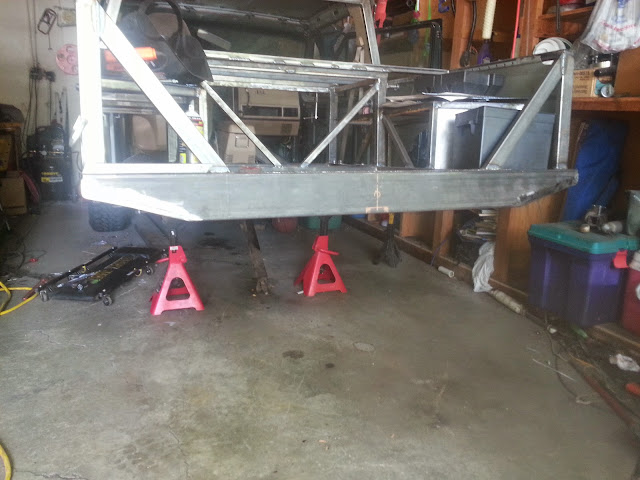
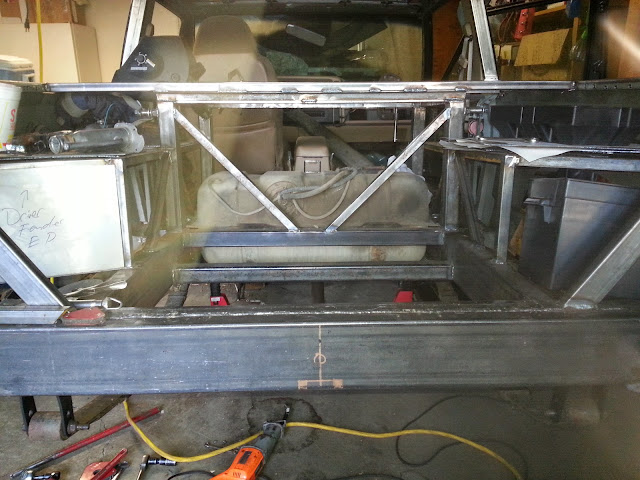
A 2x2 angle shelf for the rocker to sit on:
You can see the plugs welds here:

My biggest issue with the versions that I have seen with others is that, even with the shelf, the whole works is just stuck to thin sheet metal. Granted, most of the Jeep is made of it, but mine won't be. . .so, after much discussion and a lot of staring, I decided to sandwich the shelf with another chunk of bar stock on the INSIDE:

So, the angle "shelf" is welded to the body and the bar stock is welded to the shelf (through holes in the body. Next step is to tie the bar stock into the new frame rails. What I didn't get a picture of is the final mock of the inner frame rail, but it is ready for holes to be drilled and then to get prepped and burned in.
So, while I'm prepping for that, I'm noodling around my biggest "issues".
Cage and fuel tank. . .and the associated mounting of said. Including the spare tire mounts.
Also got a new exhaust manifold and a new downpipe and a fairlead for the synthetic rope.
Then I got to makin' black boogers. . .mocos negros.
The current project is to make keep on pluggin' away at the 2x6 rocker replacements. First order of business was to figure out how to tie them in to the structure in the "middle" area. The ends will eventually pick up the cage. Here's what some interwebz research and some pharmerengineering came up with:
A 2x2 angle shelf for the rocker to sit on:
You can see the plugs welds here:
My biggest issue with the versions that I have seen with others is that, even with the shelf, the whole works is just stuck to thin sheet metal. Granted, most of the Jeep is made of it, but mine won't be. . .so, after much discussion and a lot of staring, I decided to sandwich the shelf with another chunk of bar stock on the INSIDE:
So, the angle "shelf" is welded to the body and the bar stock is welded to the shelf (through holes in the body. Next step is to tie the bar stock into the new frame rails. What I didn't get a picture of is the final mock of the inner frame rail, but it is ready for holes to be drilled and then to get prepped and burned in.
So, while I'm prepping for that, I'm noodling around my biggest "issues".
Cage and fuel tank. . .and the associated mounting of said. Including the spare tire mounts.
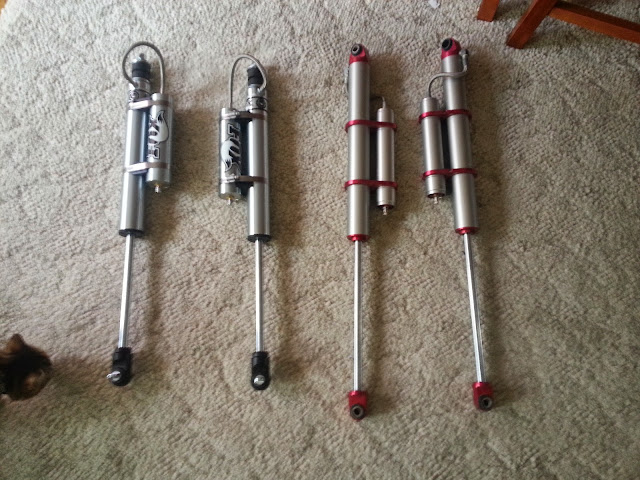
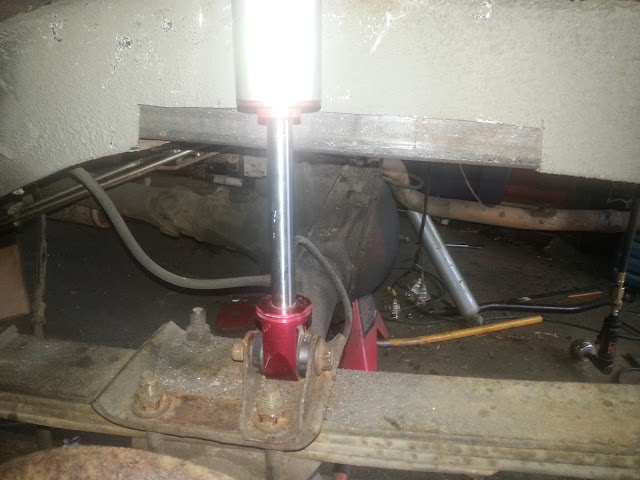
OK. . .measuring for suspension and seeking input. With the knowledge that O is lifted 2"/1.5" and the fact that I have MANY spring combo's available AND that I am limited to 9.5" travel front shocks (not too shabby), What is the appropriate balance of clearance to stability? Use case: well, you've seen how I drive. "constantly" is probably the best term for it.
I can tune with shackle's etc. . .but I am thinking of getting a balance of just over 50/50 up/down travel in the front and just a smidge more than that 60/40 in the rear. . .10" front, 12" rear and call it a day.
Any other things I should consider? I'll bump to shock length and strap the front if I have to. Rear should be limited by the shackles. . .
what say yous?
BTW, that balance along with my new rear frame rails looks like about 4" of front lift and 3.5" of rear for those that use those measurements over stock. It will feel pretty tall to me but I can likely use at least one sway bar on the road along with my good shocks. Dunno though. . .
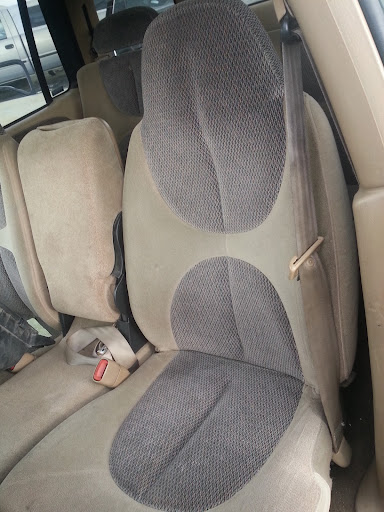
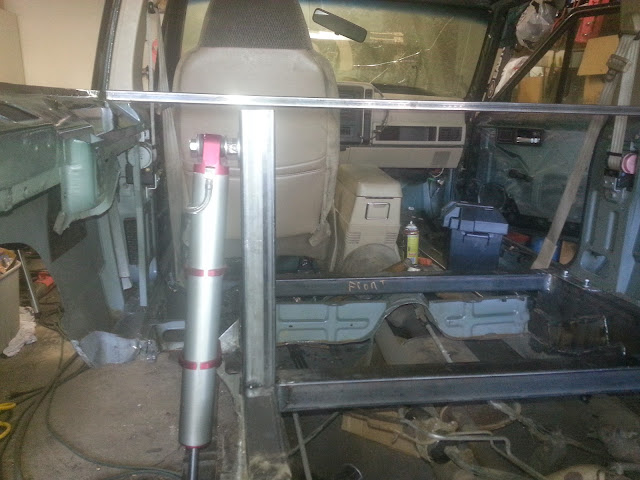
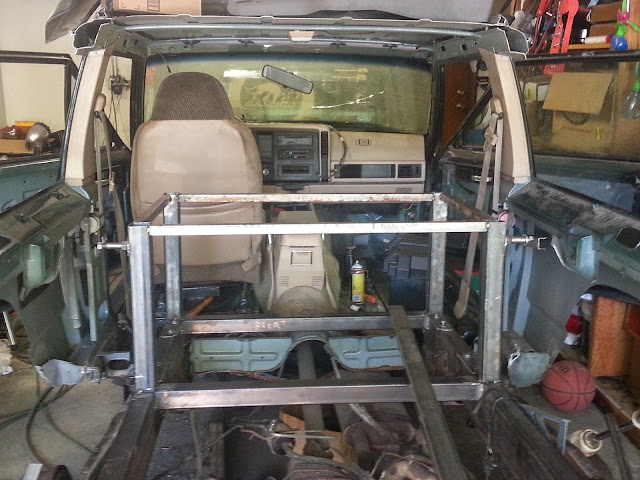
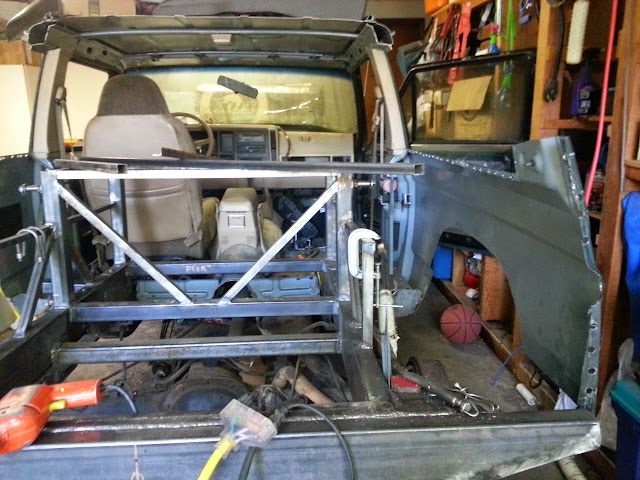
Driver's seat, Driver's main Frame Rail and tie ins are done. Getting the larger seats and mounts centered was tough on the driver's side.
The 2" square is tied into the inner plates for the rocker panel mounts as well as to the main 3" frame rails.

The seat has full range of motion but is about an inch higher than stock. . .because I am SHORT.
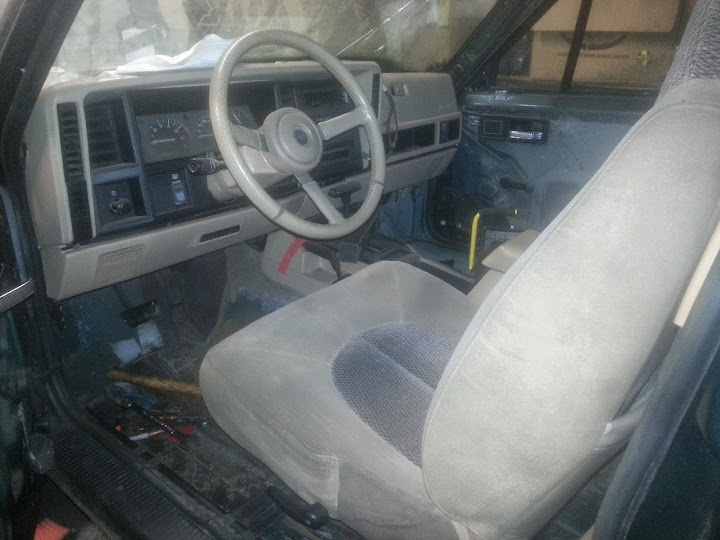
Upon spending a few minutes sitting in the seat making Vroom Vroom noises, the Durango seats get 2 thumbs up. In the future, I may consider bolting in some heated/leather versions of same. that is the big reason that I kept the sliders/seat mounts stock. Bolt in goodness.
Passenger side will be much easier since I don't have to center it on the steering wheel.
I can finally see light at the end of the tunnel. Final plans have been made for the bulkhead, window, expo sleeping platform, gas tank, spare tire and shock mounts (those are all one project. I will do the wheel wells last(ish). All suspension is in the house as is the new exhaust from tip/tail. The big unknown at this point is in the air conditioner. MUST fix that all up.
The 2" square is tied into the inner plates for the rocker panel mounts as well as to the main 3" frame rails.
The seat has full range of motion but is about an inch higher than stock. . .because I am SHORT.
Upon spending a few minutes sitting in the seat making Vroom Vroom noises, the Durango seats get 2 thumbs up. In the future, I may consider bolting in some heated/leather versions of same. that is the big reason that I kept the sliders/seat mounts stock. Bolt in goodness.
Passenger side will be much easier since I don't have to center it on the steering wheel.
I can finally see light at the end of the tunnel. Final plans have been made for the bulkhead, window, expo sleeping platform, gas tank, spare tire and shock mounts (those are all one project. I will do the wheel wells last(ish). All suspension is in the house as is the new exhaust from tip/tail. The big unknown at this point is in the air conditioner. MUST fix that all up.
Progress. . .PS frame rail is in. I'm holding off on the seat mounts for just a minute while I fix the floors on that side. . .but I don't want to wait on sheetmetal. . .and well. . .the ADD.
So, I got out my measuring instruments (tape measure and a Fat Tire) and got to mocking stuff up.
Gas Tank Goes Here (ish). . .it will sink a little lower down. This is my crushed/dented tank. It will clear the driveline/diff at full bump. The big hole is where the fuel pump goes. Filler will be high on the PS bedside.

The Spare Tire and filler approximate locations:

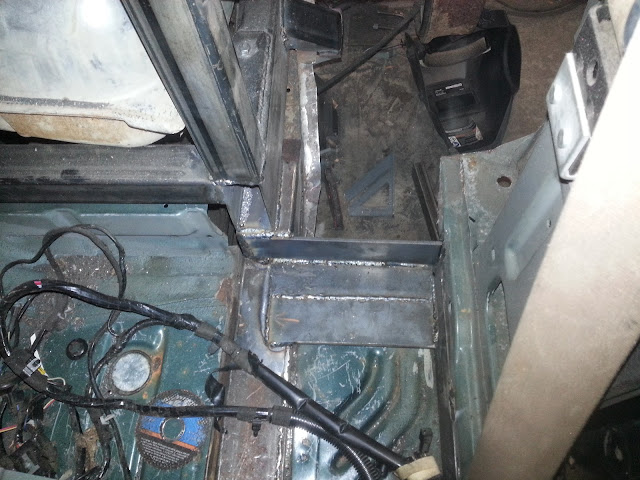
After that got the not, I had to take to blocking off the gaps in the frame and relocating fuel/evap/brake lines, etc. The block off plates are just 14G sheet. . .so it isn't as overkill as it looks. The rest is 5x2 and 3x3 Here's the hole:

The big challenge with putting the fuel tank right there is the face that it may have to come out some day and I will have a storage area over it. . .so that is the next step. I'm building it a "little house" as my wonderful wife put it. That house will bolt in/out for access to remove the tank.
The goal is to have it running/driving by Saturday afternoon. . .and I'm in the airport on my way to Minneapolis right now. . .
So, I got out my measuring instruments (tape measure and a Fat Tire) and got to mocking stuff up.
Gas Tank Goes Here (ish). . .it will sink a little lower down. This is my crushed/dented tank. It will clear the driveline/diff at full bump. The big hole is where the fuel pump goes. Filler will be high on the PS bedside.
The Spare Tire and filler approximate locations:
After that got the not, I had to take to blocking off the gaps in the frame and relocating fuel/evap/brake lines, etc. The block off plates are just 14G sheet. . .so it isn't as overkill as it looks. The rest is 5x2 and 3x3 Here's the hole:
The big challenge with putting the fuel tank right there is the face that it may have to come out some day and I will have a storage area over it. . .so that is the next step. I'm building it a "little house" as my wonderful wife put it. That house will bolt in/out for access to remove the tank.
The goal is to have it running/driving by Saturday afternoon. . .and I'm in the airport on my way to Minneapolis right now. . .
Well good news/bad news. . .
bad: It doesn't run/drive.
Good: That is by design since I want to finish off the bed area without the gas tank in. . .Other than that, I could be rolling out in a few minutes on its own power.
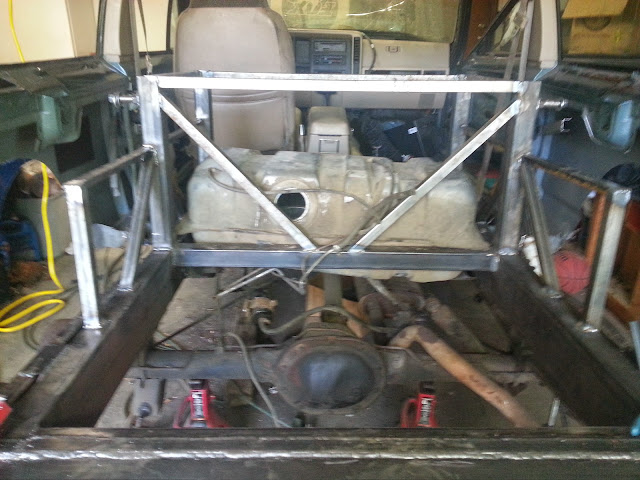
Here's where we are in the process:
Gas tank clamps. The gas tank falls in that hole and the clamps hold it down. The filler will go on top of the bed rail on the passenger side just to the rear of the B-Pillar:

With that done, I got to designing (tape/beer) the bed platform/storage area. This area is defined by the tops of the bed rails, where the spare tire sits, the gas tank, and the shock mounts. Since the bed rails are already present and the gas tank is located, shock mounts are next:
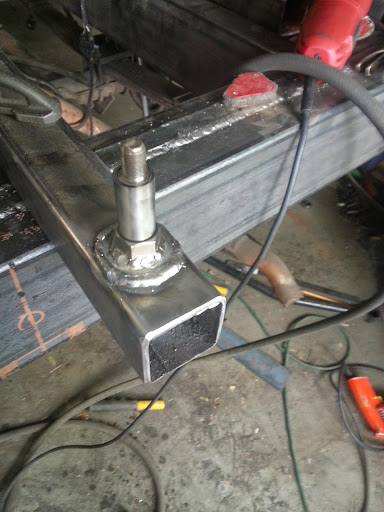
Yes, they are single shear and yes. . .they will be fine. I used actual shock mounting studs. No, they don't just sit out there in space. They provide the vertical basis for the rest of the bed structure. XJs don't deserve anything round and swoopy, so square and rectangle with a little bit of angle and tri-angle for stability is the call of the day.
In this pic, you can see the tire clearance and the lower shock mount. I put on my 285s to test because they have more backspacing and are closer to the shock than the 35s on 10s. The lower mount is the swaybar mount massaged and turned sideways.

Lower Mount
Upper mount just bolted on for now. The mount and the tower will get fully glued in when I decide that the design is final/final.
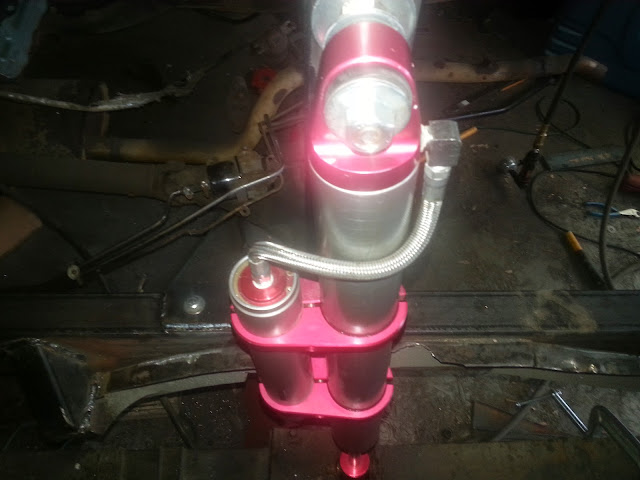
For those keeping score, a shock stud is 5/8" but high end shocks have a hole for a 1/2" bolt. . .so, the insert needs to be replaced. IN the case of Walker Evans shocks, the standard sleeve is 3/4" OD x 1/2" ID. I simply got a couple of feet of 3/4" ID x 5/8" ID tube and replaced the sleeves.
Last one. Once the structure is removed from the bedsides, the crossbar will sit on top of the shock towers and define the center bulkhead and the top of the sleeping/load deck platform.

Now that the design is final (in my head), there is a LOT of cutting/grinding/glue gun action in store for this weekend.
the goal is for the structure to be done on June 1 so I can throw on some sheet metal and the upper deck and head to the 'Con in style (well, standard weirdness, but style to ME).
bad: It doesn't run/drive.
Good: That is by design since I want to finish off the bed area without the gas tank in. . .Other than that, I could be rolling out in a few minutes on its own power.
Here's where we are in the process:
Gas tank clamps. The gas tank falls in that hole and the clamps hold it down. The filler will go on top of the bed rail on the passenger side just to the rear of the B-Pillar:
With that done, I got to designing (tape/beer) the bed platform/storage area. This area is defined by the tops of the bed rails, where the spare tire sits, the gas tank, and the shock mounts. Since the bed rails are already present and the gas tank is located, shock mounts are next:
Yes, they are single shear and yes. . .they will be fine. I used actual shock mounting studs. No, they don't just sit out there in space. They provide the vertical basis for the rest of the bed structure. XJs don't deserve anything round and swoopy, so square and rectangle with a little bit of angle and tri-angle for stability is the call of the day.
In this pic, you can see the tire clearance and the lower shock mount. I put on my 285s to test because they have more backspacing and are closer to the shock than the 35s on 10s. The lower mount is the swaybar mount massaged and turned sideways.
Lower Mount
Upper mount just bolted on for now. The mount and the tower will get fully glued in when I decide that the design is final/final.
For those keeping score, a shock stud is 5/8" but high end shocks have a hole for a 1/2" bolt. . .so, the insert needs to be replaced. IN the case of Walker Evans shocks, the standard sleeve is 3/4" OD x 1/2" ID. I simply got a couple of feet of 3/4" ID x 5/8" ID tube and replaced the sleeves.
Last one. Once the structure is removed from the bedsides, the crossbar will sit on top of the shock towers and define the center bulkhead and the top of the sleeping/load deck platform.
Now that the design is final (in my head), there is a LOT of cutting/grinding/glue gun action in store for this weekend.
the goal is for the structure to be done on June 1 so I can throw on some sheet metal and the upper deck and head to the 'Con in style (well, standard weirdness, but style to ME).

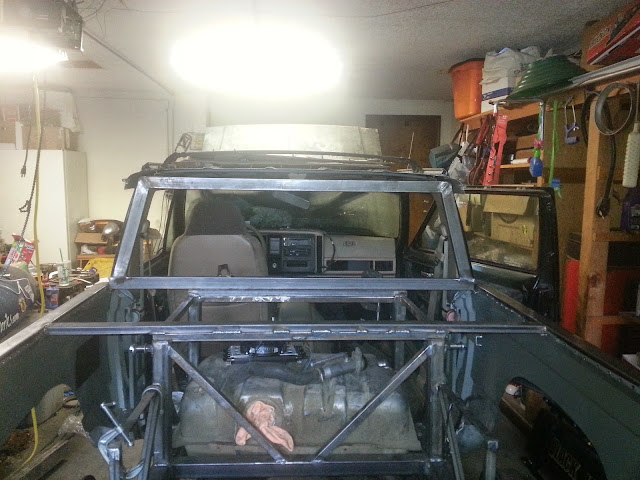
Progress. . .
Bed "cage" is done. It is mostly structure for the platform, fenders, and the shock mounts.

Approximate location of the gas tank. Approximate because this tank is beat to heck from the Rubicon last year so it isn't square in any way. An unmolested tank will fit perfectly. There is plenty of clearance for the driveline, etc.:
and, the final position for the spare tire:

EDIT: Forgot to take a pic but the tire is located in the front by another 2x2 crossmember on the bottom of the frame behind the diff.
If you use your imagination, you can see where the fenders will be. Kinda taking shape now, but lots of details still left. Other than the Rockers and a couple tie in points for them, the main structure from the firewall back is DONE.
Bed "cage" is done. It is mostly structure for the platform, fenders, and the shock mounts.
Approximate location of the gas tank. Approximate because this tank is beat to heck from the Rubicon last year so it isn't square in any way. An unmolested tank will fit perfectly. There is plenty of clearance for the driveline, etc.:
and, the final position for the spare tire:
EDIT: Forgot to take a pic but the tire is located in the front by another 2x2 crossmember on the bottom of the frame behind the diff.
If you use your imagination, you can see where the fenders will be. Kinda taking shape now, but lots of details still left. Other than the Rockers and a couple tie in points for them, the main structure from the firewall back is DONE.

Got the bumper extensions built last night. . .2" square, capped at an angle/position that compliments where the flares will eventually be.


And then it was time to locate the fenders and mock up the rub rails. For those of you that found this thread on the google machine looking for XJ chop top beds and such, the frame on an XJ is in no way parallel with the bedsides. The bedsides drop about 1" from the bulkhead under the rear seat to the back crossmember. I think that this is to visually make up for the factory rake that is built into the unloaded ride height. Anywho, here is the final mock of the driver's side rub rail and bedside support. Still needs a taper on the front, prep, square and weld, but you get the picture. The rub rail sticks out evenly with the bumper and bumper extensions.


And then it was time to locate the fenders and mock up the rub rails. For those of you that found this thread on the google machine looking for XJ chop top beds and such, the frame on an XJ is in no way parallel with the bedsides. The bedsides drop about 1" from the bulkhead under the rear seat to the back crossmember. I think that this is to visually make up for the factory rake that is built into the unloaded ride height. Anywho, here is the final mock of the driver's side rub rail and bedside support. Still needs a taper on the front, prep, square and weld, but you get the picture. The rub rail sticks out evenly with the bumper and bumper extensions.
More progress. Rub Rails are in as is the frame for the load deck in the front part of the bed. Got the window frame made. It is located, etc, but isn't welded to the structure so I can take it to the vinyl shop separately and not be without the whole Jeep so I can keep working on it. I am about a week behind schedule at this point.
Now for the bad news. One of the main spring bolts rusted itself to the bushing sleeve and thereby busted the captured nut off inside the frame. So far, this is the ONLY critical bolt that was rusted to the point that it caused a problem. So, a quick surf of the interwebz and RuffStuff was called into action to send me a brand new set of properly designed hangers. These will be here on Thursday:

I also sourced a tranny cooler/fan combo from Summit because a normal cooler A. won't fit with my winch mount and 2) Won't allow me to blast the AC on the trail when it is 95 degrees outside because of the "stacked" heat exchangers. . .so I'm going remote mounted.
Now for the bad news. One of the main spring bolts rusted itself to the bushing sleeve and thereby busted the captured nut off inside the frame. So far, this is the ONLY critical bolt that was rusted to the point that it caused a problem. So, a quick surf of the interwebz and RuffStuff was called into action to send me a brand new set of properly designed hangers. These will be here on Thursday:
I also sourced a tranny cooler/fan combo from Summit because a normal cooler A. won't fit with my winch mount and 2) Won't allow me to blast the AC on the trail when it is 95 degrees outside because of the "stacked" heat exchangers. . .so I'm going remote mounted.
and a fenderwell. . .

It looks heavy. . .it isn't. All the 1" is 16g tube. The sheetmetal will be heavier than the structure. I don't have the ability or patience to work with anything but flat sheetmetal. I guess, when it comes to sheetmetal, patience is part of ability.
Anyway, for the less imaginative, it will start to look like something recognizable when the sheet is on. That will be very, very soon.

Last night was a productive one. . .a potential deal breaker was the busted a$$ spring hanger. . .so, RuffStuff Dan set me up with a beefier unit. I couldn't hardly glue that to the rusty old XJ. . .so, off to making stuff I went.


Had to give it a little structure. . .
While I was doing that and tidying up a few odds/ends of fab work, Boyscout got down to only needing 3x more templates before we start cutting/assembling the sheets.
Another Random/Useless fact: With the ice chest and coolers on the deck, I won't be able to see chit. So. . .I Googled up the Amazons and have some nifty gadgetry on the way!!!
Saturday was a BIG day for being able to visualize the final product:
Diagonal support

And after a trip to Toby's for some plasma lovin'. . .

I'm VERY happy with how the sheet metal is turning out. Even though they still need to be cleaned up and attached, It is exciting to see what it will look like.
Diagonal support
And after a trip to Toby's for some plasma lovin'. . .
I'm VERY happy with how the sheet metal is turning out. Even though they still need to be cleaned up and attached, It is exciting to see what it will look like.

More Progress. . .
I got the rear axle removed completely and prepped the plumbing to be plumbed. . .ed. . .
Then I prepped the correct gas tank to be installed. About the time I dropped it in the hole, Boyscout trooped up to the house and helped with a little massaging. . .End result is one mounted tank. . .
And clearance from the bottom. You can also see that I hung the "new" springs off of the new shackles. Note to googlers. . .you mount the shackles with the plating towards the front or they will hit a bolt on the shackle box under compression.
Return to “Projects and Build-Ups”
Who is online
Users browsing this forum: No registered users and 8 guests