Warn M8000 Resurrection - Pic Heavy

Post pics and info of your current projects.
User avatar
mattawajeep
Posts: 1221
Joined: Wed May 19, 2010 6:18 pm
Location: Mattawa, WA

Warn M8000 Resurrection - Pic Heavy

Postby mattawajeep » Thu May 08, 2014 4:48 pm

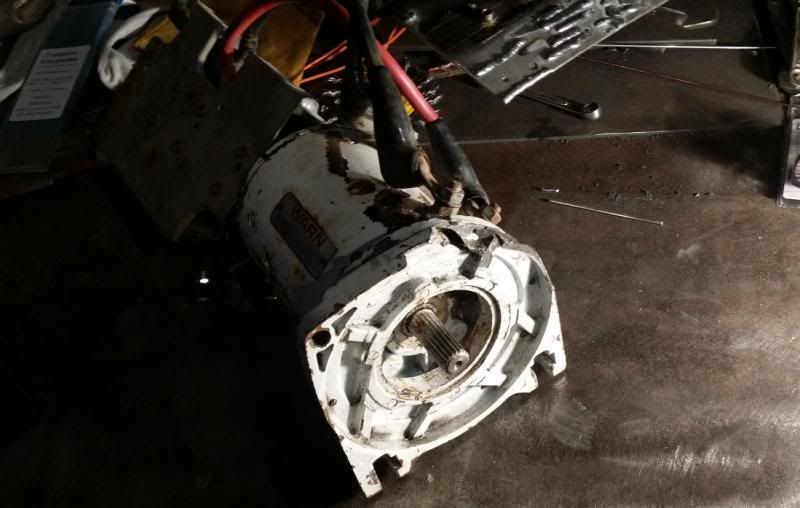
Bought a pile of M8000 parts from scumby at the meeting last night, and thought I might try and turn it into a winch for the Grand Cherokee.


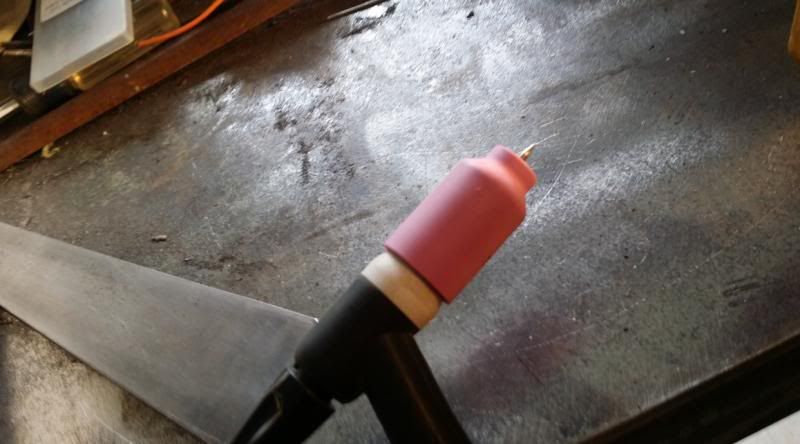
Gas lens kit for my tig torch came in last week, been dying to try it on something.
Image


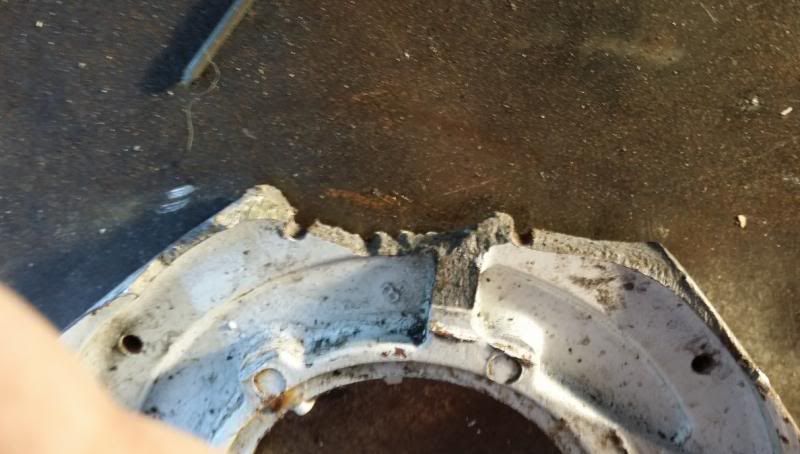
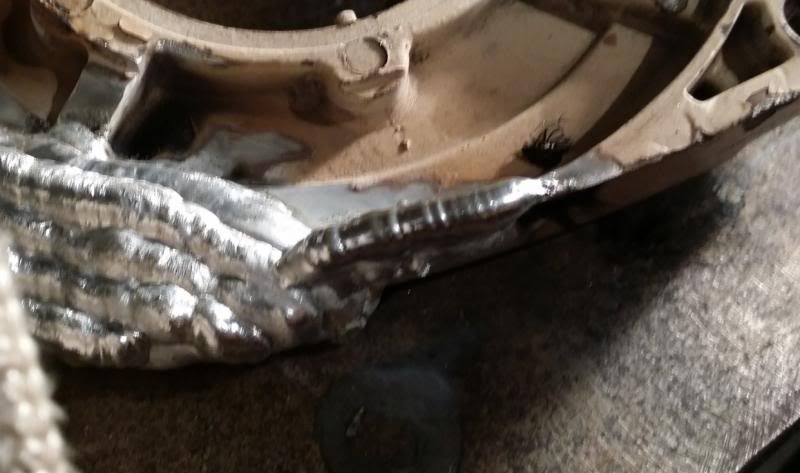
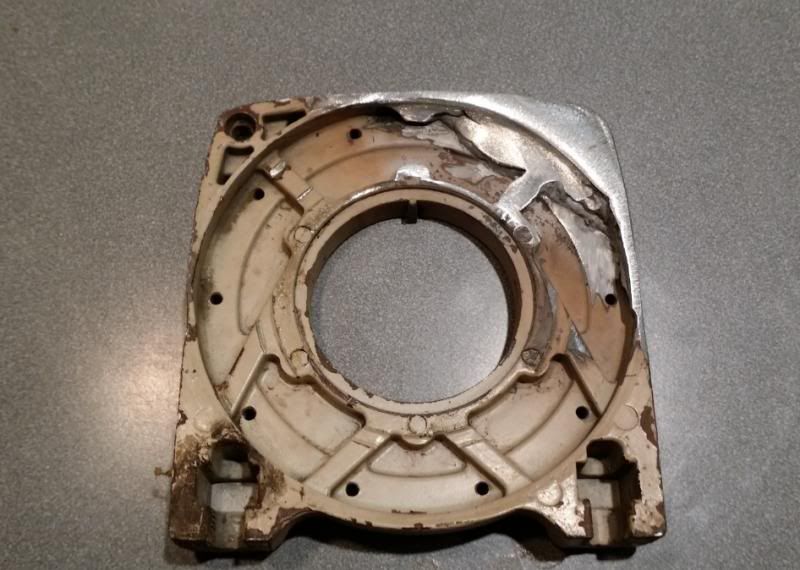
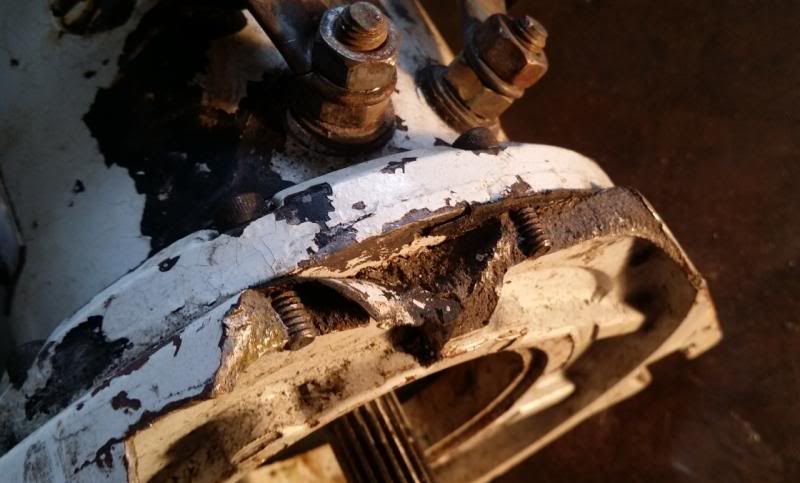
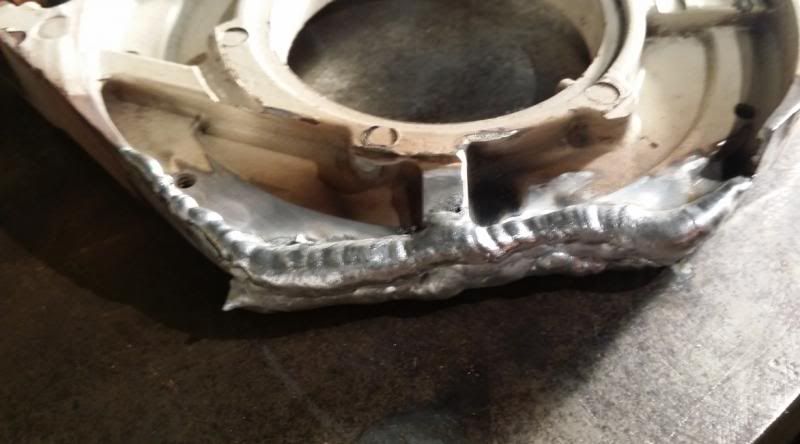
Here's the main problem with the parts pile. The motor mount thingy is busted pretty good on one side. Magnet didn't stick to it, so it's cast aluminum, and not really clean looking aluminum either.

The part is like $80 bucks, and I didn't find any used ones on e-bay or anything. I imagine they get snapped up quick, as it turns out this is a common failure point when the winch is mistreated. So, welding it is.
Image

Image

Image


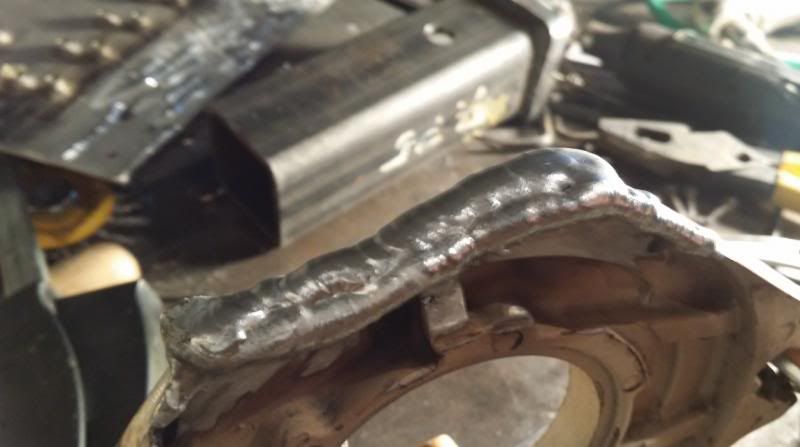
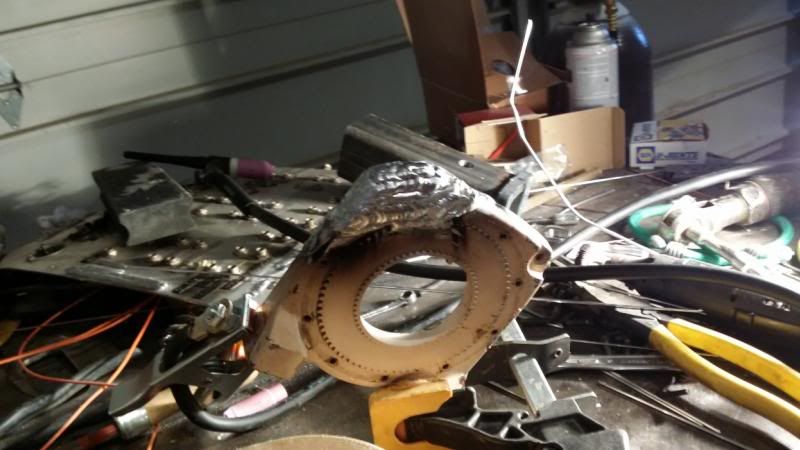
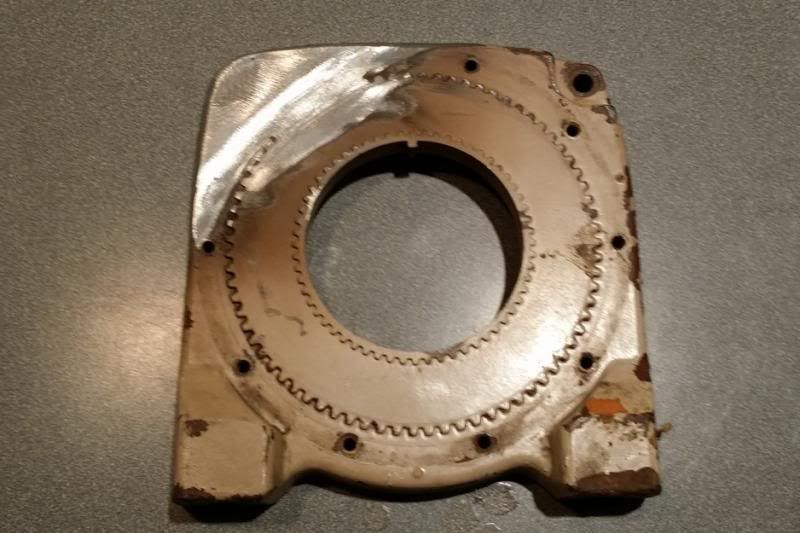
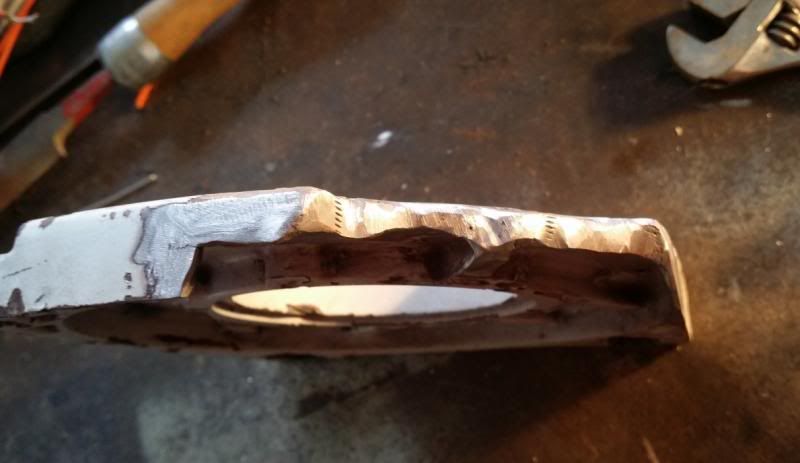
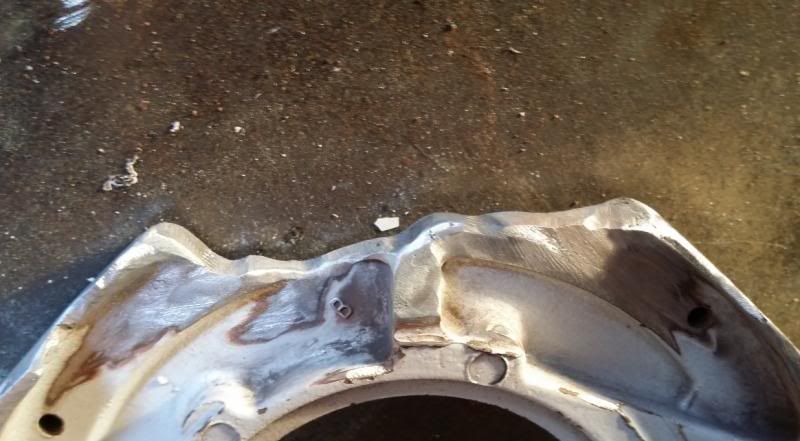
The most important thing about welding aluminum, especially cast aluminum is cleaning everything up. I probably spent 15 minutes grinding and filing, and it still wasn't enough the first go around. This was my first attempt welding something aluminum that wasn't random scrap.
Image

Image


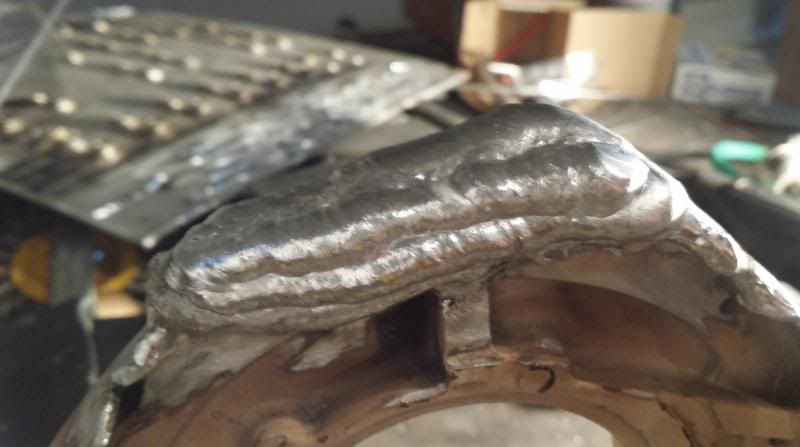
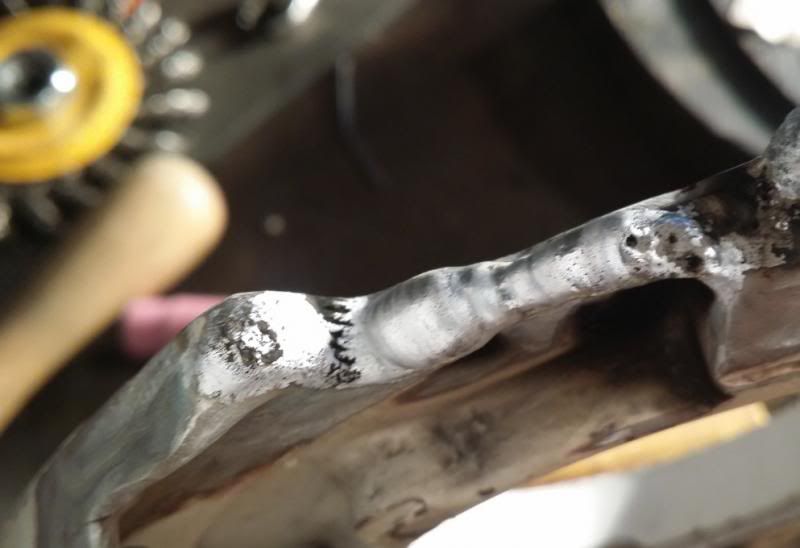
I had the EP turned up pretty high on the AC balance for the first pass, but you can see the contamination bubbling out of the cast metal. The black stuff is bad.
Image

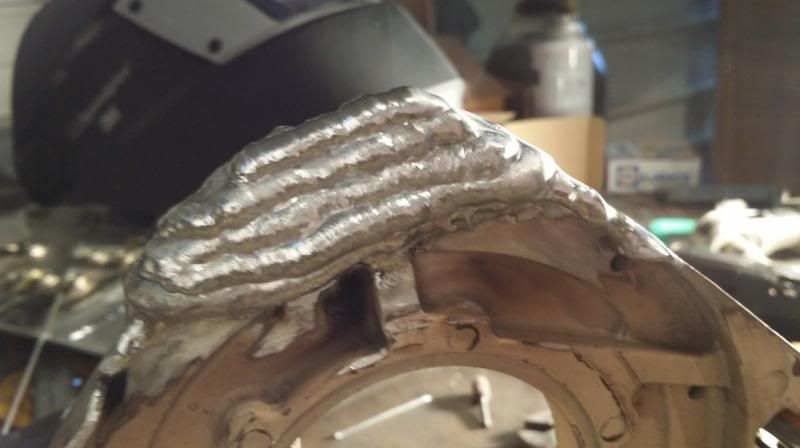
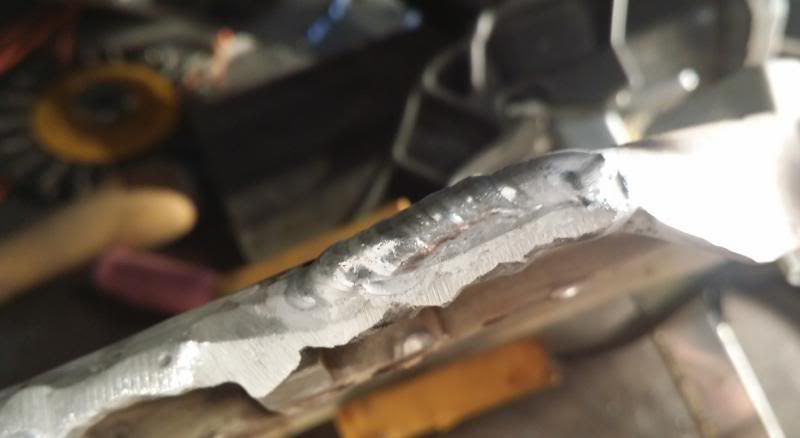
Gave it several passes without filler with the EP turned up and then cleaned up with a flapper wheel before giving it another go.
Image

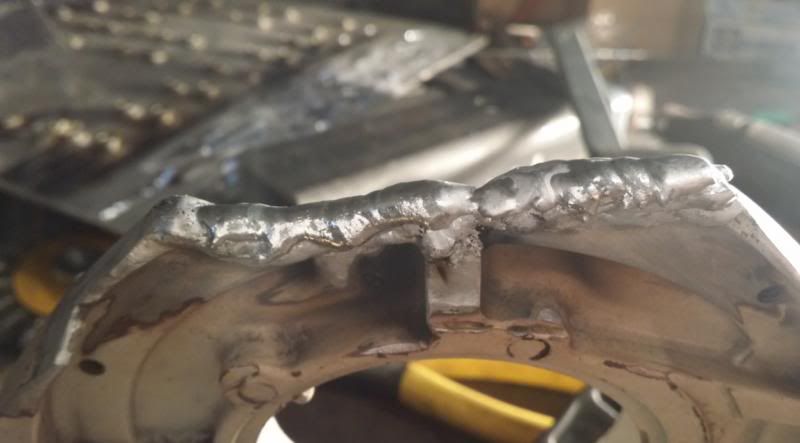
Stuff was running better, though I did have to grind a few other spots out to make sure there were no voids or porosity and the main joint.
Image

Image

Image

Image

Image

Image

Image

Image

Image


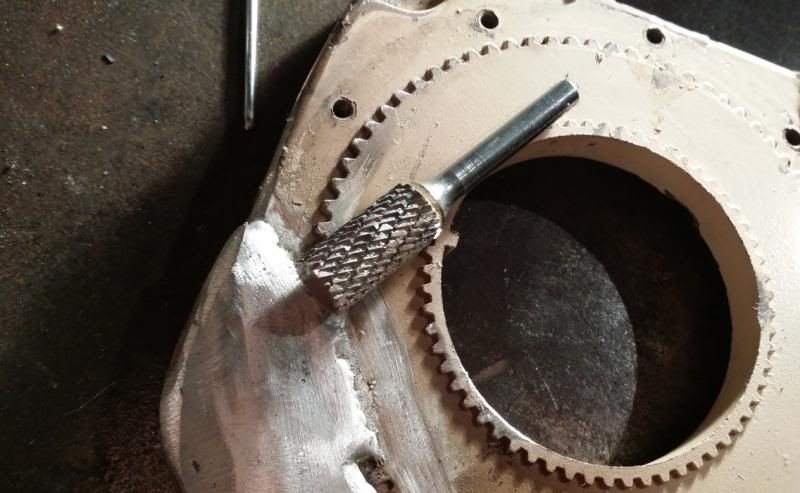
I've been cleaning everything with a flapper wheel, as it takes stuff off pretty darn quick. However, I'd like something with a little more finesse to get final lines put of everything.

Tried a carbide bit, but it loaded up just like a grinding disc would. Which is unfortunate, thought that would be my final tool.
Image


Anyone do much with aluminum and have any suggestions for a grinding tool? I really don't want to clean this thing up with a file. :lol:

User avatar
scumby
Peak Putters Member
Peak Putters Member
Posts: 1873
Joined: Tue Jun 05, 2007 6:38 am
Location: Burbank

Postby scumby » Thu May 08, 2014 5:08 pm

did i mention i had a spare end bell like that?


J/K, what's the part # your looking for?

User avatar
mattawajeep
Posts: 1221
Joined: Wed May 19, 2010 6:18 pm
Location: Mattawa, WA

Postby mattawajeep » Thu May 08, 2014 5:37 pm

scumby wrote:did i mention i had a spare end bell like that?


J/K, what's the part # your looking for?


Well, it the part I was looking at before I bought the winch was this:

http://www.summitracing.com/parts/wrn-25985

However, it seems that the mounting surface has changed. Gonna see if I can find the diagrams for the older model M8000's.

User avatar
scumby
Peak Putters Member
Peak Putters Member
Posts: 1873
Joined: Tue Jun 05, 2007 6:38 am
Location: Burbank

Postby scumby » Thu May 08, 2014 6:33 pm


User avatar
mattawajeep
Posts: 1221
Joined: Wed May 19, 2010 6:18 pm
Location: Mattawa, WA

Postby mattawajeep » Thu May 08, 2014 7:23 pm


Not sure, I'm thinking this one might be even older. That has a different part number, but the picture looks like the newer style. It doesn't have the little teeth like this one does. I also can't seem to find it for sale anywhere, I think these older parts are going to be harder to find. It has the same motor molder number as the first generation 8274. Might call warn tomorrow and figure it out, as there are some other parts I'll be needing.


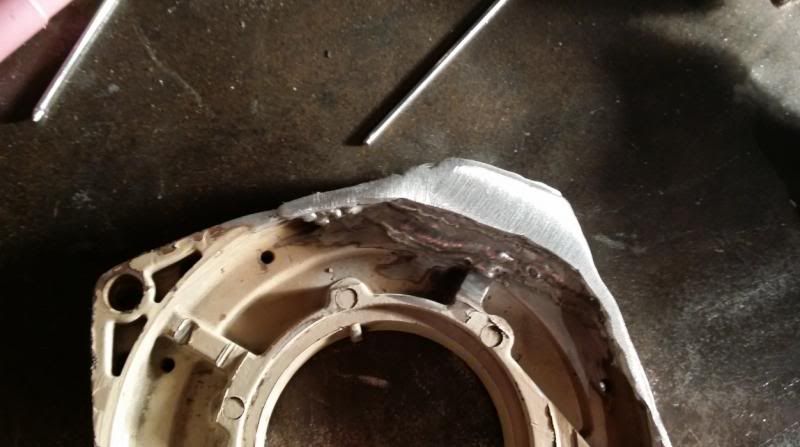
I probably wasted more time looking for the part than running the flapper wheel.

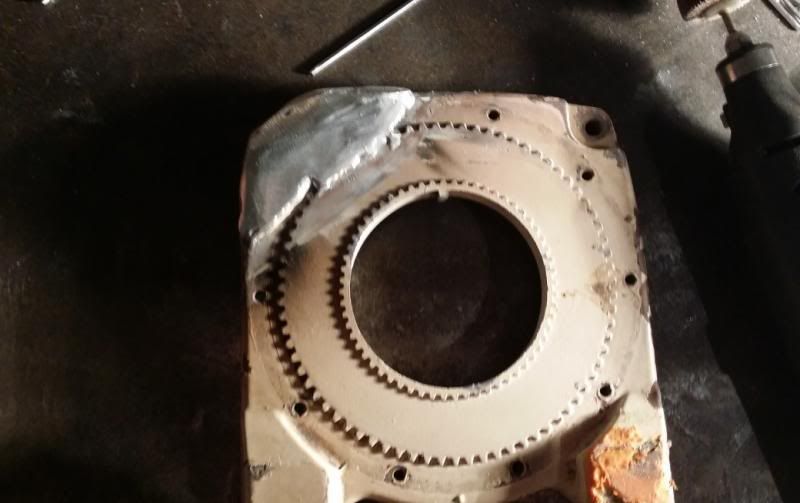
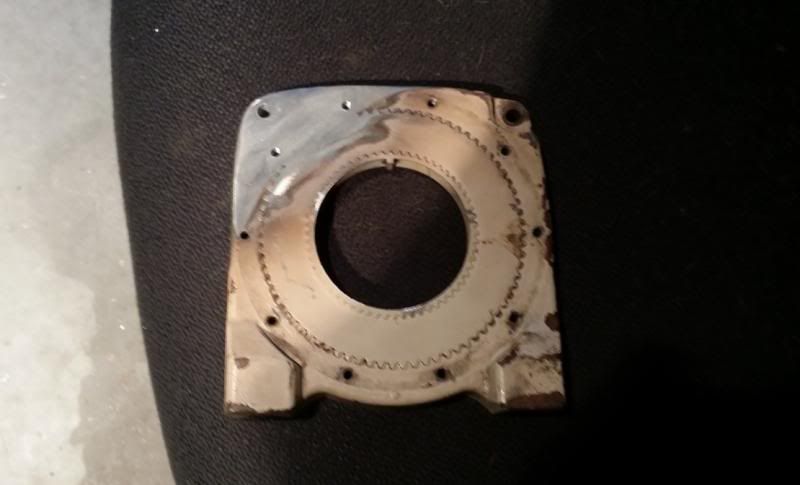
Good as new, or good enough. :lol:

Image

Image

Just need to drill 3 holes, and tap two of them. Should have the proper tap size in the toolbox.

I think this should close to as strong as a new one. I left the metal a bit thicker where I could, and the cleaning passes with the torch, and the way it started to flow after being perfectly clean should mean the bond is as good as you can get.

User avatar
scumby
Peak Putters Member
Peak Putters Member
Posts: 1873
Joined: Tue Jun 05, 2007 6:38 am
Location: Burbank

Postby scumby » Fri May 09, 2014 5:46 am

nice, very nice.

User avatar
mattawajeep
Posts: 1221
Joined: Wed May 19, 2010 6:18 pm
Location: Mattawa, WA

Postby mattawajeep » Fri May 09, 2014 4:59 pm

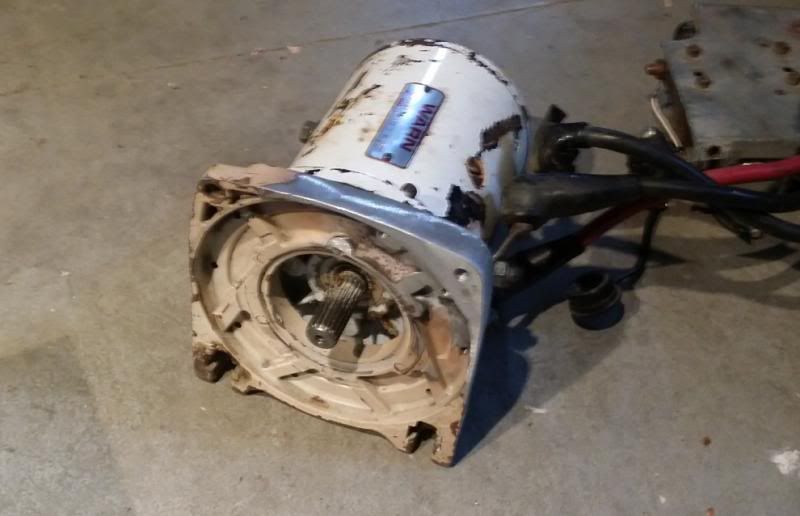
Should do the job. Bolts up.

Image

Image

Got the rest of the internal parts I needed ordered. Should have a functioning winch when they get in next week. Now I just need some decent paint.

User avatar
scumby
Peak Putters Member
Peak Putters Member
Posts: 1873
Joined: Tue Jun 05, 2007 6:38 am
Location: Burbank

Postby scumby » Fri May 09, 2014 5:03 pm

and the total cost is?

User avatar
mattawajeep
Posts: 1221
Joined: Wed May 19, 2010 6:18 pm
Location: Mattawa, WA

Postby mattawajeep » Fri May 09, 2014 5:09 pm

scumby wrote:and the total cost is?


$180 - A little more than I was expecting, but better than you can generally do on craigslist and this one will have newish internals.

That's with a couple internal gear thingies, new bushings, hook, some cable, strap, tie rods, and a $30 Warn solenoid pack cover. Guess I coulda built a cover, but whatever, plastic is probably better than steel for the application.

User avatar
scumby
Peak Putters Member
Peak Putters Member
Posts: 1873
Joined: Tue Jun 05, 2007 6:38 am
Location: Burbank

Postby scumby » Fri May 09, 2014 5:33 pm

mattawajeep wrote:
scumby wrote:and the total cost is?


$180 - A little more than I was expecting, but better than you can generally do on craigslist and this one will have newish internals.

That's with a couple internal gear thingies, new bushings, hook, some cable, strap, tie rods, and a $30 Warn solenoid pack cover. Guess I coulda built a cover, but whatever, plastic is probably better than steel for the application.


good job

User avatar
mattawajeep
Posts: 1221
Joined: Wed May 19, 2010 6:18 pm
Location: Mattawa, WA

Postby mattawajeep » Fri May 16, 2014 5:29 am

Anyone know where to get moly grease with an NLGI 1 rating locally? I hear it's pretty common for airplanes.

User avatar
mattawajeep
Posts: 1221
Joined: Wed May 19, 2010 6:18 pm
Location: Mattawa, WA

Postby mattawajeep » Fri May 16, 2014 11:19 am

Bergstrom Aircraft had some AEROSHELL 33MS in stock that will do the trick in case anyone needs to rebild a winch.

User avatar
scumby
Peak Putters Member
Peak Putters Member
Posts: 1873
Joined: Tue Jun 05, 2007 6:38 am
Location: Burbank

Postby scumby » Fri May 16, 2014 5:04 pm

more pics :thu2:

User avatar
mattawajeep
Posts: 1221
Joined: Wed May 19, 2010 6:18 pm
Location: Mattawa, WA

Postby mattawajeep » Wed May 21, 2014 9:12 am

Hasn't been a whole lot going on that makes for interesting pictures.

Degreased and cleaned up the internals, of which I now have everything but 1 part. Still waiting on Warn to ship it.

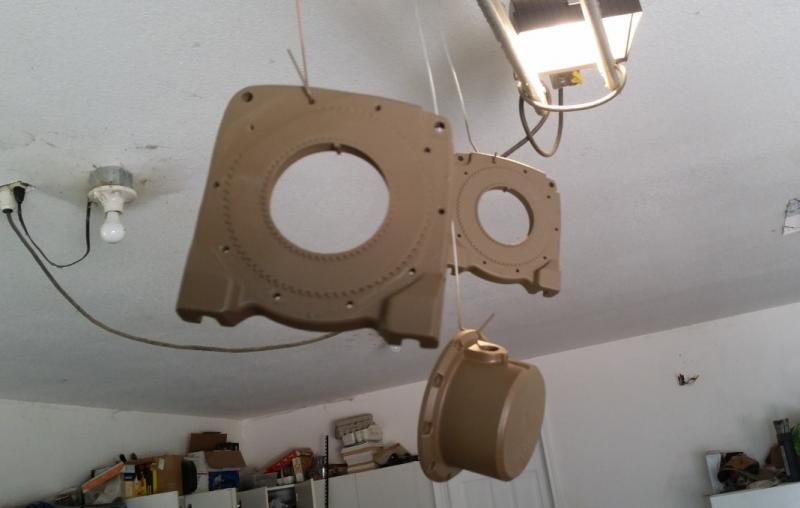
Got all the housing pieces cleaned down to bare metal and primed with some Zinc Chromate Primer this weekend. Zinc chromate stuff went inside and out, I'm hoping to avoid any more galvanic corrosion of which there was some. I think the winch had been submerged in water quite a few times, and may have had the wrong grease added at some point.

Image

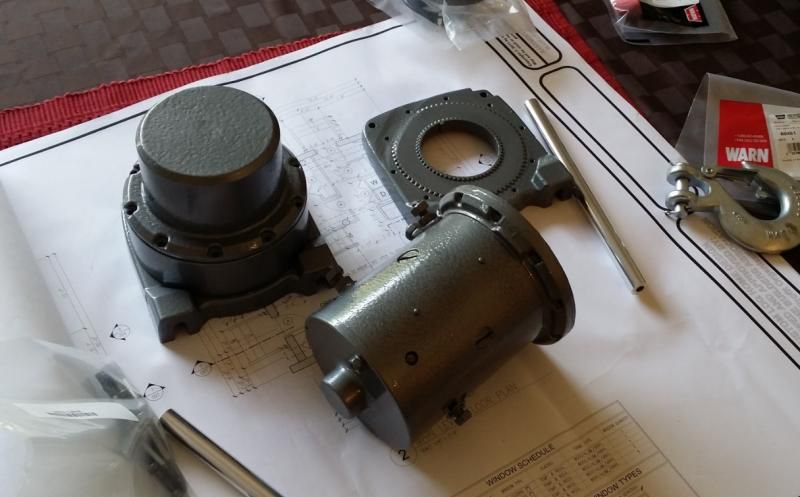
Finished the top coat of stuff on Monday, and it's just now cured and ready for assembly.

Image

User avatar
scumby
Peak Putters Member
Peak Putters Member
Posts: 1873
Joined: Tue Jun 05, 2007 6:38 am
Location: Burbank

Postby scumby » Wed May 21, 2014 3:15 pm

what part are you waiting for?

i don't know if it was submerged but it was from Kodiak, AK and they get about 110" of rain a year.

User avatar
mattawajeep
Posts: 1221
Joined: Wed May 19, 2010 6:18 pm
Location: Mattawa, WA

Postby mattawajeep » Wed May 21, 2014 4:11 pm

scumby wrote:what part are you waiting for?

i don't know if it was submerged but it was from Kodiak, AK and they get about 110" of rain a year.


Last one I'm waiting for:

http://www.amazon.com/26006-Winch-Motor ... B001U7M21M

Could get it tomorrow if I ordered it from Amazon, but I'll wait. It was cheaper with the other stuff direct from Warn.

110" would probably do it. That's a whole lot of water. Winch probably had a lot more fun than the one on my TJ. :D

User avatar
mattawajeep
Posts: 1221
Joined: Wed May 19, 2010 6:18 pm
Location: Mattawa, WA

Postby mattawajeep » Fri Jun 20, 2014 5:02 pm

It's been crazy busy lately. Finally got a chance to come back to this project. I canceled the order I had with warn and bought the part from amazon. The last piece showed up today.

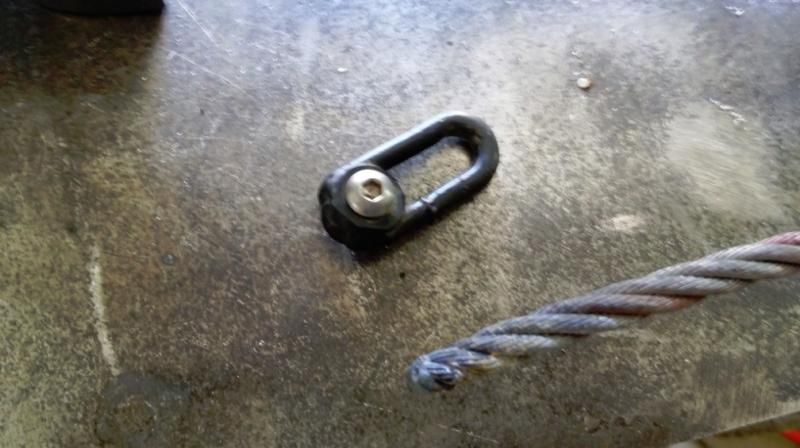
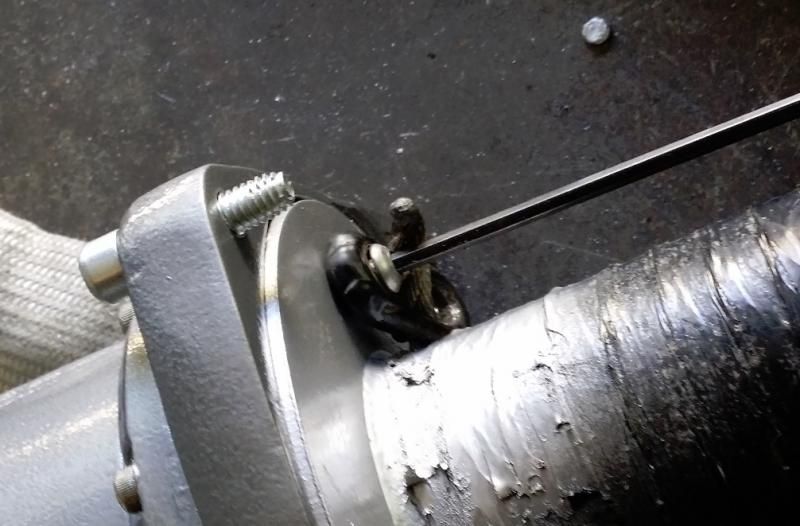
However, I'm kind of stuck now. I can't seem to find any instructions, or pictures on how the cable is supposed to attach with the old style clamps I've got.

Here's a couple pics of the clamp, and my best guess as to how this stuff attaches. It just seems a little hinky to me.

Image

Image

benw
Posts: 216
Joined: Mon Apr 09, 2007 7:15 pm
Location: Yakima, WA

Postby benw » Fri Jun 20, 2014 5:42 pm

The chain link eyelet you have is for synthetic rope. If you are using that wire rope it will need a swaged eyelet on the end.

User avatar
mattawajeep
Posts: 1221
Joined: Wed May 19, 2010 6:18 pm
Location: Mattawa, WA

Postby mattawajeep » Fri Jun 20, 2014 5:53 pm

benw wrote:The chain link eyelet you have is for synthetic rope. If you are using that wire rope it will need a swaged eyelet on the end.


Ahh, that's the answer I needed. Thanks. Guess I'll find a proper wire rope end and get it crimped on. Shouldn't a sold that synthetic rope I had lying around. :lol:

I have a big set of bolt cutters and some crimping jaws around someplace. If what I have won't work anyone have the tool to do it?


Return to “Projects and Build-Ups”

Who is online

Users browsing this forum: No registered users and 8 guests