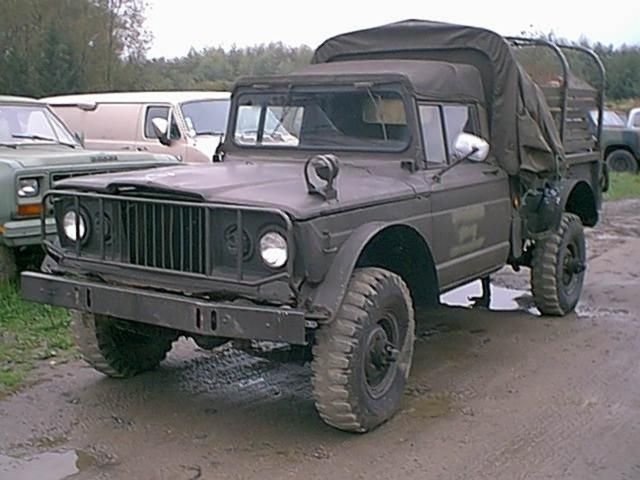
Gladiator 2.0

Post pics and info of your current projects.
User avatar
mattawajeep
Posts: 1221
Joined: Wed May 19, 2010 6:18 pm
Location: Mattawa, WA

Gladiator 2.0

Postby mattawajeep » Thu Aug 21, 2014 3:16 pm

Figured I should give this one it's own thread.

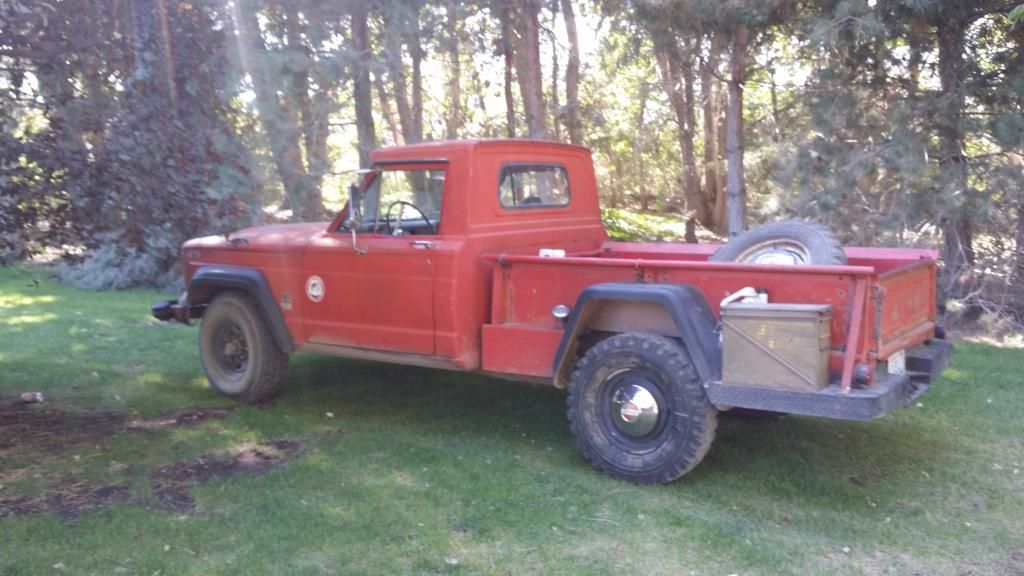
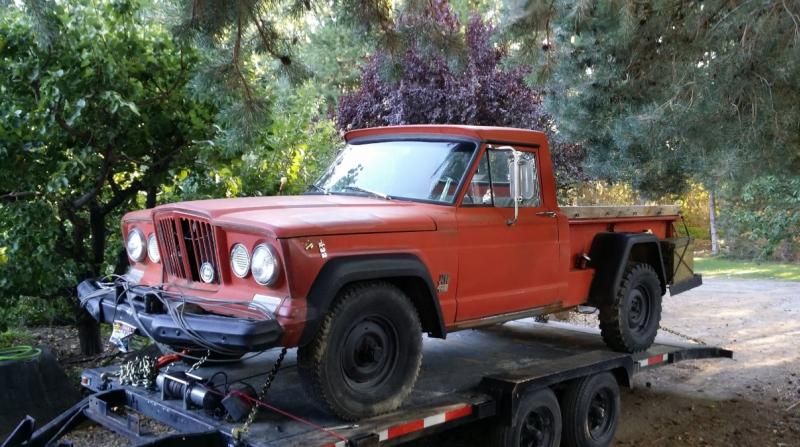
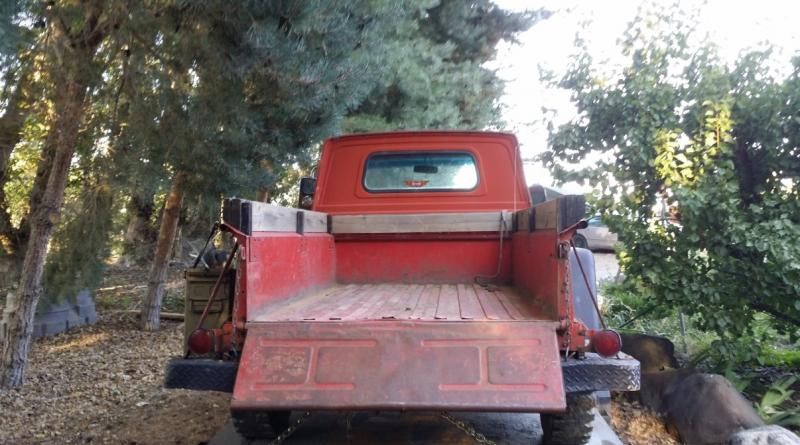
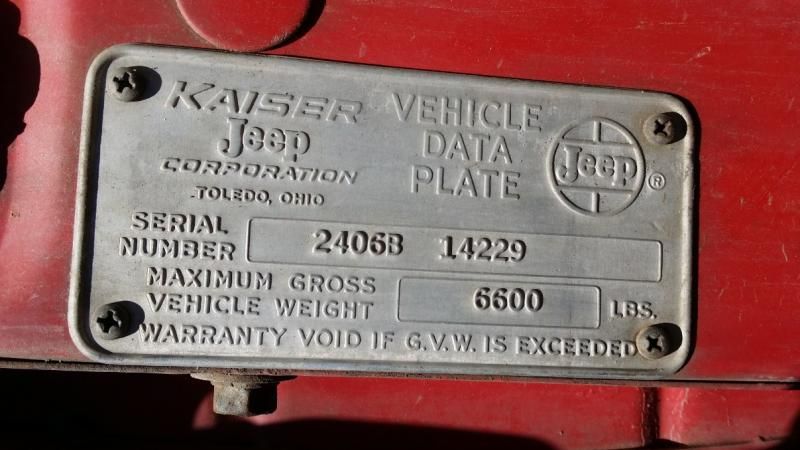
Somone on IFSJA.org helped me nail down the year. It is a 1964 for sure.

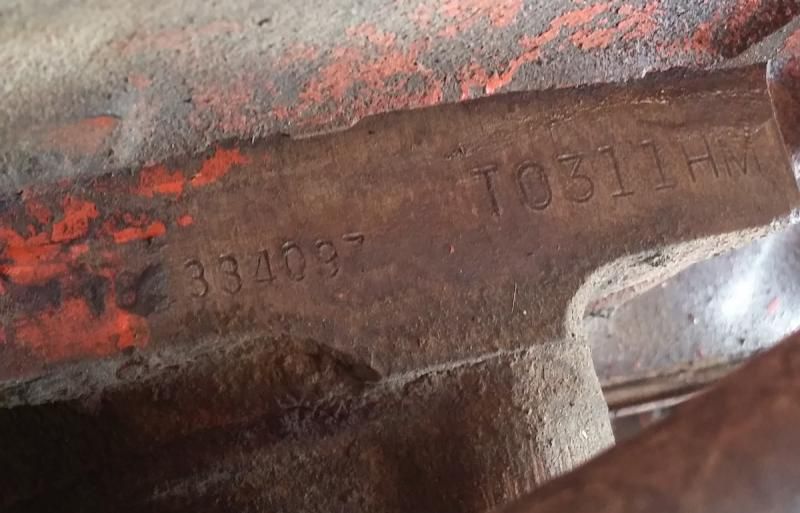
1964 J220 3/4 Ton
Dana 44 Front
Dana 53 Rear (Really Beefy Semi-Float, Precursor to the 60-2)
4.88 Gears
Chevy 327
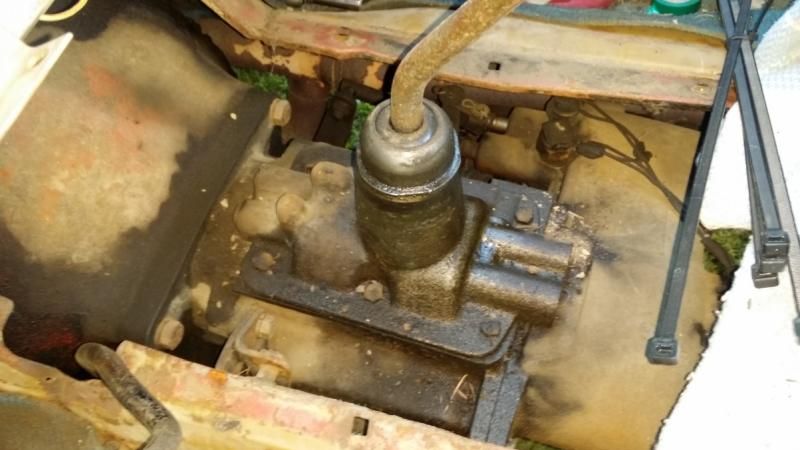
T90C Transmission
Dana 20 T/C w/ Front and Rear PTO Outputs
Ramsey PTO Winch
Image

Image

Image


Image

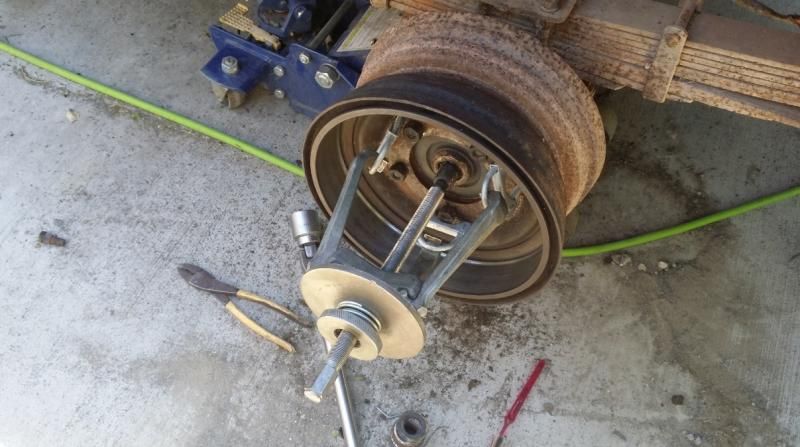
I decided to change out the brakes, which turned into rebuilding all 4 hubs. New drums, new studs, new shoes, new wheel cylinders, new master, new hoses, new lines ect... The only thing I kept were the springs and adjuster hardware. Bigger job than I though it would be, had to get creative with the pullers, and it took 3 weekends.
Image

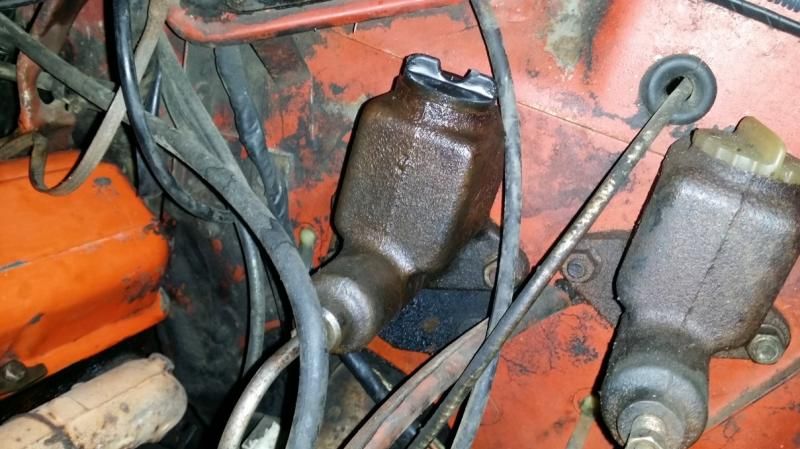
The clutch is hydraulic, and it turns out that was factory for 1964.
Image


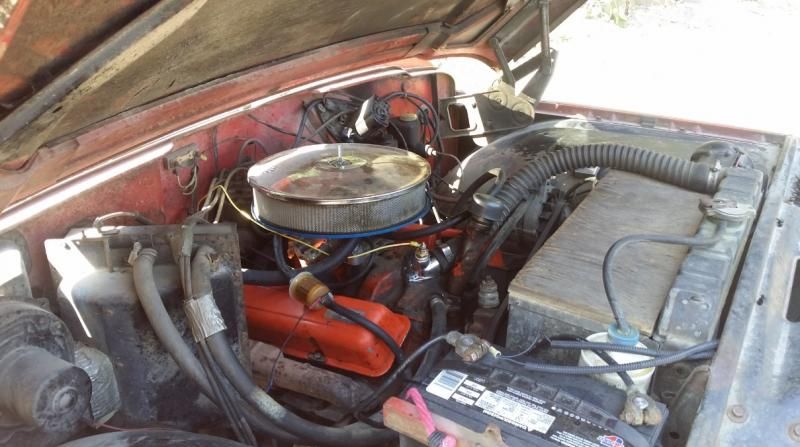
327 Engine which will be getting swapped out. It burns too much oil.
Image

Image

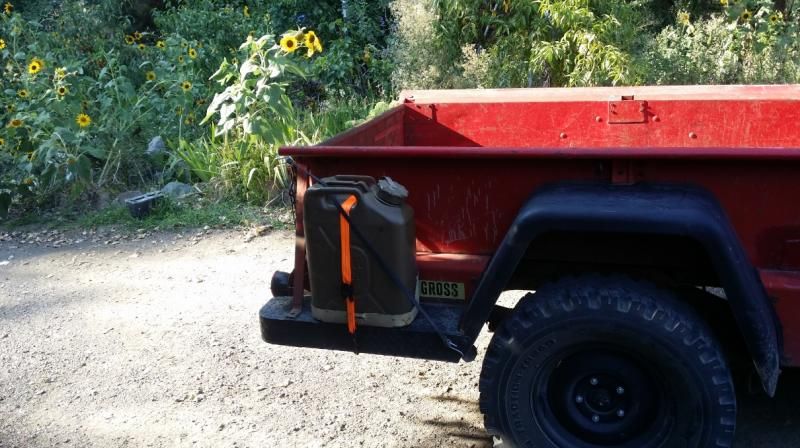
Bolted this on before the trip into town yesterday. No odometer and no fuel gauge is scary when you don't know what kind of MPG you're getting. Turns out it's getting 11 MPG. 3300 RPM to go 60mph will do that to you.
Image


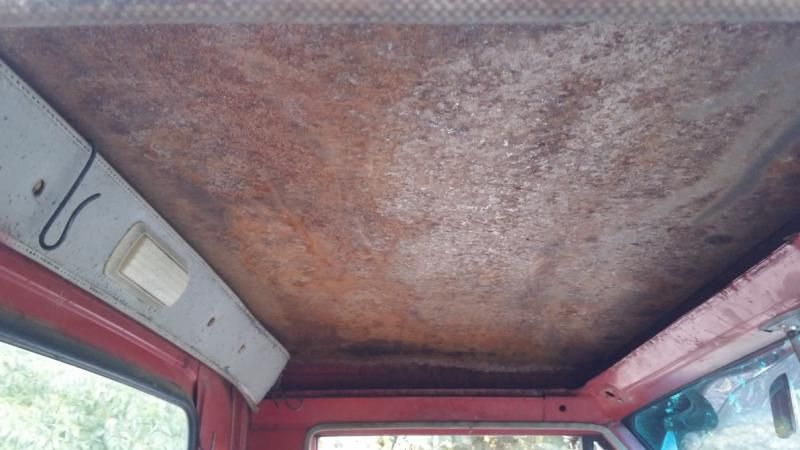
Here was last evenings project. Scraped off all the old factory sprayed on sound deadener.
Image

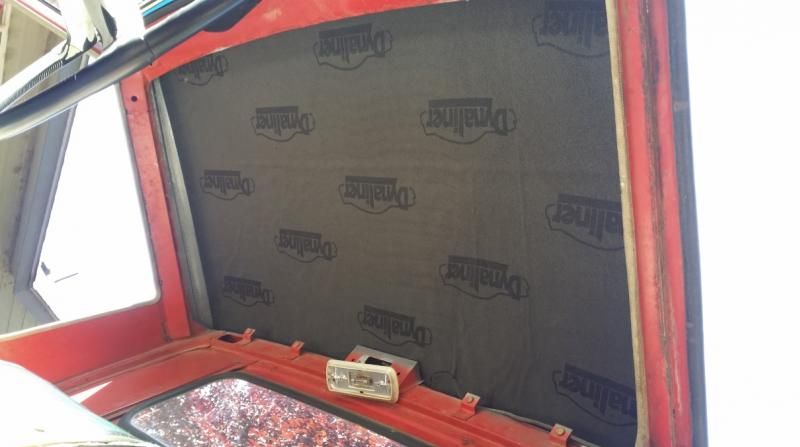
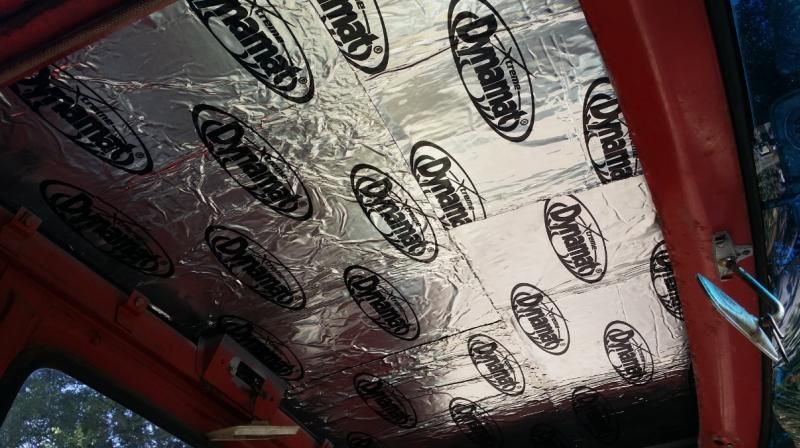
And I seem to have stopped taking pictures for a bit. Hit the roof with a wire wheel, and then a scotchbrite pad, followed by a thorough wipe down with wax and grease remover. Then two coats of primer, and a topcoat of some random gloss paints.

After it dried:

A layer of dynamat.
Image

And a layer of dynaliner.

Image

I'm going to get the seat reupholstered in a couple weeks, and then once my new floors are welded in and the seat reinstalled I'm going to have an ABS plastic headliner with a cubby area in the brow made up.
Nukegumby
Posts: 52
Joined: Wed Jul 31, 2013 10:41 pm
Location: Pasco, WA

Postby Nukegumby » Thu Aug 21, 2014 7:04 pm

:::Drool::: I love the Gladiator and hope to build one someday. It's my favorite full-sized truck.

If you're interested, I have a '71 Buick 455 sitting in the garage that could provide the torque you need to move that hunk of old iron. It'd come pretty cheap (or with a fair trade), since I got it on trade myself and have no idea what condition it's really in.

-Mikey-

User avatar
mattawajeep
Posts: 1221
Joined: Wed May 19, 2010 6:18 pm
Location: Mattawa, WA

Postby mattawajeep » Thu Aug 21, 2014 7:54 pm

Nukegumby wrote::::Drool::: I love the Gladiator and hope to build one someday. It's my favorite full-sized truck.

If you're interested, I have a '71 Buick 455 sitting in the garage that could provide the torque you need to move that hunk of old iron. It'd come pretty cheap (or with a fair trade), since I got it on trade myself and have no idea what condition it's really in.

-Mikey-


A 455 Buick would be sweet. I think they're pretty easy to adapt to the rest of the drivetrain as well.


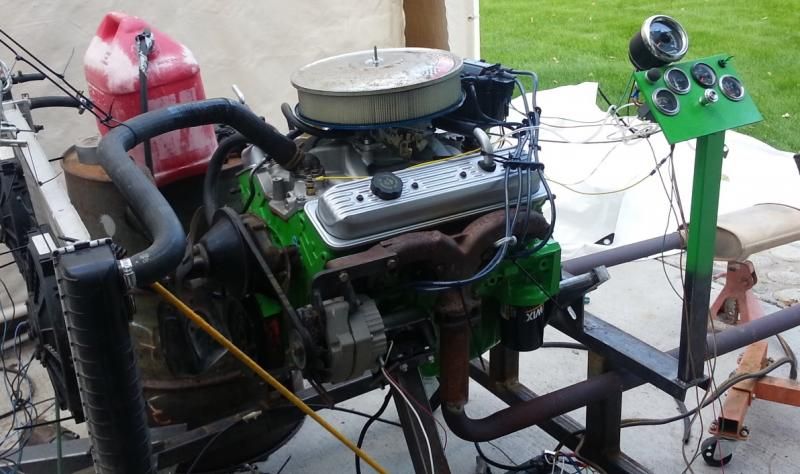
However, fortunately, or unfortunately I already have a built replacement for the 327.

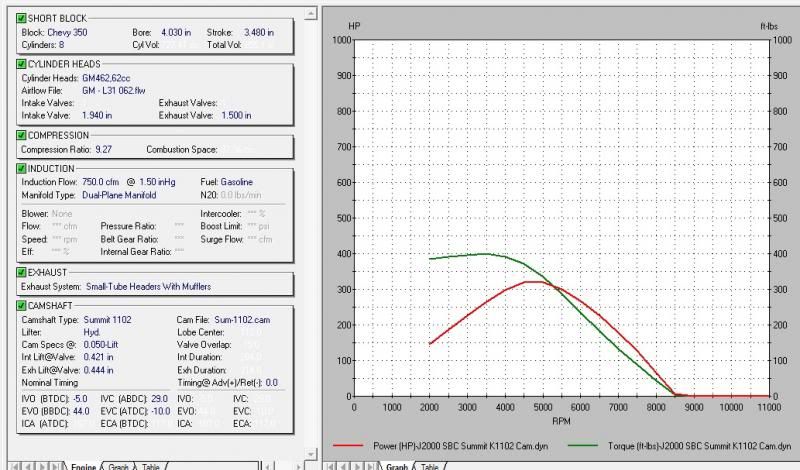
A 320HP 400 ft/lb Torque Chevy 350.

On a desktop dyno anyway. Think I'll be happy with it whatever it really outputs. These old Thriftside Gladiators were pretty light. Consensus seems to be around 3500 lbs, maybe a bit more for the 3/4 ton rigs. Which reminds me, I need to run this thing over the scale tomorrow and see what it really weighs.

Image

Image


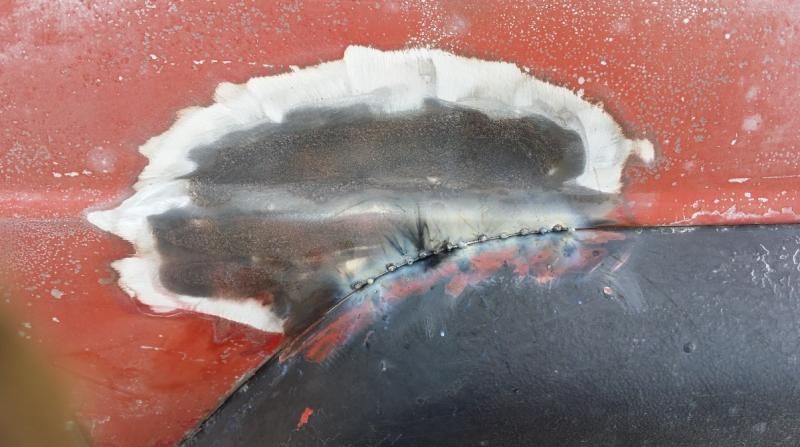
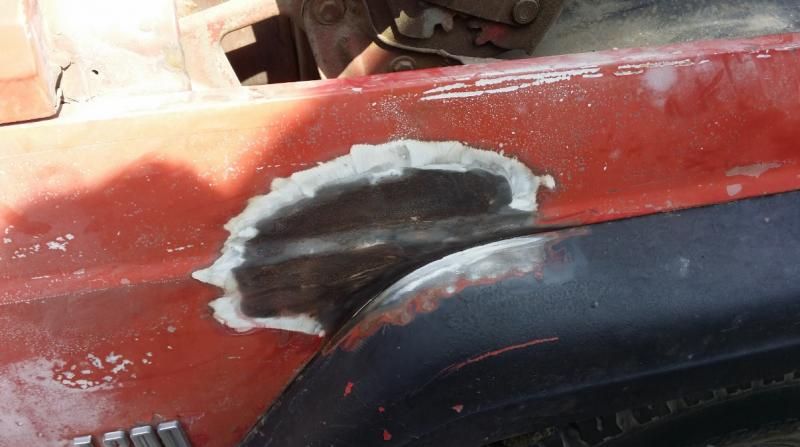
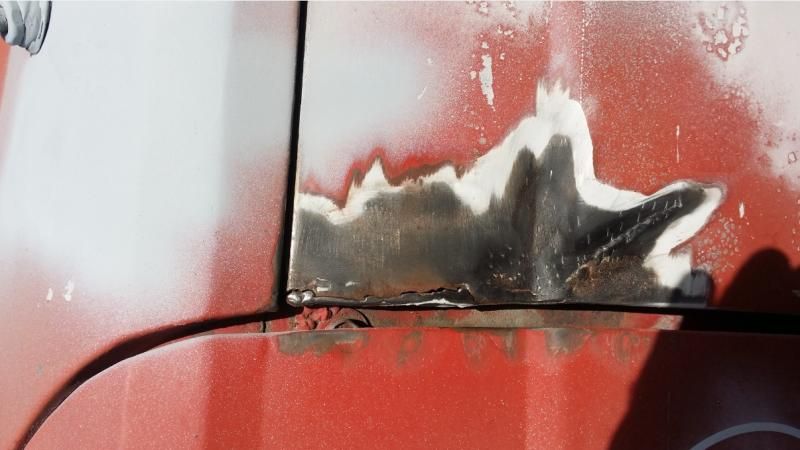
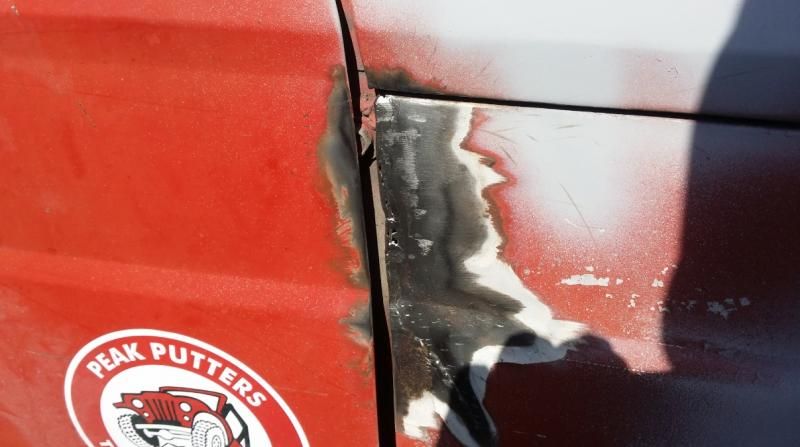
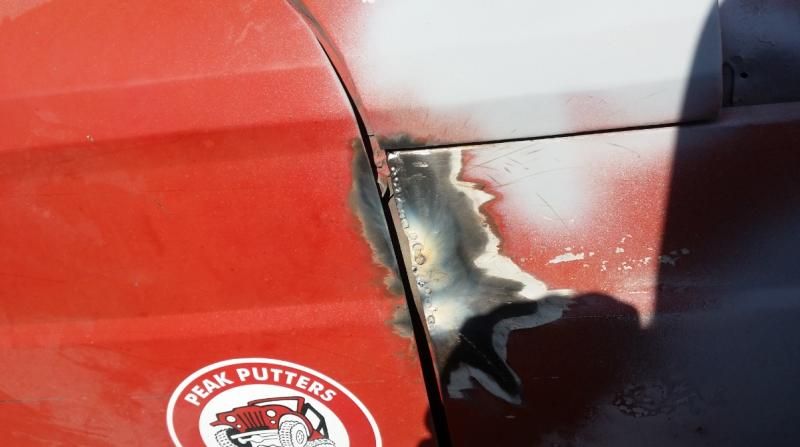
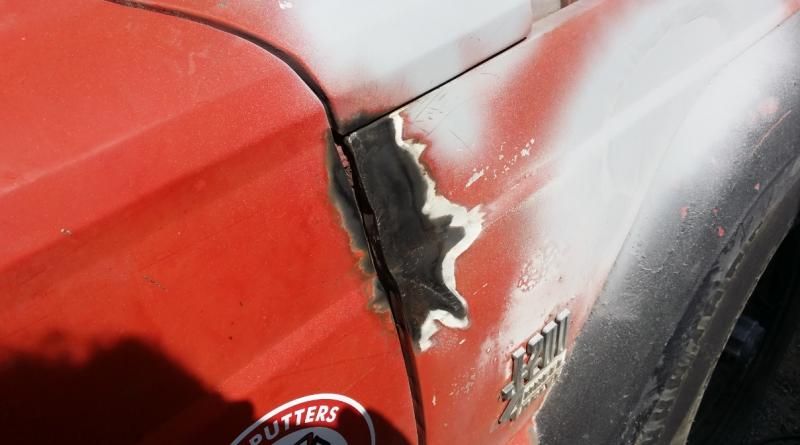
Had all the welding gear out as I was working on an excavator bucket today, so I did a little body work this evening. There are a few spots that need attention, and were badly repaired by somebody.

Weird spot for a crack, it just follows slightly above the fender.

Image

All cleaned up:

Image


Someone tried to weld this up once, then just filled it with bondo.

Image

Image

Image

Image

User avatar
mattawajeep
Posts: 1221
Joined: Wed May 19, 2010 6:18 pm
Location: Mattawa, WA

Postby mattawajeep » Fri Aug 22, 2014 4:16 pm

Drove the truck over the scale at the local Wilbur Ellis today.

Truck was 4,220 lbs with a full tank of gas, plus the spare 5 gal, and nothing else. This make's me think factory weight ratings for a thriftside were rather far off.

The truck probably has an extra 350lbs (might be generous) with the fabricated bumpers, PTO, & Winch. The V8 might weight a bit more as well, but I'm thinking it's probably pretty close to the Tornado, if the specs of 575lbs I'm finding online is correct.

That leaves the truck at it's base probably weighing around ~3900 lbs. About 300-400 lbs off listed curb weight.

Nukegumby
Posts: 52
Joined: Wed Jul 31, 2013 10:41 pm
Location: Pasco, WA

Postby Nukegumby » Fri Aug 22, 2014 7:22 pm

Cool. I'm an SBC fan as well. Have a stroker sitting on the engine stand which, while fairly new, lost old pressure early on and I don't yet understand it. Have to figure that out. In any case, sweet ride. I look forward to watching you build the Gladdie.

-Mikey-

User avatar
SPR
Peak Putters Member
Peak Putters Member
Posts: 2344
Joined: Thu Mar 15, 2007 6:31 am
Location: Tri-Cities

Postby SPR » Fri Aug 22, 2014 8:01 pm

Dale, the stuff that you get into is amazing.
I don't Text (at least not very well), I eat Blackberrys, and I only Twitter after sex...

User avatar
mattawajeep
Posts: 1221
Joined: Wed May 19, 2010 6:18 pm
Location: Mattawa, WA

Postby mattawajeep » Sat Aug 23, 2014 7:16 am

SPR wrote:Dale, the stuff that you get into is amazing.


It's the getting in part that's easy. :lol:

OldGreen
Posts: 4502
Joined: Tue Mar 13, 2007 6:21 am
Location: coming or going?

Postby OldGreen » Sat Aug 23, 2014 8:37 am

Love that torque curve. Keep it up!!!

User avatar
mattawajeep
Posts: 1221
Joined: Wed May 19, 2010 6:18 pm
Location: Mattawa, WA

Postby mattawajeep » Tue Sep 09, 2014 2:30 pm

Haven't had a chance to swap the engine yet, apple harvest is too crazy.

Got some bling for the wheels though. Which is almost as important. :lol:

Image

I just need to find a new set of bias ply tires with the old school tread. And then either live with the high RPM's, or find a good way to swap in an overdrive while keeping the Dana 20 with it's PTO output.

User avatar
mattawajeep
Posts: 1221
Joined: Wed May 19, 2010 6:18 pm
Location: Mattawa, WA

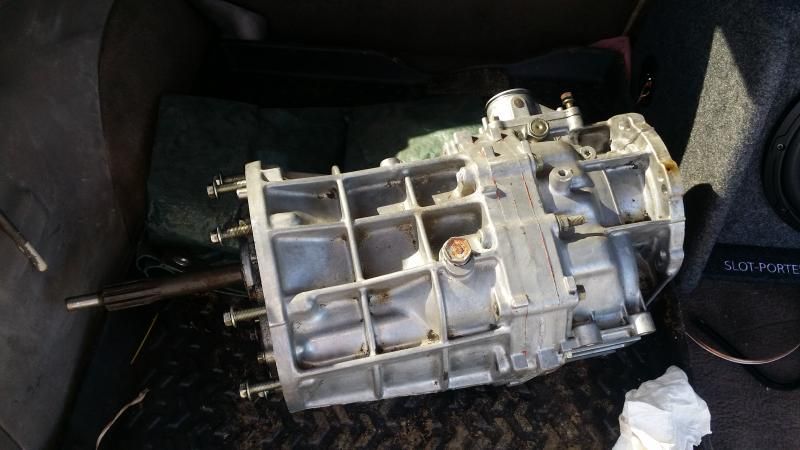
Postby mattawajeep » Mon Oct 06, 2014 2:13 pm

Image

User avatar
scumby
Peak Putters Member
Peak Putters Member
Posts: 1873
Joined: Tue Jun 05, 2007 6:38 am
Location: Burbank

Postby scumby » Mon Oct 06, 2014 4:28 pm

ax-15?

User avatar
mattawajeep
Posts: 1221
Joined: Wed May 19, 2010 6:18 pm
Location: Mattawa, WA

Postby mattawajeep » Mon Oct 06, 2014 7:45 pm

Yup. $250. Should work well if I don't drive like an idiot. If it breaks I'll get another one with upgraded parts from a twin turbo supra, then I won't need to worry about it.

User avatar
mattawajeep
Posts: 1221
Joined: Wed May 19, 2010 6:18 pm
Location: Mattawa, WA

Postby mattawajeep » Tue Oct 21, 2014 5:58 pm

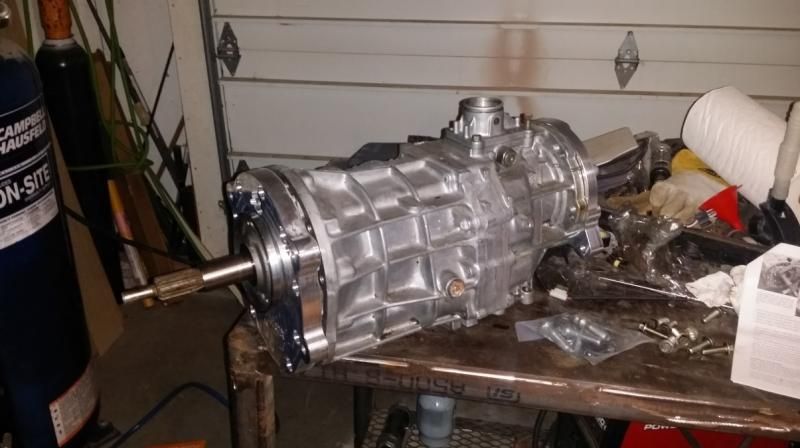
Got the final parts needed for the swap today.

Image

Novak Engine to transmission adapter, and an Advanced Adapters kit to bolt up the Dana 20.

The t-case should now bolt right up, and I have a bunch of options for clocking position. The transmission will bolt onto a SBC bellhousing, uses a standard GM clutch, and even comes with a GM bearing retainer so that I can use the hydraulic slave that's already on the truck.

Need to pull the old engine, weld in some better motor mounts and bolt everything back together. I have a lot of room up front, so I think I can move the engine mounting point and still keep my drivelines at their current lengths.

User avatar
mattawajeep
Posts: 1221
Joined: Wed May 19, 2010 6:18 pm
Location: Mattawa, WA

Postby mattawajeep » Thu Jan 01, 2015 12:28 am

I've been really busy since Thanksgiving. Not much time to breath with all the paperwork I've been saddled with at work. My free time, what little there has been has been spent in the shop.

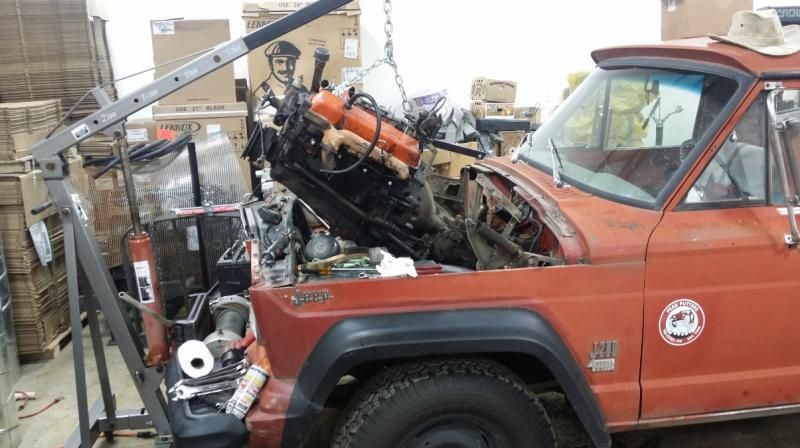
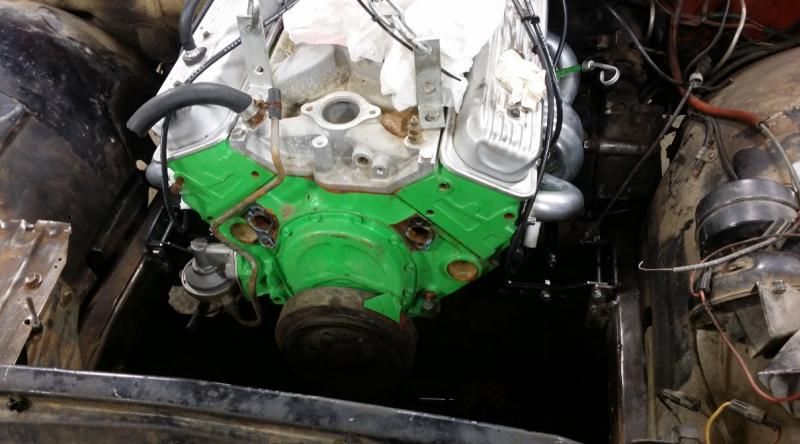
No more 327.

Image

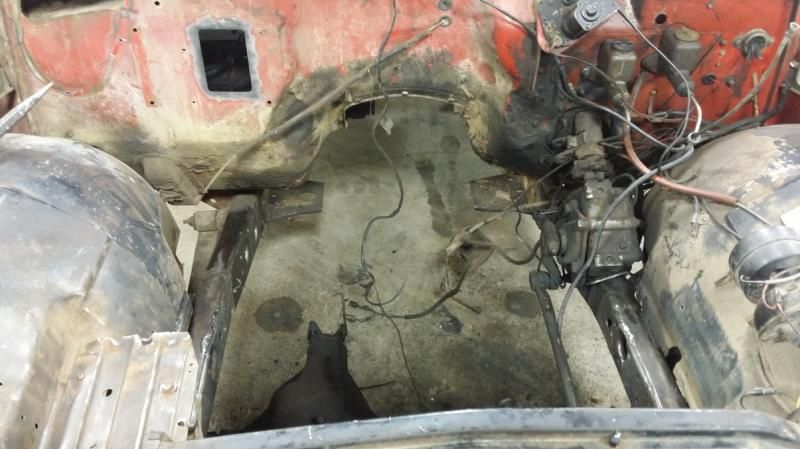
Nasty horrible gooberwelded motor mounts removed.

Image

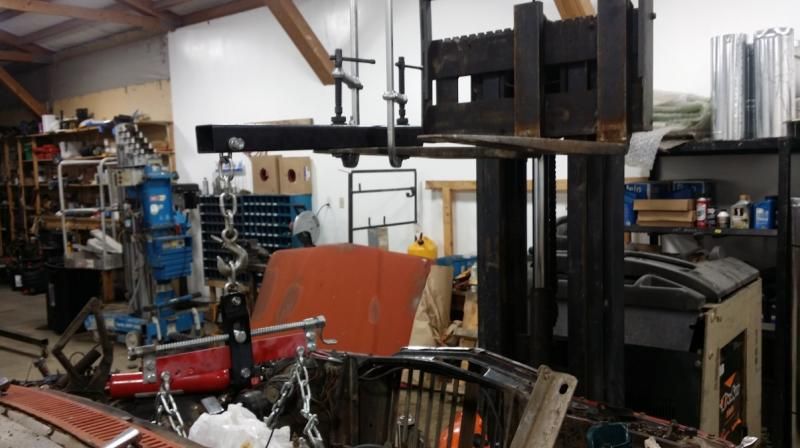
Engine hoist wasn't long enough and I didn't want to remove the whole front clip. Cheating is good. :lol:

Image

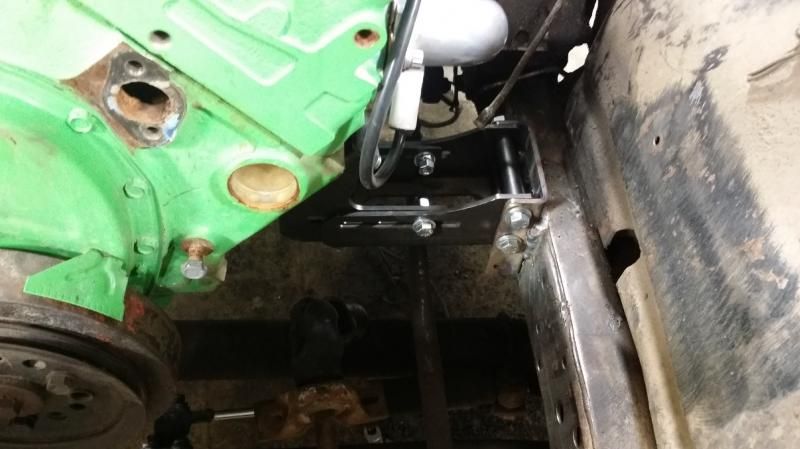
Novak SBC mounts. Dunno if I'm going to keep the engine where it is or bring it down a notch. We'll see if the hood closes. If it doesn't I'll move the engine or add a 67 Shelby scoop to the hood.

Image

Image

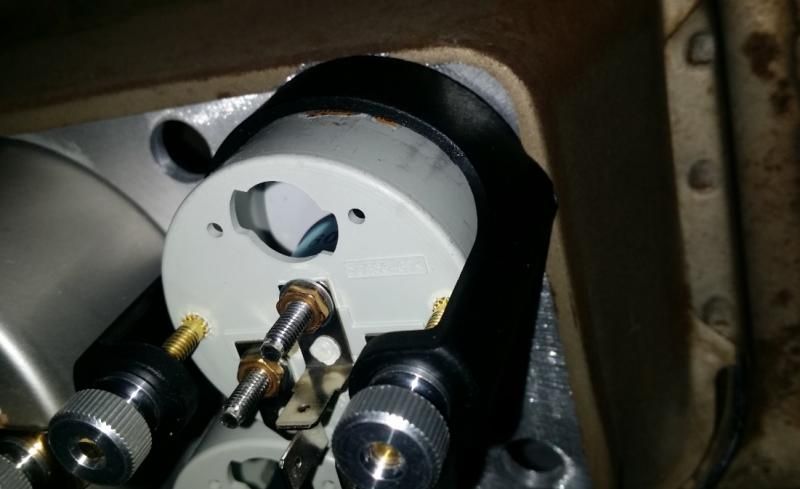
Both of my Gladiators need gauge panels. I've spent the last couple years off and on looking for replacements with no luck. Every one I've come across in a junkyard has been trashed.

So, I've resigned myself to using aftermarket gauges. There really isn't much room on the early models, especially if you want to keep a good viewing angle.

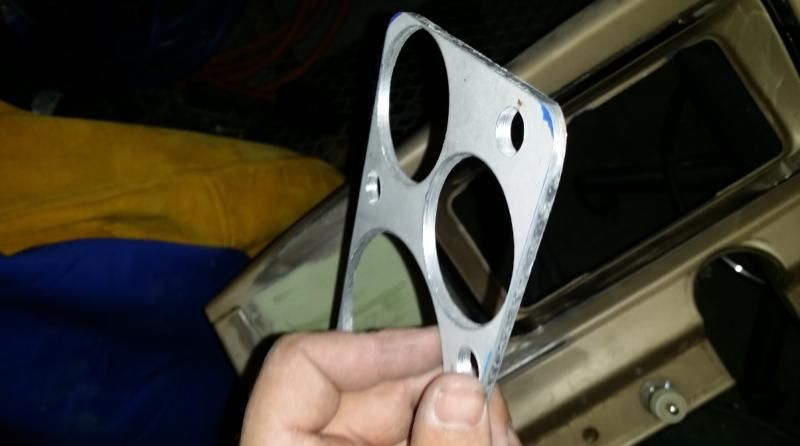
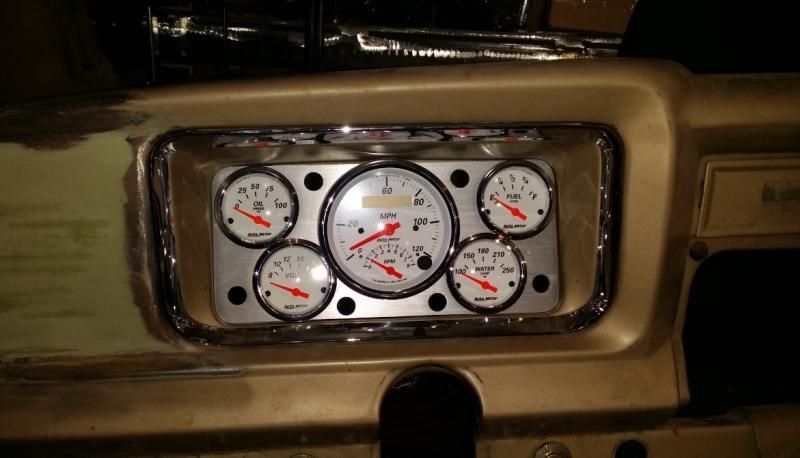
Started messing around in autocad and found that the only way to fit in 5 gauges to get all the information I want, was to stack/layer them.


Here's what I came up with after a bunch of trial and error:

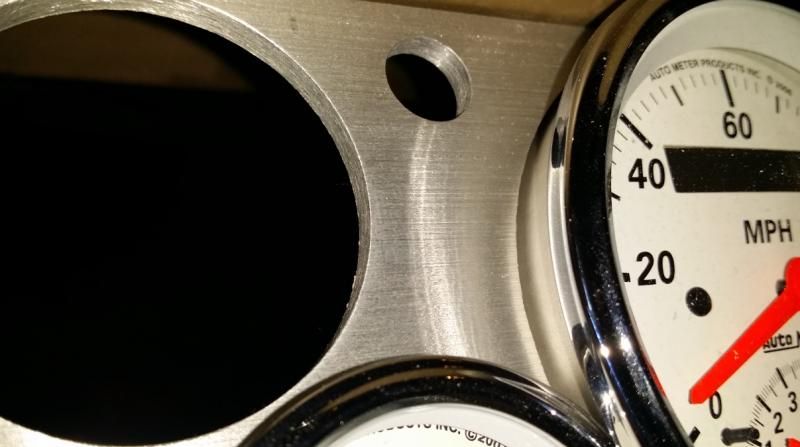
I'm using some 3/16 thick aluminum plate from some old breaker cabinets.

Image

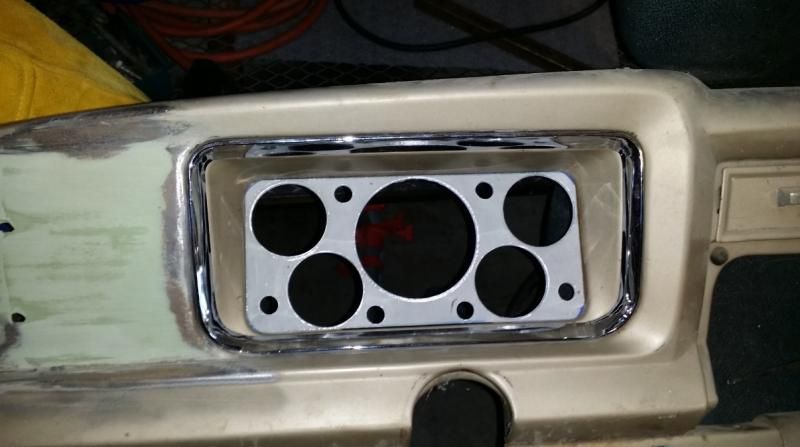
Fit's right down into the stock dash.

Image

Here you can see what I mean by stacked. Speedometer on top, and each successive layer underneath to clear the gauge bezels.

Image

Sanded off the old paint that was on the scrap and then gave it a nice brushed finish.

Image

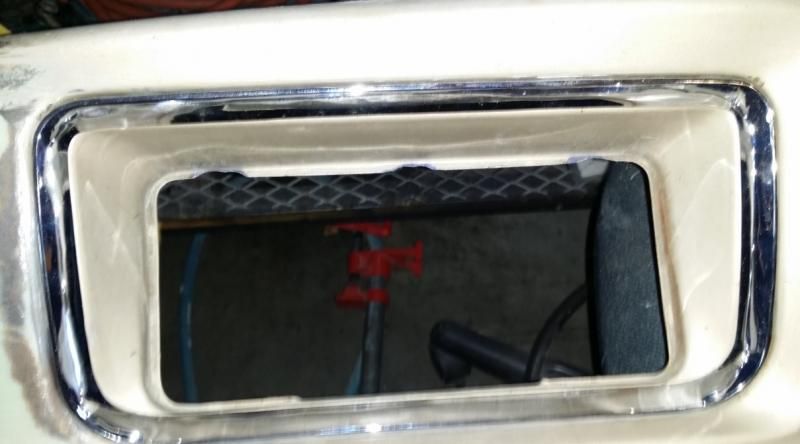
Original dash requires very slight modifications. Just file the top edge in three spots as shown until the gauges fit.

Image

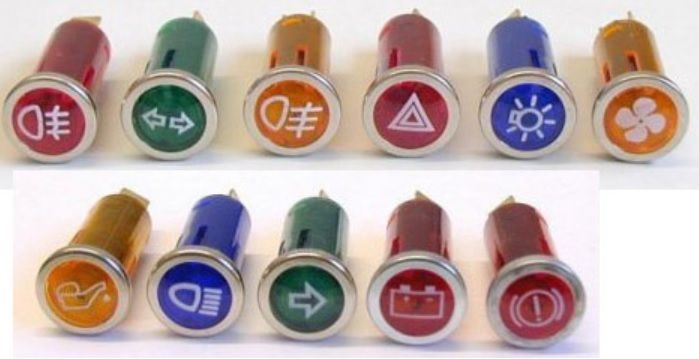
The additional holes in the panel are for turn signals, warning lights, brights etc.....

Image

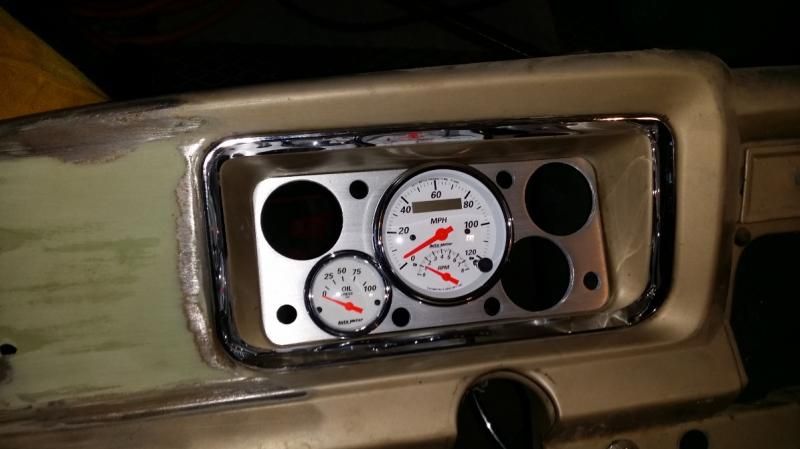
Got the rest of my Gauges in today and I did a rough mockup. Still waiting on indicator lights.

Image

The original dash clips aren't going to do me any good, but I don't think any clips will be required. The auto meter gauges come with nifty little plastic clamps that will hold everything in place all on their own. Way nicer than the standard flimsy metal erector set pieces you normally get.

Should work just fine:

Image

User avatar
White trash
Posts: 1763
Joined: Tue Jan 22, 2008 9:38 pm
Location: El Pasco

Postby White trash » Thu Jan 01, 2015 2:08 am

I like the gauge panel, that's a nice looking piece you made. Who is the source for the indicator lights? The auto x truck is losing it's dash this winter so I'll be needing some of those. :D

Wrench
Peak Putters Member
Peak Putters Member
Posts: 1237
Joined: Sat May 30, 2009 7:23 am
Location: in a van down by the river

Postby Wrench » Thu Jan 01, 2015 7:22 am

That looks awesome, Dale!

To help slim things down, I plan to run a Trail Tech Vapor computer with indicator dashboard on my Cherokee. They are designed for motorcycles, but can be used on anything. They dont do alternator, fuel level, or oil pressure indication, though.
Paul
'84 XJ, '19JL

User avatar
mattawajeep
Posts: 1221
Joined: Wed May 19, 2010 6:18 pm
Location: Mattawa, WA

Postby mattawajeep » Thu Jan 01, 2015 9:58 am

White trash wrote:I like the gauge panel, that's a nice looking piece you made. Who is the source for the indicator lights? The auto x truck is losing it's dash this winter so I'll be needing some of those. :D


Yeah, it turned out nicer than I thought it would. Adding the brushed finish covers up all the flaws. The indicators are from a company in Britain:

http://www.ratsport.com/PBSCProduct.asp?ItmID=9611778

There was also an Aussie company that had them, but they were bigger and didn't look as nice. Couldn't find anything like them for sale in the states.

Wrench wrote:That looks awesome, Dale!

To help slim things down, I plan to run a Trail Tech Vapor computer with indicator dashboard on my Cherokee. They are designed for motorcycles, but can be used on anything. They dont do alternator, fuel level, or oil pressure indication, though.


Those are pretty cool, nice and compact. While looking them up I discovered this:

http://www.ratsport.com/PBSCProduct.asp?ItmID=9611778

Looks like it'll do fuel & oil. No volt gauge, but you could easily add an alternator light.

User avatar
Rottwheeler
Posts: 244
Joined: Mon Jan 18, 2010 11:58 am
Location: Kennewick, WA

Postby Rottwheeler » Fri Jan 02, 2015 11:00 pm

This thing is way cool!!! :OO3
Rottwheeler
White 13' JKU Rubicon, 3.5" Rubicon Express Super Flex suspension, 3:73s, 35" Nittos on American Racing ATX black faux bead locks... for now.

User avatar
Danny
Peak Putters Associate
Posts: 1331
Joined: Wed Mar 14, 2007 9:41 pm
Location: Richland, WA

Postby Danny » Sat Jan 03, 2015 9:39 am

Dale, u the man. Do u hire out?
Forget your age and live your life!

User avatar
mattawajeep
Posts: 1221
Joined: Wed May 19, 2010 6:18 pm
Location: Mattawa, WA

Postby mattawajeep » Sat Jan 03, 2015 3:22 pm

Danny wrote:Dale, u the man. Do u hire out?


Got a project vehicle you want me to take apart in a day, then take 3 years to reassemble?

I'm an expert in that field. :lol:

User avatar
Danny
Peak Putters Associate
Posts: 1331
Joined: Wed Mar 14, 2007 9:41 pm
Location: Richland, WA

Postby Danny » Sat Jan 03, 2015 6:47 pm

LOL
Forget your age and live your life!

User avatar
mattawajeep
Posts: 1221
Joined: Wed May 19, 2010 6:18 pm
Location: Mattawa, WA

Postby mattawajeep » Thu Jan 22, 2015 6:08 pm

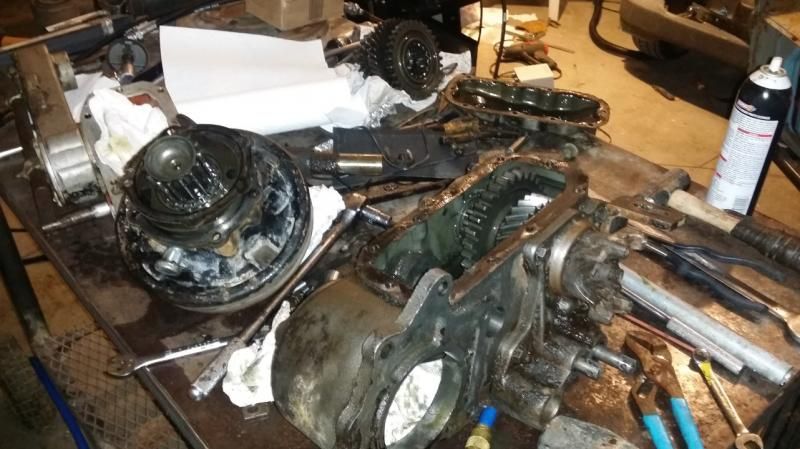
So.... The Dana 20 that was in the truck won't shift without a very large hammer. I thought it was simply the crummy linkage when it was still drivable.

Fortunately I have a spare case that works well, and this one will work better with dual shifters, no modifications needed for all positions. I figured I'd just swap the PTO unit over and call it good.

Unfortunately it has a bunch of leaks. That wouldn't normally be all that annoying except for the fact that you have to completely disassemble the case, and rip everything out to get to all the seals......

Image

Needle bearings should be outlawed. This is gonna be fun to put back together....

Wrench
Peak Putters Member
Peak Putters Member
Posts: 1237
Joined: Sat May 30, 2009 7:23 am
Location: in a van down by the river

Postby Wrench » Thu Jan 22, 2015 6:35 pm

Super sticky boat wheel bearing grease works very well to keep needle bearings in place for reassembly. :D
Paul
'84 XJ, '19JL

User avatar
mattawajeep
Posts: 1221
Joined: Wed May 19, 2010 6:18 pm
Location: Mattawa, WA

Postby mattawajeep » Fri Jan 23, 2015 5:43 pm

Wrench wrote:Super sticky boat wheel bearing grease works very well to keep needle bearings in place for reassembly. :D


Got some power punch, hopefully that'll hold things in.


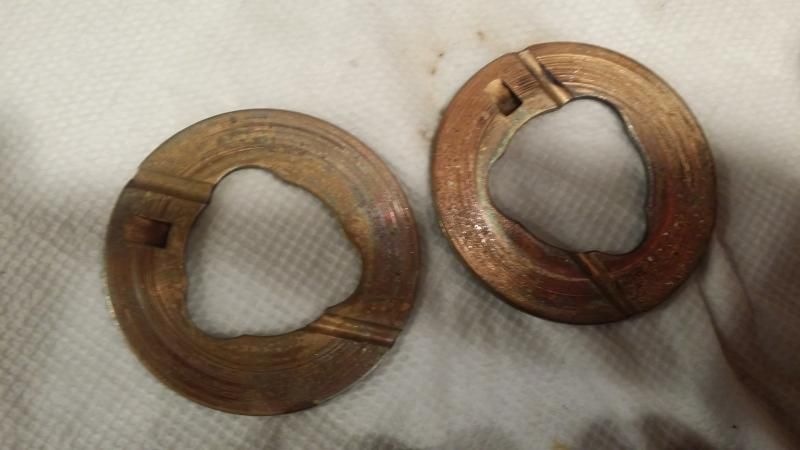
Meh....

Image

Taking things apart is fun. You end up replacing things that you'd really rather just not know about.

User avatar
mattawajeep
Posts: 1221
Joined: Wed May 19, 2010 6:18 pm
Location: Mattawa, WA

Postby mattawajeep » Tue Jan 27, 2015 9:42 pm

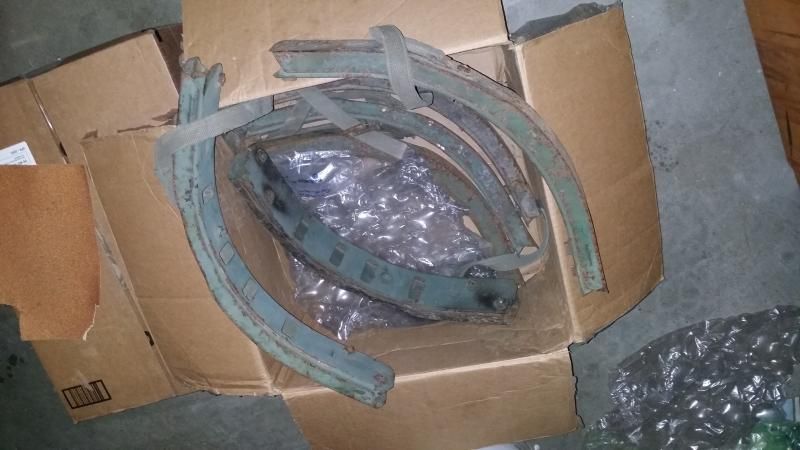
Got a set of M35 Cargo bow corners off of ebay super cheap.

Image

Turns out the standard military bow size is a match for the thriftside stake pockets. So I'll be making a canopy, or having a tentmaker sew one up for me. After fabbing up a mount for my hammock inside the bed I'll be set.

Image


Return to “Projects and Build-Ups”

Who is online

Users browsing this forum: No registered users and 5 guests