Fabbin' on my YJ again
OldGreen wrote:Nice work Kev. . .as always. Maybe I could throw a tow strap on your rear end to be able to follow you now. . .LOL
Thx, and
Wha...t? Like I keep telling you and Cim, I'm just doing this to keep up with you guys. Now you've got a whole new rig that I have to try and keep up with.
Paul, on the drivers side it's angled to clear the cover, I just did the passenger to match.
I did a punch list the other night of steps to take to finish up. I'll post it just for fun. I'm hoping to fit this all in over the next 3 weekends, we'll see.
• Coilovers revalved and charged
• Torch brackets on truss – grind and cleanup, fill in holes
• Fit upper 3rd link bracket to frame, shorten as well
• Pedestal for 3rd link on truss
• Drain rad & remove (fan and shroud as well)
• Flush engine
• At bump, tack 3rd link bracket to truss and bracket on frame
• At ride height, set 3rd link length, tack together
• Check compression at bump
ooo Ram to find new rad location
ooo Truss to engine(use old bumpstops or not?)
ooo 3rd link to motor mount
ooo Coilovers to frame
ooo Panhard to frame
• Make panhard brackets
• At bump, set panhard length, tack brackets, set panhard a little long with no adjustment
• At bump, mount radiator and fan (check fan first for function)
• Fit coilover hoops & tack in place
• Make ‘mockup shock’ at 32” eye to eye
• At ride, tack coilover tabs in place
• Mount coilovers without springs, check for clearance
ooo Everything!
ooo At bump
ooo Articulated, check driver bump steering arm clearance
ooo At full droop, driveline bind
• Install limiting straps(mindful of driveline bind)
• Mount steering valve and plumb lines
• Shorten tie rods, drill and weld tabs to ends
• Gusset coilover tabs once final location is set
• Build ‘strut bar’ at good location, possibly gusset coilover hoops as well
• Finish weld everything
• Paint everything
• Install winch and line
• Make fan and winch in cab controls
• Wire fan and winch
• Bleed steering
• Fill with coolant and fire engine
• Finish bleeding steering under power
• Set fan ‘kick on’ temp
• Attach tie rods, set toe
• Tires on and suspend
• Set ride height
• Tighten all suspension bolts
• Drive!
Paul wrote:Bah, just a couple hours work.
I wish.
First item is done. I stopped by the shop where I bought my coil springs, and Chris showed me how to swap valving, then charged the shocks for me. Piece of cake.
I highly recommend Chris at Oregon Motorsports, their parts are fair prices, and he's a helluva cool guy.
http://www.oregonmotorsports2000.com/servlet/StoreFront
The SAWs were shimmed .08/.12 comp/reb with one of the 2 bleed screws removed. I swapped the shims and removed the other bleed screw. I'm 100% sure it's not going to be right the first time, but it should be close enough that I can run it until I get a rear suspension that is also tune-able. Then I can go to town!
Didn't stop to take pics this weekend. Maybe one night this week I can snap some.
JMOP came up saturday and gave me a hand setting up the 3rd link. I'm very happy with how it turned out. From ride to full bump it gains 4* caster, from bump to full droop it only loses 2*. At least that's what it seems like now, and as best as I can remember.
I made the panhard and mounts today. It also turned out well. Now I need to finish welding the axle side brackets, then I can get on with mounting the coilovers. It will be nice to have it suspended again.
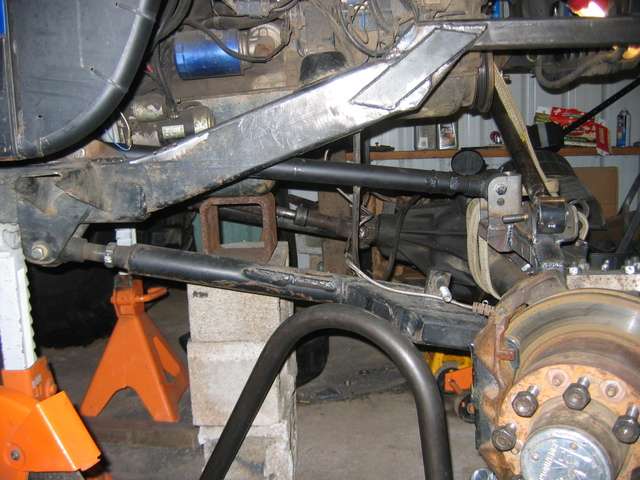
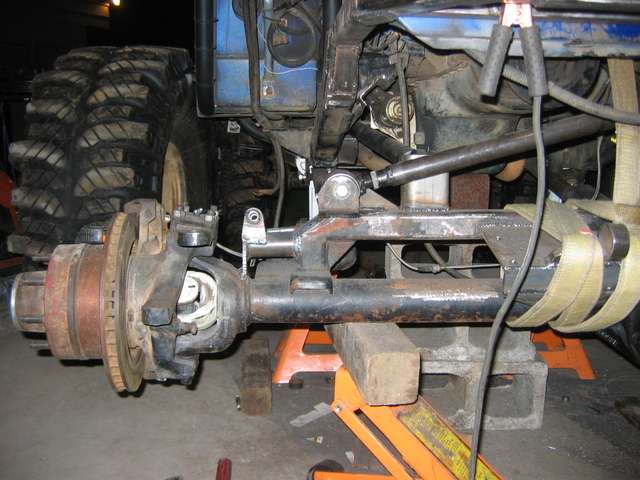
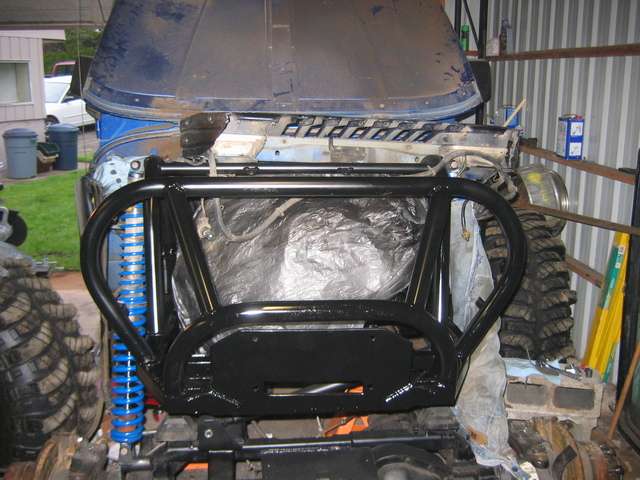
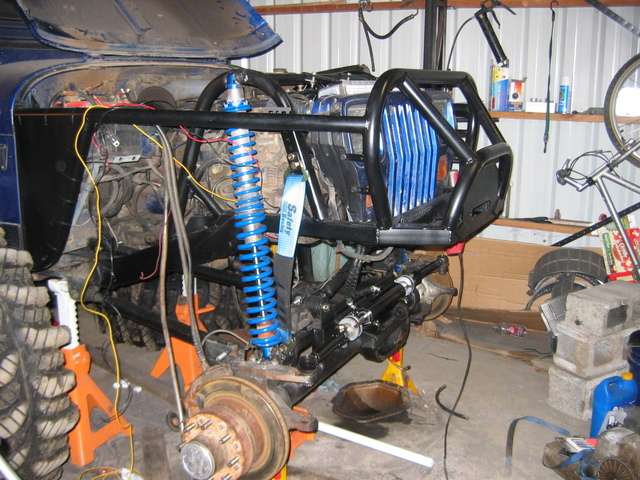
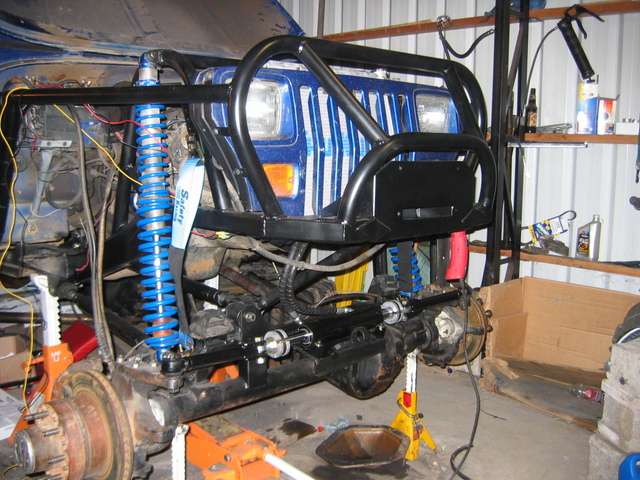
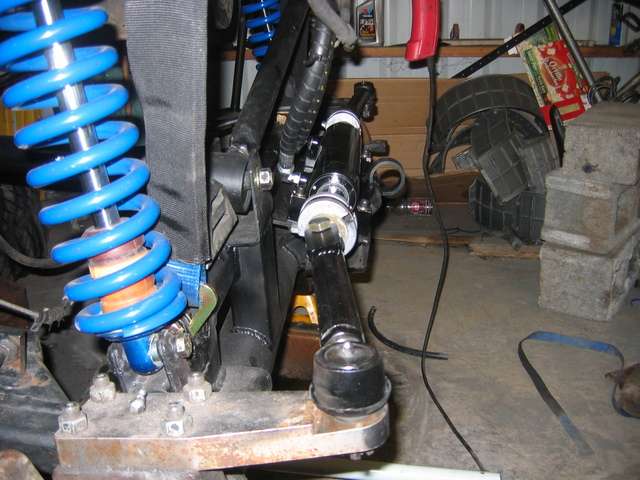
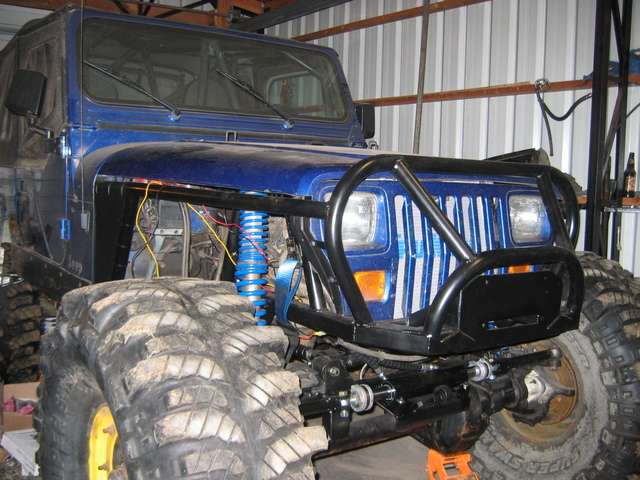
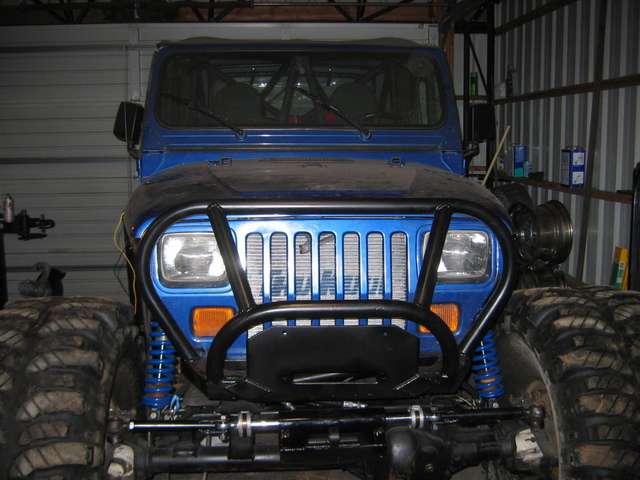
Here's some pics from this weekend. Some of the work was done last weekend as well. 3rd link and panhard are both finished. I would normally shoot for a much flatter panhard, but it goes to pretty well horizontal at full bump, and with full hydro I don't have to worry about bumpsteer.
At bump the truss almost hit's the harmonic dampner the same time the 3rd link hits the bottom of the motor mount and the driveline hits my clutch hardline. Clearenced the bottom of the motor mount, and tacked in a replacement piece to get it to full bump.
Whenever I do a V8 I'll make the motor mounts higher, as well as go to a soft line on the clutch slave to get it out of the way.
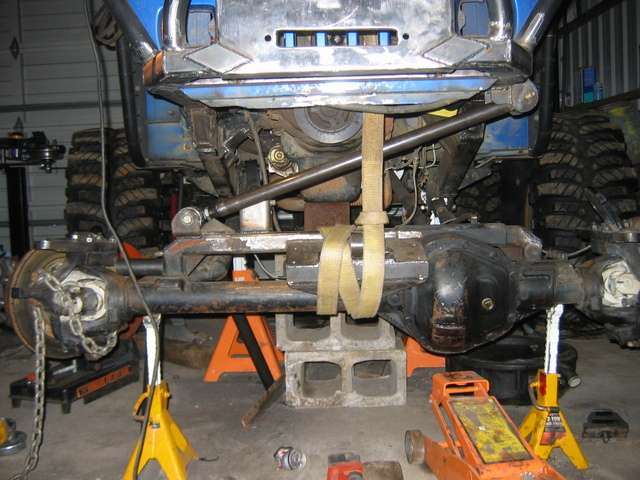
I've pulled the fan and radiator, so now I can pickup the axle through the engine bay with the strap you see there and my hoist. Next up, as always, is the coilover mounts. You can also see one of the upper hoops sitting there.


At bump the truss almost hit's the harmonic dampner the same time the 3rd link hits the bottom of the motor mount and the driveline hits my clutch hardline. Clearenced the bottom of the motor mount, and tacked in a replacement piece to get it to full bump.
Whenever I do a V8 I'll make the motor mounts higher, as well as go to a soft line on the clutch slave to get it out of the way.
I've pulled the fan and radiator, so now I can pickup the axle through the engine bay with the strap you see there and my hoist. Next up, as always, is the coilover mounts. You can also see one of the upper hoops sitting there.
-
colemancooler
- Posts: 288
- Joined: Wed Mar 14, 2007 4:49 pm
- Location: yakima
I'm planning on mounting it to the radiator mounts I haven't built yet. 
The race Al radiators are a bit of a trick to mount since they don't have any brackets on them at all. Have to make buckets under the tanks on the side, and a clamp on the sides or top. I'm thinking sides right now. Hope to make the mounts, with the fan on the rad, then weld the whole deal into the frame.
The race Al radiators are a bit of a trick to mount since they don't have any brackets on them at all. Have to make buckets under the tanks on the side, and a clamp on the sides or top. I'm thinking sides right now. Hope to make the mounts, with the fan on the rad, then weld the whole deal into the frame.


No pics from this weekend. I got to redo a bunch of work though...
I've been keeping an eye out for some 14" shocks. 16s are just too much shock for the front. Fully collapsed they are 24", and it's hard to get much bump travel and keep them under the hood. Found a good deal last week, guy should be shipping them out tomorrow.
http://www.dezertrangers.com/vb/showthr ... post898576
I'll probly add reservoirs to them sometime.
So I spent most of the weekend making room for 3" more bump. Still not done yet. I cut more out of the motor mount, shortened the panhard 5" so it can go up inside the frame, added the old bumpstops back on the axle. Cut the back half of the truss out in the middle. Ground for clearance on the lower link brackets to give the links more up travel.
I also drilled and tapped the clutch slave cylinder from 7/16 24 tpi to 20 tpi so I can use a banjo brake setup. Ground down the banjo bolt head until it's about 1/16" thick, then filed the sides to fit a 9/16" wrench.
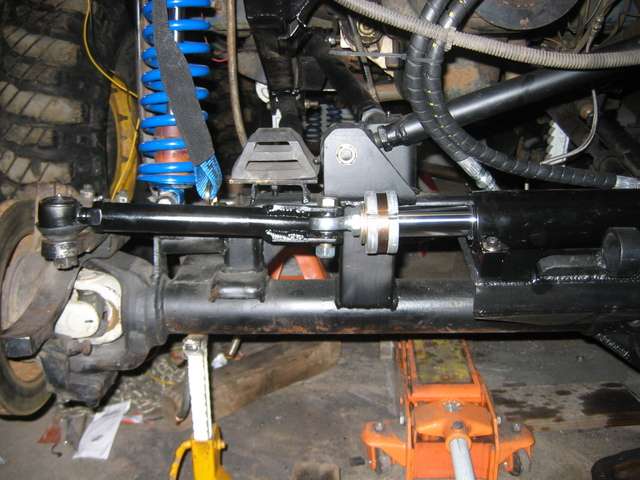
This will let the driveline go up past the slave cylinder, but it doesn't quite yet. I'm still going to have to shift the tranny-tcase to the driver side to get the driveline to clear the banjo bolt. Either that or make a couple new front drivelines that are pretty small diameter (~1"). I might try that first, already tried to wiggle the tcase over, and it hit the tunnel right away.
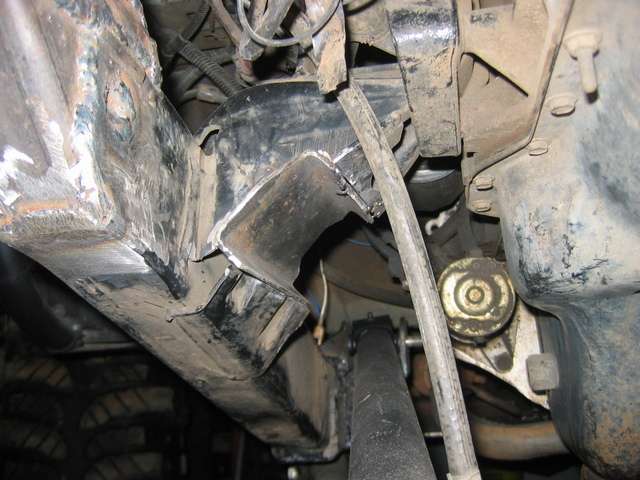
You can see in this pic from before where the 1/4" brakeline runs out of the side of the slave just over the driveline, and then up to the master. I'll get a pic of the new setup after it works.
I've been keeping an eye out for some 14" shocks. 16s are just too much shock for the front. Fully collapsed they are 24", and it's hard to get much bump travel and keep them under the hood. Found a good deal last week, guy should be shipping them out tomorrow.
http://www.dezertrangers.com/vb/showthr ... post898576
I'll probly add reservoirs to them sometime.
So I spent most of the weekend making room for 3" more bump. Still not done yet. I cut more out of the motor mount, shortened the panhard 5" so it can go up inside the frame, added the old bumpstops back on the axle. Cut the back half of the truss out in the middle. Ground for clearance on the lower link brackets to give the links more up travel.
I also drilled and tapped the clutch slave cylinder from 7/16 24 tpi to 20 tpi so I can use a banjo brake setup. Ground down the banjo bolt head until it's about 1/16" thick, then filed the sides to fit a 9/16" wrench.
This will let the driveline go up past the slave cylinder, but it doesn't quite yet. I'm still going to have to shift the tranny-tcase to the driver side to get the driveline to clear the banjo bolt. Either that or make a couple new front drivelines that are pretty small diameter (~1"). I might try that first, already tried to wiggle the tcase over, and it hit the tunnel right away.
You can see in this pic from before where the 1/4" brakeline runs out of the side of the slave just over the driveline, and then up to the master. I'll get a pic of the new setup after it works.
-
White trash

- Posts: 1763
- Joined: Tue Jan 22, 2008 9:38 pm
- Location: El Pasco
Nice. I remember seeing that on Porter's rig, but I had forgotten all about it.
I'm going to try and build one out of the old small diameter XJ front shafts. Going junkyard diving tonight, hopefully.
If that doesn't work I'll get ahold of S&N. I wonder what they do to convert the d44 ujoints to driveline style ujoints?
I'm going to try and build one out of the old small diameter XJ front shafts. Going junkyard diving tonight, hopefully.
If that doesn't work I'll get ahold of S&N. I wonder what they do to convert the d44 ujoints to driveline style ujoints?
Well hell. I went and laid in the mud at the junkyard tonight staring at the tiny little XJ driveline.
It then occured to me, that all I have to do is make a little plate bracket to rotate the stupid slave cylinder. I just checked it out, and yep, that'll do. I'll have to bleed it out of position, then put it in place, but that's a small price to pay.
It then occured to me, that all I have to do is make a little plate bracket to rotate the stupid slave cylinder. I just checked it out, and yep, that'll do. I'll have to bleed it out of position, then put it in place, but that's a small price to pay.
Haha, yeah I took a couple weeks off. Went to Hawaii, it was nice.
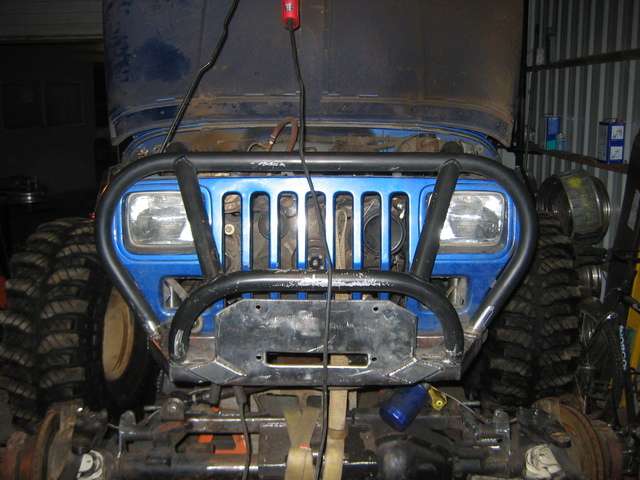
I put a few hours in this weekend. Finished up patching the motor mount, gutted the grill some more to fit the radiator.
The OBA was the latest feature to get the cut in order to fit my crazy up travel plans. Even the new smaller radiator has to be mounted at a pretty extreme angle to clear the axle on full bump.
The radiator inlet was only 1/2" or so from the front of the york clutch, so I pulled the york. Guess I'm going to have to do a CO2 setup or something until I get a v8, which should set the accessories far enough back that I can redo the radiator hoses a little more creatively.
Now that the radiator has a spot, I still need to mount it, and the fan(which fits the radiator pretty well, btw). I'll try to get some pics of that setup.
Well I haven't had any big chunks of weekend to work on the jeep so progress has been slow.
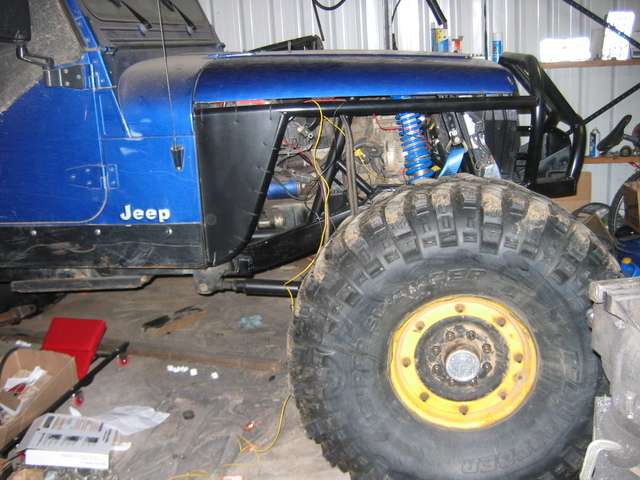
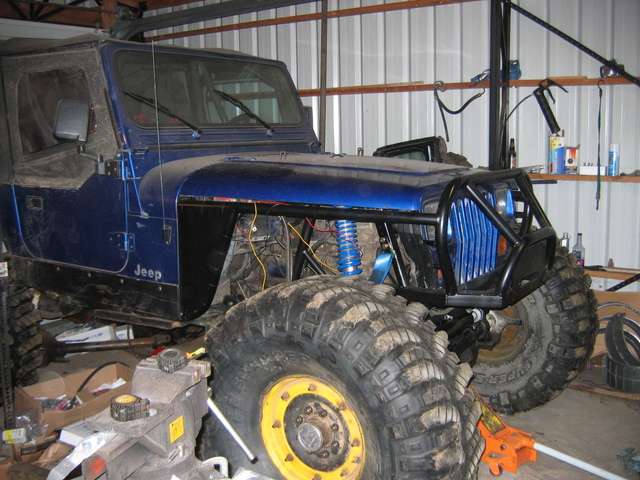
Most of the heavy fab is done. Just need to setup limiting straps for the coilovers and build tie rods for the ram to the knuckles. I got anxious and hung the coilovers last week. Pulled the grill to finish painting tonight, thought I would snap some pics.
Paint is still wet, it should ungloss a lot when it dries.


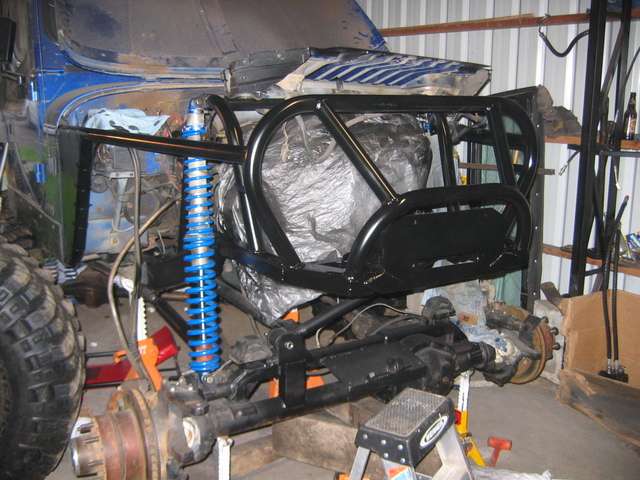
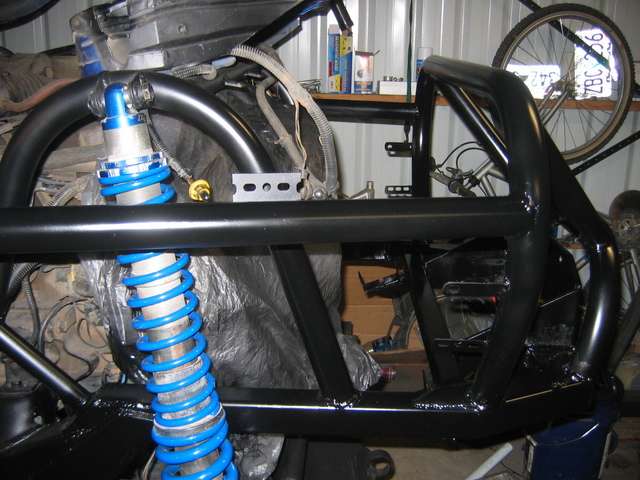
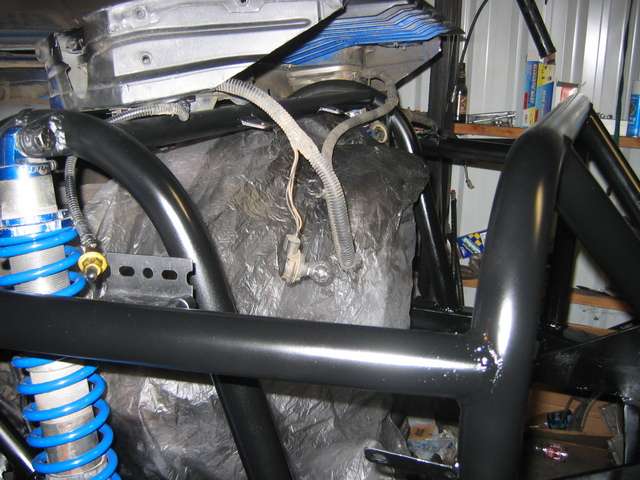
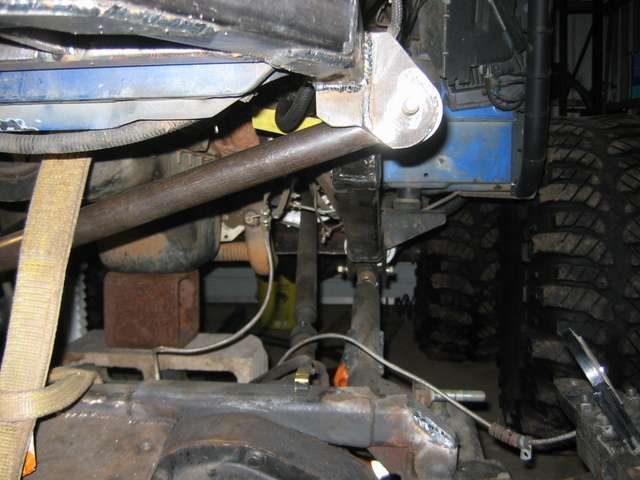
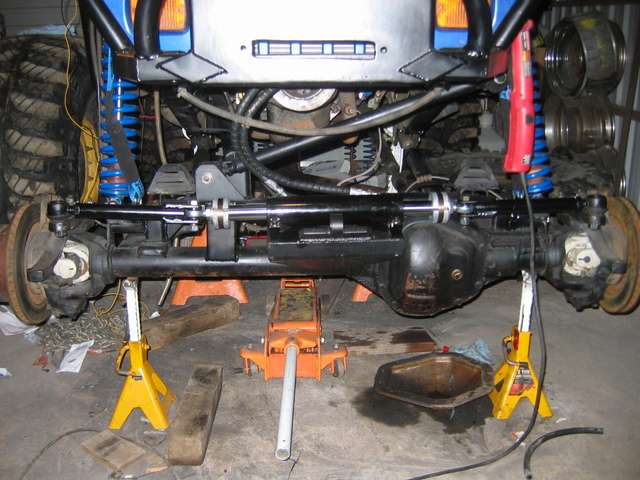
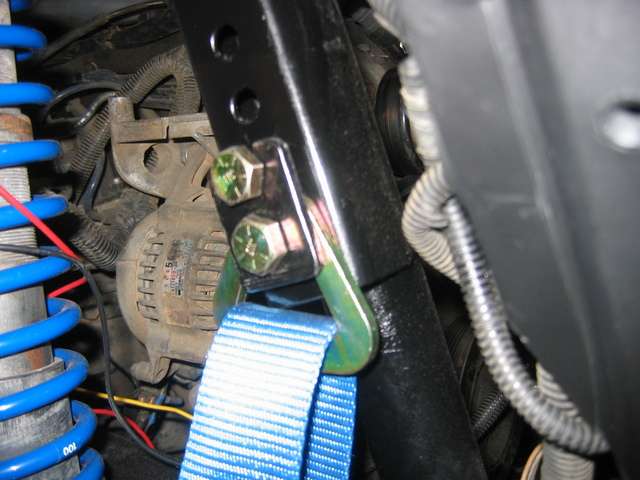
Here is the new location of the track bar. I also added an extra brace from the truss down the axle tube since the 3rd link and track bar both tie in there.
Also, this is about 2" short of full droop, the track bar doesn't look so wacky/short in person.
 [/list]
Most of the heavy fab is done. Just need to setup limiting straps for the coilovers and build tie rods for the ram to the knuckles. I got anxious and hung the coilovers last week. Pulled the grill to finish painting tonight, thought I would snap some pics.
Paint is still wet, it should ungloss a lot when it dries.
Here is the new location of the track bar. I also added an extra brace from the truss down the axle tube since the 3rd link and track bar both tie in there.
Also, this is about 2" short of full droop, the track bar doesn't look so wacky/short in person.
[/list]Assembly pics from this weekend.
Going well. Tie rods made, limiting strap brackets on, coolant topped off, steering bled and working great.
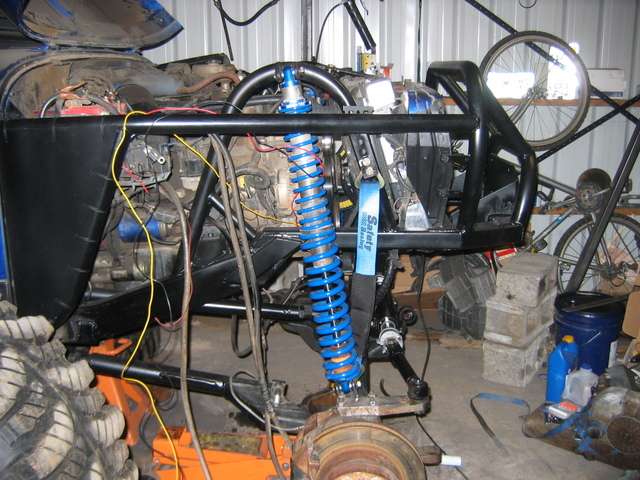
Still neeed to put the clutch line back on and bleed, hang the brake lines on the back of the axle, set the alignment, wire the e-fan, hang the winch, and incab winch controls. Getting close though.
Going well. Tie rods made, limiting strap brackets on, coolant topped off, steering bled and working great.
Still neeed to put the clutch line back on and bleed, hang the brake lines on the back of the axle, set the alignment, wire the e-fan, hang the winch, and incab winch controls. Getting close though.

-
GRADESCHOOL

- Posts: 192
- Joined: Tue Apr 03, 2007 2:00 pm
- Location: tri-cities
Return to “Projects and Build-Ups”
Who is online
Users browsing this forum: No registered users and 83 guests