2005 LJ

Re: 2005 LJ
So apparently the LJ isn't for the youngest minion anymore?
Re: 2005 LJ
Roman wrote:So apparently the LJ isn't for the youngest minion anymore?
Well, truth be told, it never really was... she laid claim to it the moment she saw it and in a moment of weakness my response just wasn't emphatic enough to keep her from thinking as much. Further, because of the bevvy of other junk at my disposal, I initially saw no harm in keeping things tame so that she could in fact drive it from time to time. Fast forward a couple years and she's got a dedicated car of her own and my ADD just won't allow me to leave things alone

Yep, I've wheeled one of those, too...

Re: 2005 LJ
With the front fenders loosely relocated 3-1/4" up and the hood trimmed accordingly, it was time to address getting the rear fenders to match. This seemed simple, right up until I realized that the evap canister is hiding in the cavity behind the passenger rear tire...
After some disassembly and a little ciphering, a plan was devised to modify the existing mounting shelf and simply push the canister back about 2":
That looks better:
I finished it up by making a splash shield out of an old plastic "mud flap" that was laying on the bench:
The driver side was much less dramatic, only requiring a decision on how to handle the interference between the raised flare and the fuel filler. My decision was to modify the filler rather than the flare simply because replacement fillers are a whole lot less expensive if something went horribly wrong during surgery:
- IMG_5615.JPG (1.31 MiB) Viewed 2342 times
- IMG_5616.JPG (1.28 MiB) Viewed 2342 times
After some disassembly and a little ciphering, a plan was devised to modify the existing mounting shelf and simply push the canister back about 2":
- IMG_5617.JPG (1.25 MiB) Viewed 2342 times
- IMG_5618.JPG (1.41 MiB) Viewed 2342 times
- IMG_5624.JPG (1.16 MiB) Viewed 2342 times
That looks better:
- IMG_5627.JPG (1.17 MiB) Viewed 2342 times
- IMG_5626.JPG (1.27 MiB) Viewed 2342 times
I finished it up by making a splash shield out of an old plastic "mud flap" that was laying on the bench:
- IMG_5628.JPG (1.26 MiB) Viewed 2342 times
The driver side was much less dramatic, only requiring a decision on how to handle the interference between the raised flare and the fuel filler. My decision was to modify the filler rather than the flare simply because replacement fillers are a whole lot less expensive if something went horribly wrong during surgery:
- IMG_5600.JPG (1.29 MiB) Viewed 2342 times
- IMG_5603.JPG (1.27 MiB) Viewed 2342 times
- IMG_5607.JPG (1.05 MiB) Viewed 2342 times
Yep, I've wheeled one of those, too...
Re: 2005 LJ
Now that all of the body modifications were complete, it was time to address finding new homes for everything that was displaced underhood. These include the battery, fuse block, air cleaner, horn, evap purge solenoid, and the wiper fluid reservoir... Oh, and in my case the ARB compressor that I had stuffed beside the brake booster.
Sheesh
The fender mounting bracket(s) were modified by simply cutting them in half and raising the section that engages the fender by 3-1/4". This gave me a relocated battery tray on the passenger side, and a relocated ABS tray on the driver side so I could salvage my ARB mount:
With the battery on location I removed the fuse block from it's original mounting bracket and simply bolted it directly to the fender:
Here is where my heart truly broke on this entire endeavor... there is simply no headspace for the factory airbox assembly, so I spent almost 2 hours at the U-Pull yard scouring all manner of vehicles for an OEM intake setup that might work. What I brought home, sadly, ended up not meeting my expectations so I had to do the unthinkable and head to the boy racer aisle at the O'Napzone and pick up a conical open element filter
The purge solenoid bracket was lightly modified and relocated, and the horn mercifully fit back in it's original location by simply rotating the head to reroute the wiring harness for hood clearance. What I haven't yet addressed is the fluid washer bottle, and while I picked up a small universal jug that will serve the purpose, I will need to make a bracket to mount it and I just didn't have the desire to do that today
The last item to address was how to keep the hood shut now that the latches aren't there anymore. I chose to go with hood pins:
At this point, I had drawn many units of Unicorn blood and I was tired of doing so... The list was double czeked and everything seemed to have been addressed, so it was time to pull it out of the shop and really see what happened. Clearly this is just the beginning of the story here, as the axles and steering will need some attention to make things survive, but for now we have a drivable LJ on 39's:

Sheesh
The fender mounting bracket(s) were modified by simply cutting them in half and raising the section that engages the fender by 3-1/4". This gave me a relocated battery tray on the passenger side, and a relocated ABS tray on the driver side so I could salvage my ARB mount:
- IMG_5577.JPG (1.45 MiB) Viewed 2336 times
- IMG_5578.JPG (1.44 MiB) Viewed 2336 times
- IMG_5564.JPG (1.46 MiB) Viewed 2336 times
- IMG_5580.JPG (1.65 MiB) Viewed 2336 times
With the battery on location I removed the fuse block from it's original mounting bracket and simply bolted it directly to the fender:
- IMG_5563.JPG (1.52 MiB) Viewed 2336 times
Here is where my heart truly broke on this entire endeavor... there is simply no headspace for the factory airbox assembly, so I spent almost 2 hours at the U-Pull yard scouring all manner of vehicles for an OEM intake setup that might work. What I brought home, sadly, ended up not meeting my expectations so I had to do the unthinkable and head to the boy racer aisle at the O'Napzone and pick up a conical open element filter
- IMG_5595.JPG (1.29 MiB) Viewed 2336 times
- IMG_5612.JPG (1.53 MiB) Viewed 2336 times
The purge solenoid bracket was lightly modified and relocated, and the horn mercifully fit back in it's original location by simply rotating the head to reroute the wiring harness for hood clearance. What I haven't yet addressed is the fluid washer bottle, and while I picked up a small universal jug that will serve the purpose, I will need to make a bracket to mount it and I just didn't have the desire to do that today
The last item to address was how to keep the hood shut now that the latches aren't there anymore. I chose to go with hood pins:
- IMG_5611.JPG (1.26 MiB) Viewed 2336 times
At this point, I had drawn many units of Unicorn blood and I was tired of doing so... The list was double czeked and everything seemed to have been addressed, so it was time to pull it out of the shop and really see what happened. Clearly this is just the beginning of the story here, as the axles and steering will need some attention to make things survive, but for now we have a drivable LJ on 39's:
- IMG_5630.JPG (1.36 MiB) Viewed 2336 times
- IMG_5632.JPG (1.08 MiB) Viewed 2336 times
- IMG_5636.JPG (1.2 MiB) Viewed 2336 times
- IMG_5638.JPG (1.28 MiB) Viewed 2336 times
Yep, I've wheeled one of those, too...
Re: 2005 LJ
Simply. Awesome.
I look forward to every one of your posts/mods/fabrications. Thank you for sharing.
I look forward to every one of your posts/mods/fabrications. Thank you for sharing.
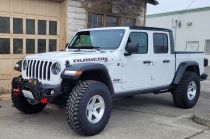
2018 JLU Rubicon
Tow bar mount
Trailer hitch
Tow bar mount
Trailer hitch
Re: 2005 LJ
LOL, most of my MODS these days is just to keep my junk on the road...
Re: 2005 LJ
When I saw your pic of the PCM I instinctively went to WF website!
I fought the orange Jeep for a long time before finally coughing up the dough for their PCM
I fought the orange Jeep for a long time before finally coughing up the dough for their PCM
Re: 2005 LJ
TJDave wrote:Simply. Awesome.
I look forward to every one of your posts/mods/fabrications. Thank you for sharing.
Appreciate the kind words Dave. I hope to have more coming...
Yep, I've wheeled one of those, too...
Re: 2005 LJ
Roman wrote:When I saw your pic of the PCM I instinctively went to WF website!
I fought the orange Jeep for a long time before finally coughing up the dough for their PCM
Thankfully I have no indication of any PCM issues at this point...

Yep, I've wheeled one of those, too...
Re: 2005 LJ
Spent a couple minutes with the forklift to czek clearance, and I'm cautiously optimistic based on what I saw:
- IMG_5657.JPG (1.47 MiB) Viewed 2230 times
- IMG_5658.JPG (1.35 MiB) Viewed 2230 times
- IMG_5660.JPG (1.43 MiB) Viewed 2230 times
- IMG_5668.JPG (1.5 MiB) Viewed 2230 times
- IMG_5664.JPG (1.49 MiB) Viewed 2230 times
Yep, I've wheeled one of those, too...
Re: 2005 LJ
To add switches to control things like auxiliary lights and the ARB compressor, I wanted to come up with something overhead because I simply love the "upfitter switches" offered by FoMoCo in their pickups and the 6G Bronco. After some research and mockup, I landed on a sweet little housing/bracket setup that I found on Etsy (  ) that mounts directly to the rollcage and allows the switches to be oriented exactly how I wanted them:
To power the auxiliary equipment, I picked up an inexpensive (but waterproof ) relay panel from Amazon, fab'd up a quick mount bracket, and landed it on some free space on the passenger fender where the airbox used to live:
Success!!
- IMG_5683.JPG (1.19 MiB) Viewed 1659 times
- IMG_5687.JPG (1.14 MiB) Viewed 1659 times
- IMG_5694.JPG (1.16 MiB) Viewed 1659 times
To power the auxiliary equipment, I picked up an inexpensive (but waterproof
- IMG_5682.JPG (1.12 MiB) Viewed 1659 times
- IMG_5693.JPG (1.46 MiB) Viewed 1659 times
Success!!
- IMG_5697.JPG (1.1 MiB) Viewed 1659 times
Yep, I've wheeled one of those, too...
Re: 2005 LJ
Good, bad, or otherwise the LJ isn't chalk full of creature comforts like the newer model Jeeps, and one thing I have grown to enjoy is wireless Carplay for running onX Maps on the big screen. To address the issue, I picked up a cheap head unit from Amazon along with a double DIN installation kit for the TJ/LJ dash:
I'm still noodling on ideas for mounting a backup camera, but I pre-routed all of the wiring and have it tucked away and ready to simply plug in when I come up with a game plan...
- IMG_5706.JPG (1.36 MiB) Viewed 954 times
- IMG_5699.JPG (1.15 MiB) Viewed 954 times
I'm still noodling on ideas for mounting a backup camera, but I pre-routed all of the wiring and have it tucked away and ready to simply plug in when I come up with a game plan...
Yep, I've wheeled one of those, too...
Re: 2005 LJ
I finally got around to fabricating a little bracket to mount a reverse camera, and at the same time relocate the license plate. It's just ridiculous how long that silly little things like this can take 
- IMG_5881.JPG (1.47 MiB) Viewed 382 times
- IMG_5882.JPG (1.46 MiB) Viewed 382 times
Yep, I've wheeled one of those, too...
Re: 2005 LJ
The 39's are a big tire, at least for the TJ platform... That said, for my use case, I have little concern with the durability of the Dana 44 rear axle, particularly with the addition of some chromoly shafts and a full-replacement carrier such as a Detroit locker. With that in mind, my attention turnt to the front axle, the lowly Dana 30... Now, I fully understand the limitations therein, but I also respect them. That is to say, I'm not much of a driver, but I do my best to not be abusive and I'm not too proud to take a rope or winch line. So, in what may amount to the worlds shortest, and dumbest, experiment, I'm going to see just how far I can push a polished turd(y)
The factory Dana 30 in the LJ is of a low pinion design, which technically runs on the weak side of the ring gear. Simple solution here is to find and run a Dana 30 found in pre-99 XJ's, which are high pinion. This will do a couple of nice things for me: improve the strength of the R&P interface; and provide a better front driveline angle. So, step one was to find such a beast. Czek:
After stripping it down and starting to clean it up, I found some damage to the passenger LCA bracket that will necessitate some surgery. No big deal, as some added beef in the LCA brackets won't hurt my feeling anyway:
With the axle stripped down, I took a few minutes to fire up the CAD machine and develop a truss:
The other big detriment with larger tires on the LJ is the brakes. They were pretty awful in stock form, but add a few pounds of armor and rollcage into the mix, topped off with 39's, and it's downright sketchy if you have to stop in any sort of a hurry. To address this, I sourced a pair of knuckles from a 2002 Grand Cherokee WJ, which will allow me to run the 1" diameter larger WJ rotors and dual piston calipers. Additionally, these knuckles have provisions for true crossover style steering to eliminate the factory inverted 'Y' arrangement. The first step in getting these to work is to glue on some 1/4" spacers to properly index the unit bearings, as the WJ uses an odd length, compact CV axle assembly and in order to use normal shafts, you have to push the unit bearing away from the knuckle so the steering axis lines up properly. Since the knuckles and the spacers are of different caliber base materials, some pre and post-heat treatment are in order:
Smells delicious After post heating (read: s-l-o-w cooling), I was happy to find no cracks around the weldment areas so I think we are good to press on with this operation:
Next up will be replacing the LCA mounts, welding out the truss on the axle housing, and then mocking up the brakes and axle shafts to ensure everything is happy. Once that's done, it'll be onto gears and then swapping it into place under the Jeep...
The factory Dana 30 in the LJ is of a low pinion design, which technically runs on the weak side of the ring gear. Simple solution here is to find and run a Dana 30 found in pre-99 XJ's, which are high pinion. This will do a couple of nice things for me: improve the strength of the R&P interface; and provide a better front driveline angle. So, step one was to find such a beast. Czek:
- IMG_5702.JPG (1.23 MiB) Viewed 379 times
- IMG_5719.JPG (1.58 MiB) Viewed 379 times
After stripping it down and starting to clean it up, I found some damage to the passenger LCA bracket that will necessitate some surgery. No big deal, as some added beef in the LCA brackets won't hurt my feeling anyway:
- IMG_5721.JPG (1.38 MiB) Viewed 379 times
With the axle stripped down, I took a few minutes to fire up the CAD machine and develop a truss:
- IMG_5884.JPG (1.17 MiB) Viewed 379 times
- IMG_5887.JPG (1.4 MiB) Viewed 379 times
- IMG_5888.JPG (1.43 MiB) Viewed 379 times
- IMG_5894.JPG (1.53 MiB) Viewed 379 times
The other big detriment with larger tires on the LJ is the brakes. They were pretty awful in stock form, but add a few pounds of armor and rollcage into the mix, topped off with 39's, and it's downright sketchy if you have to stop in any sort of a hurry. To address this, I sourced a pair of knuckles from a 2002 Grand Cherokee WJ, which will allow me to run the 1" diameter larger WJ rotors and dual piston calipers. Additionally, these knuckles have provisions for true crossover style steering to eliminate the factory inverted 'Y' arrangement. The first step in getting these to work is to glue on some 1/4" spacers to properly index the unit bearings, as the WJ uses an odd length, compact CV axle assembly and in order to use normal shafts, you have to push the unit bearing away from the knuckle so the steering axis lines up properly. Since the knuckles and the spacers are of different caliber base materials, some pre and post-heat treatment are in order:
- IMG_5883.JPG (1.52 MiB) Viewed 379 times
- IMG_5886.JPG (1.64 MiB) Viewed 379 times
- IMG_5885.JPG (1.25 MiB) Viewed 379 times
Smells delicious
After post heating (read: s-l-o-w cooling), I was happy to find no cracks around the weldment areas so I think we are good to press on with this operation:- IMG_5895.JPG (1.24 MiB) Viewed 379 times
Next up will be replacing the LCA mounts, welding out the truss on the axle housing, and then mocking up the brakes and axle shafts to ensure everything is happy. Once that's done, it'll be onto gears and then swapping it into place under the Jeep...
Yep, I've wheeled one of those, too...
Return to “Projects and Build-Ups”
Who is online
Users browsing this forum: No registered users and 97 guests